Wedding Photography for Beginners – Vol. 8
Welcome to the final volume of Wedding Photography for Beginners! For the past 8 weeks we’ve been taking you through a number of topics and giving you insider’s tips and tricks to help you transition into professional wedding photography. Did you miss Vol. 1, Vol. 2, Vol. 3, Vol. 4, Vol. 5, Vol. 6 or Vol. 7? Let’s get you caught up! Interested in reading all of our Presetpro articles but don’t have time to check the blog? Subscribe to The Presetpro Weekly Newsletter and get all of our weekly articles PLUS Free Lightroom Presets sent directly to your inbox every Tuesday!
For the final article in our series, we’re going to discuss the process of editing in Adobe Lightroom. I’ll be giving you pointers on how to stream line your editing process and deliver beautiful wedding shots in half the time. Let’s get started!
1. Backing up
This may go without saying, but the first step of any editing process is backing up your photos. Make sure that you have at least one other copy (two is best) of your RAW/JPEG photos saved on an external hard drive before you begin. You never know what might happen in the editing process, and you don’t want to take any chances with your hard earned wedding photos.
2. Importing & Sorting
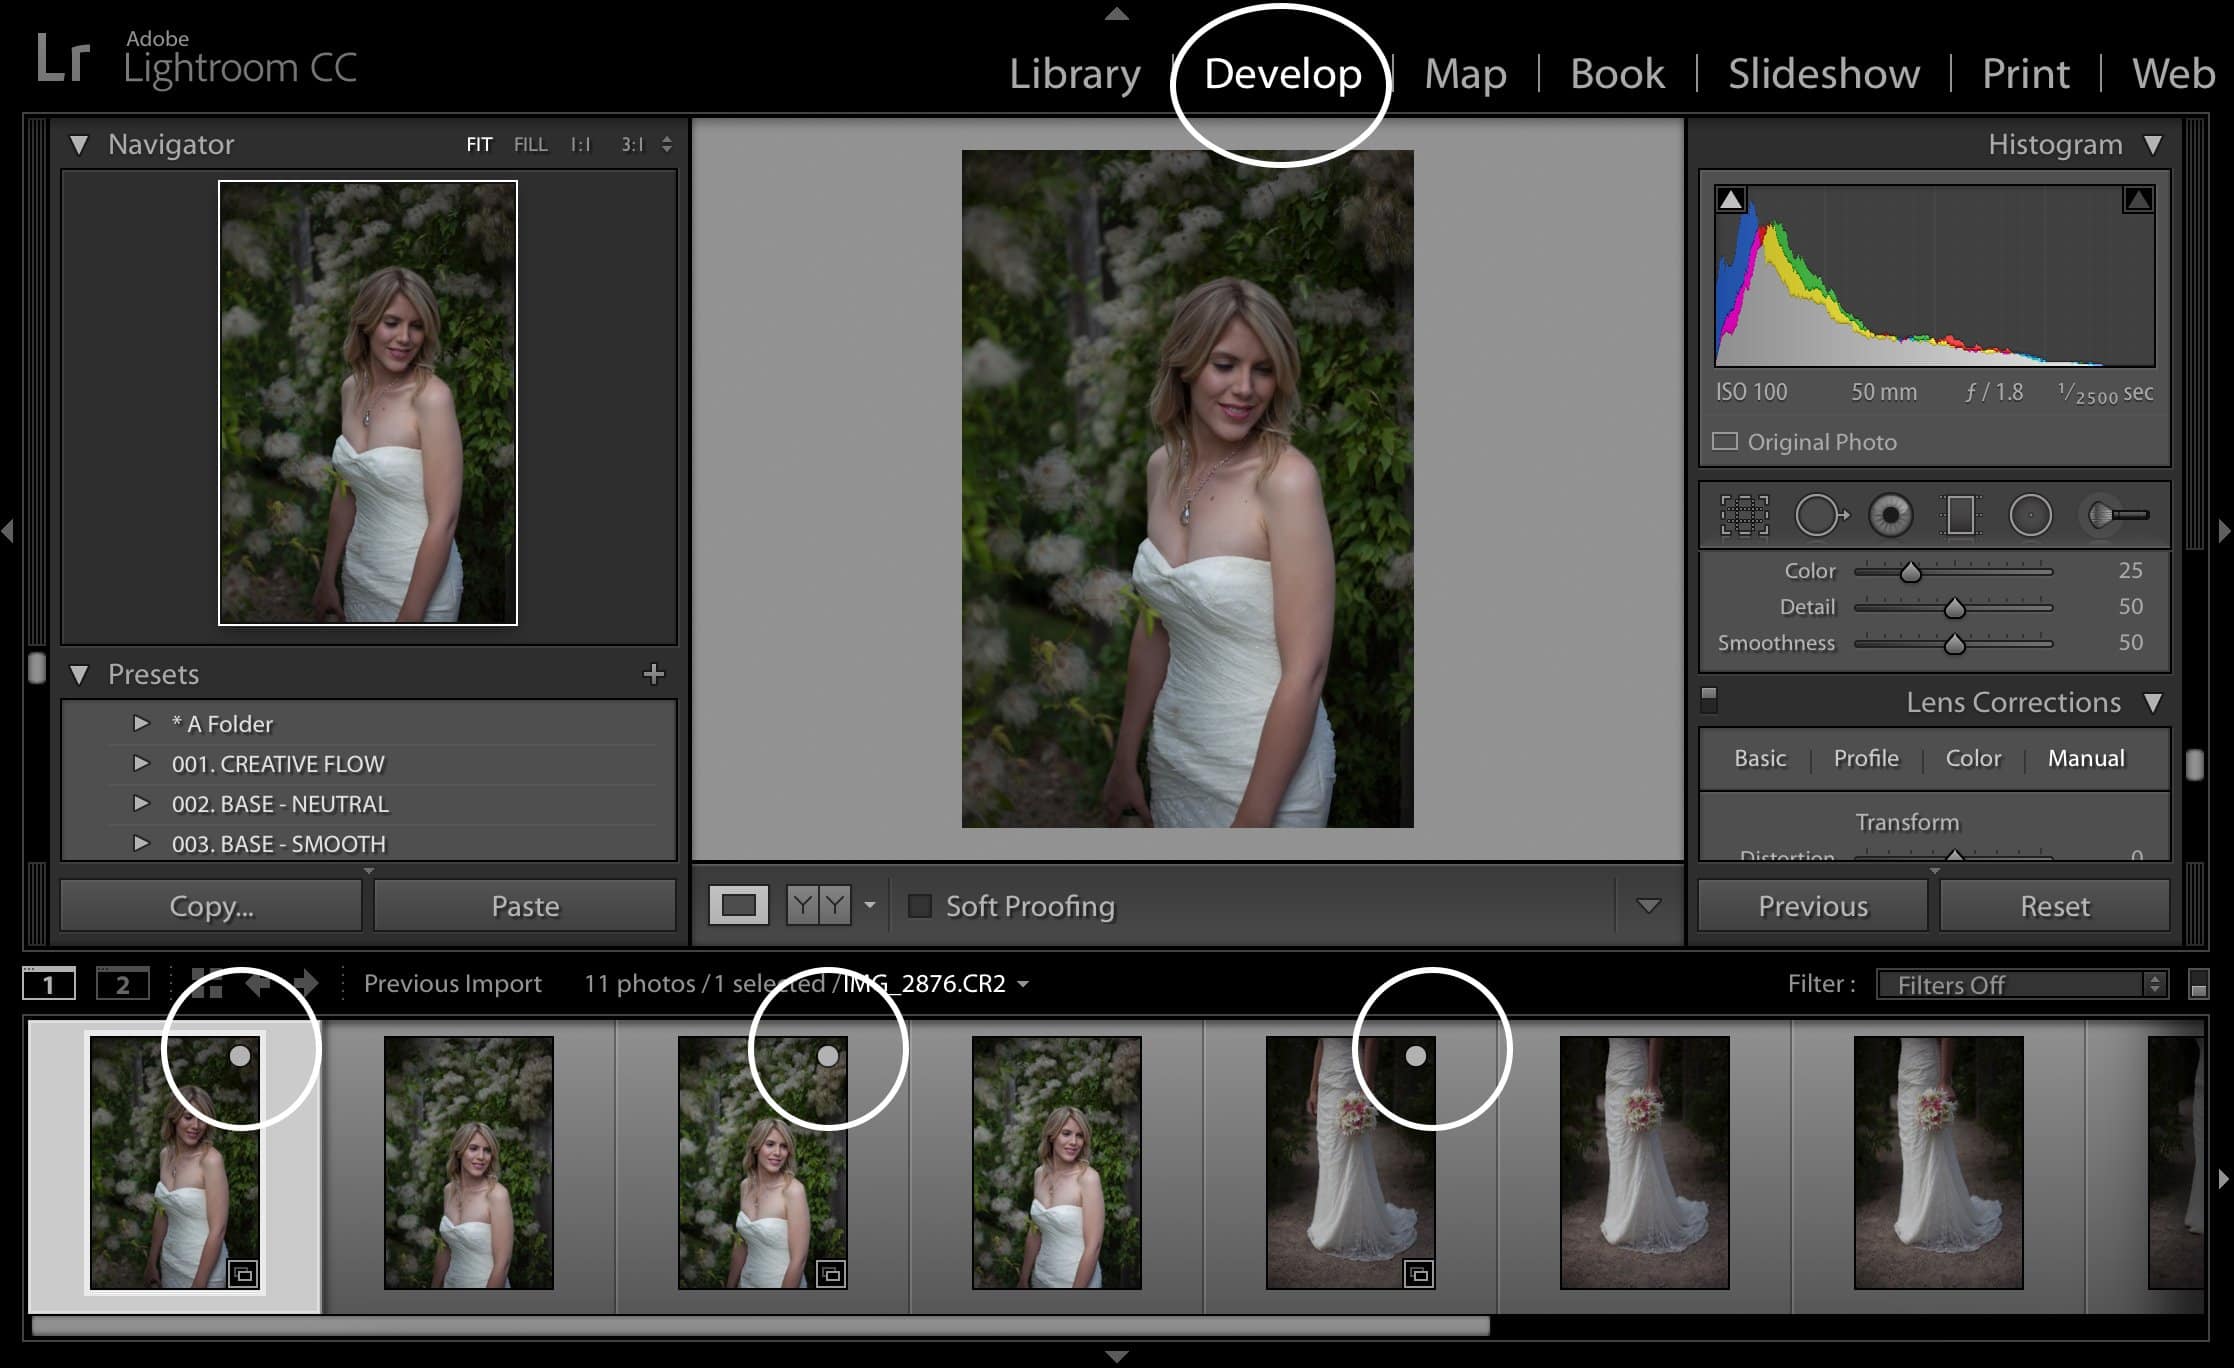
Most wedding photographers take hundreds, if not thousands of photos and it can be extremely time consuming to sort through each shot one by one. Consider importing all the photos right into Adobe Lightroom and sorting through them there. While your photos are still in the “Library” mode, take a quick glance at your shots and mark your favourites (click the circle on the top right corner of each photo). When your photos are transferred into the “Develop” mode, you’ll be able to see which one’s you’ve already marked as your favourites. This will give you a good idea of which photos you want to delete and which ones you want to keep. From there you can continue to refine your choices until you’re left with the photos that you want to edit. Quick Tip: It’s important that you trust your gut and make quick decisions when it comes to sorting your images. Otherwise this can be a very time consuming process.
Image 1.
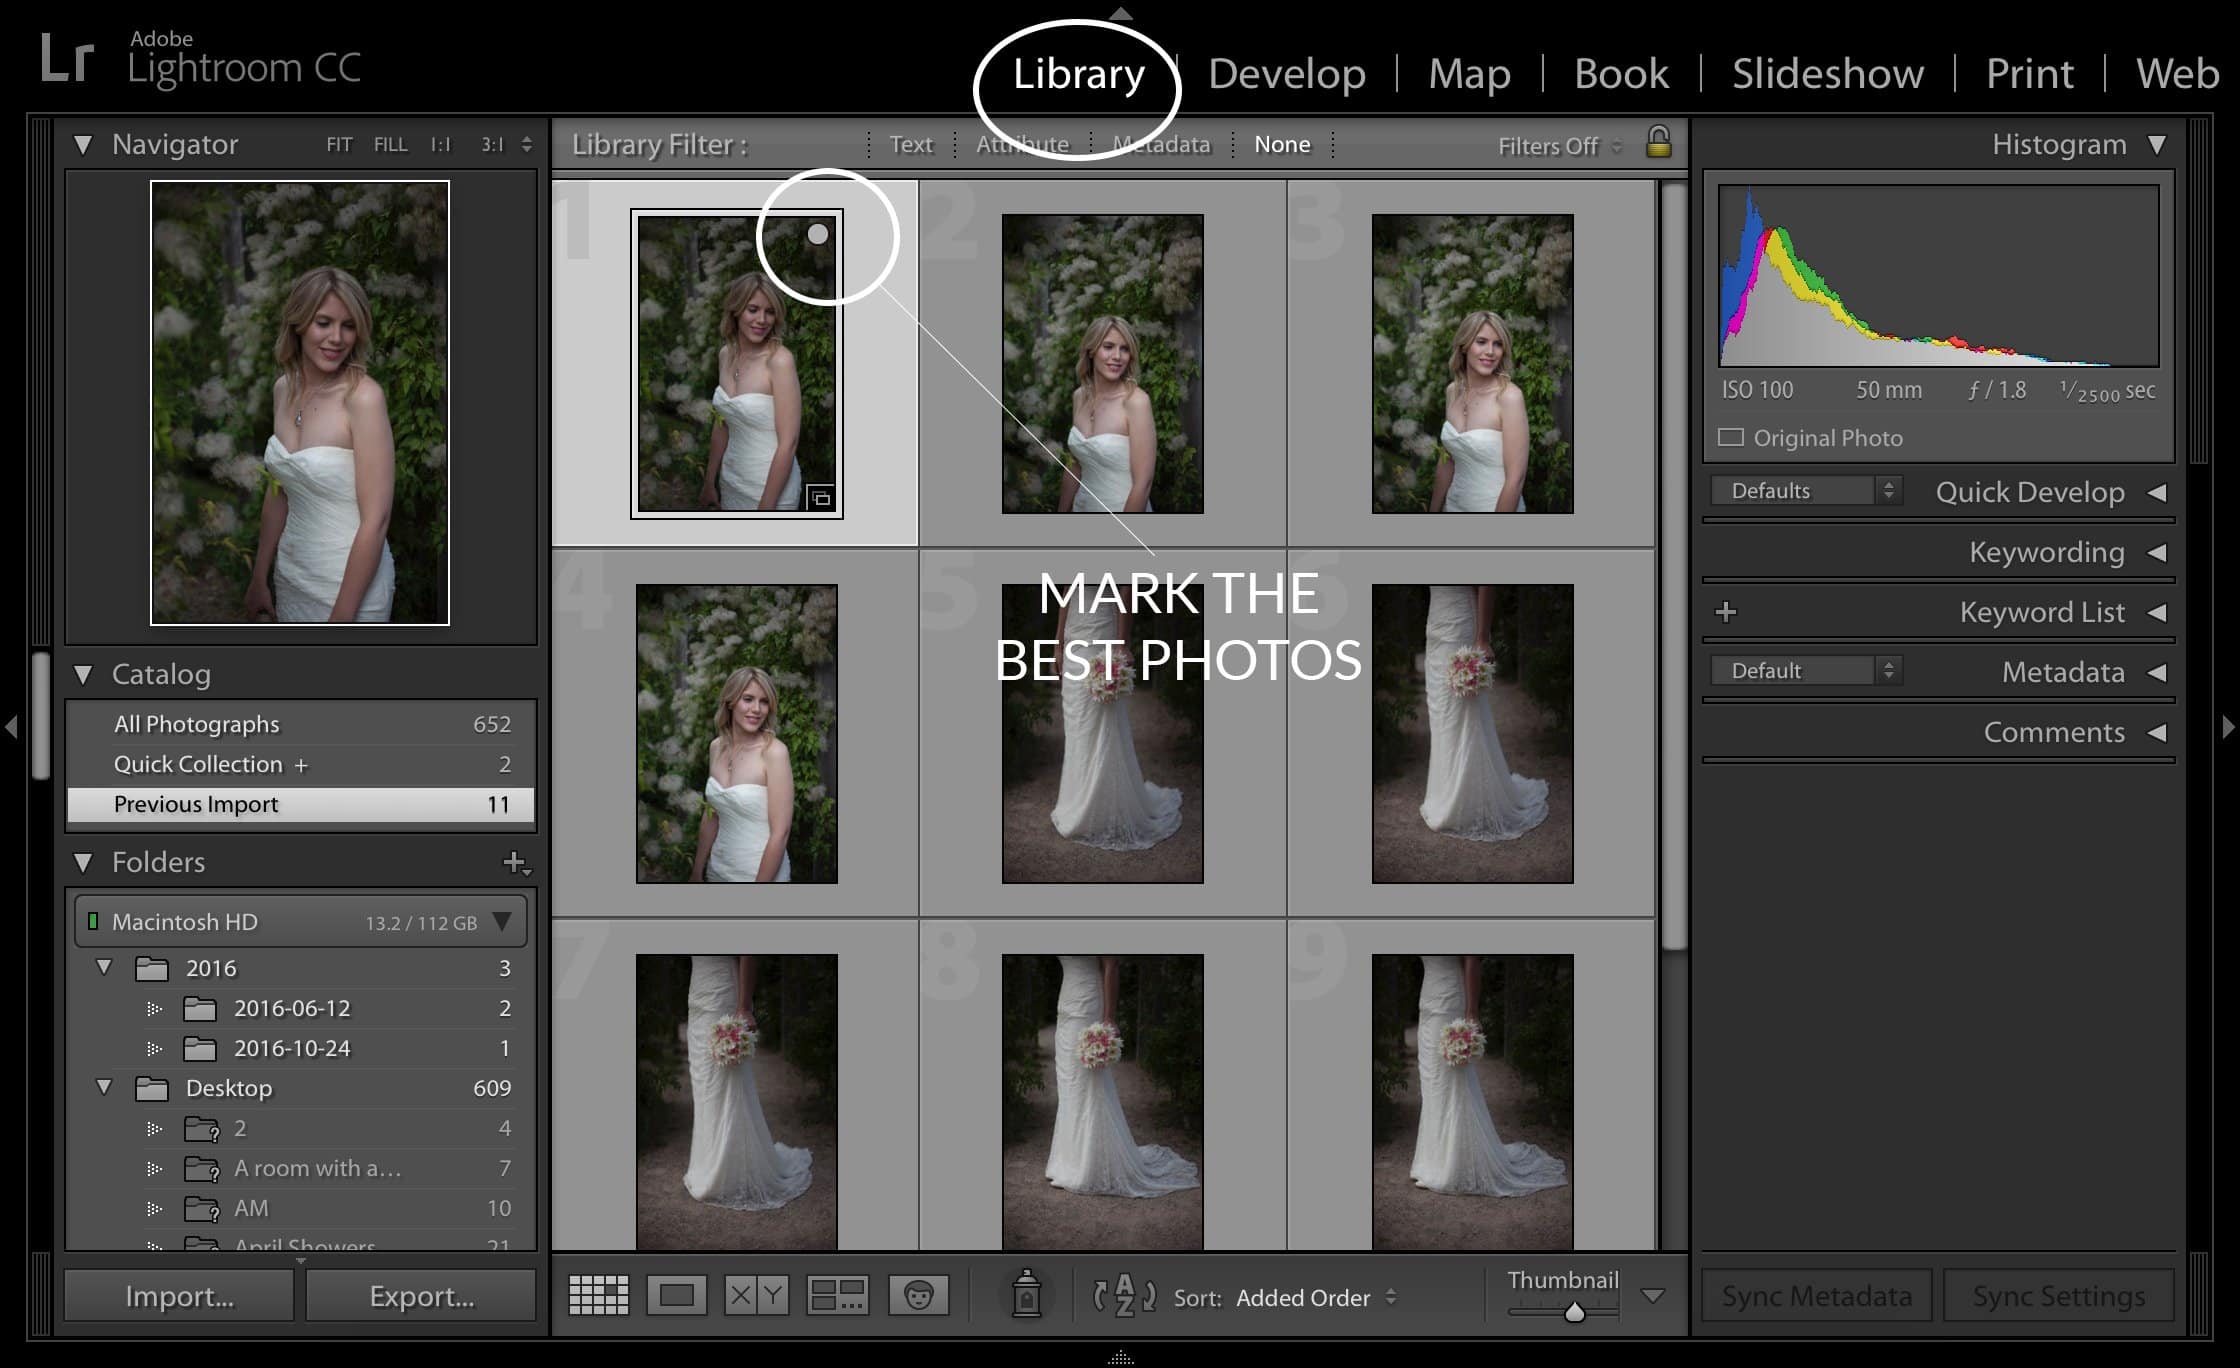
Image 2.
3. Editing Tips
When editing in Lightroom, always remember to look at your Histogram. The Histogram is located in the top right corner of your control panel. There you’ll find a graph that gives you information about how your photo was originally shot. The graph breaks your photo down into 5 different elements: blacks, shadows, exposure, highlights and whites. Each element is charted on the histogram graph. From this chart, you can hover over any spike and it will tell you how much or how little your shot needs to be adjusted. For example: If your original photo is overexposed, the graph will spike in the highlight section of the histogram… and so on. Correct each element with your control panel until the graph looks more balanced.
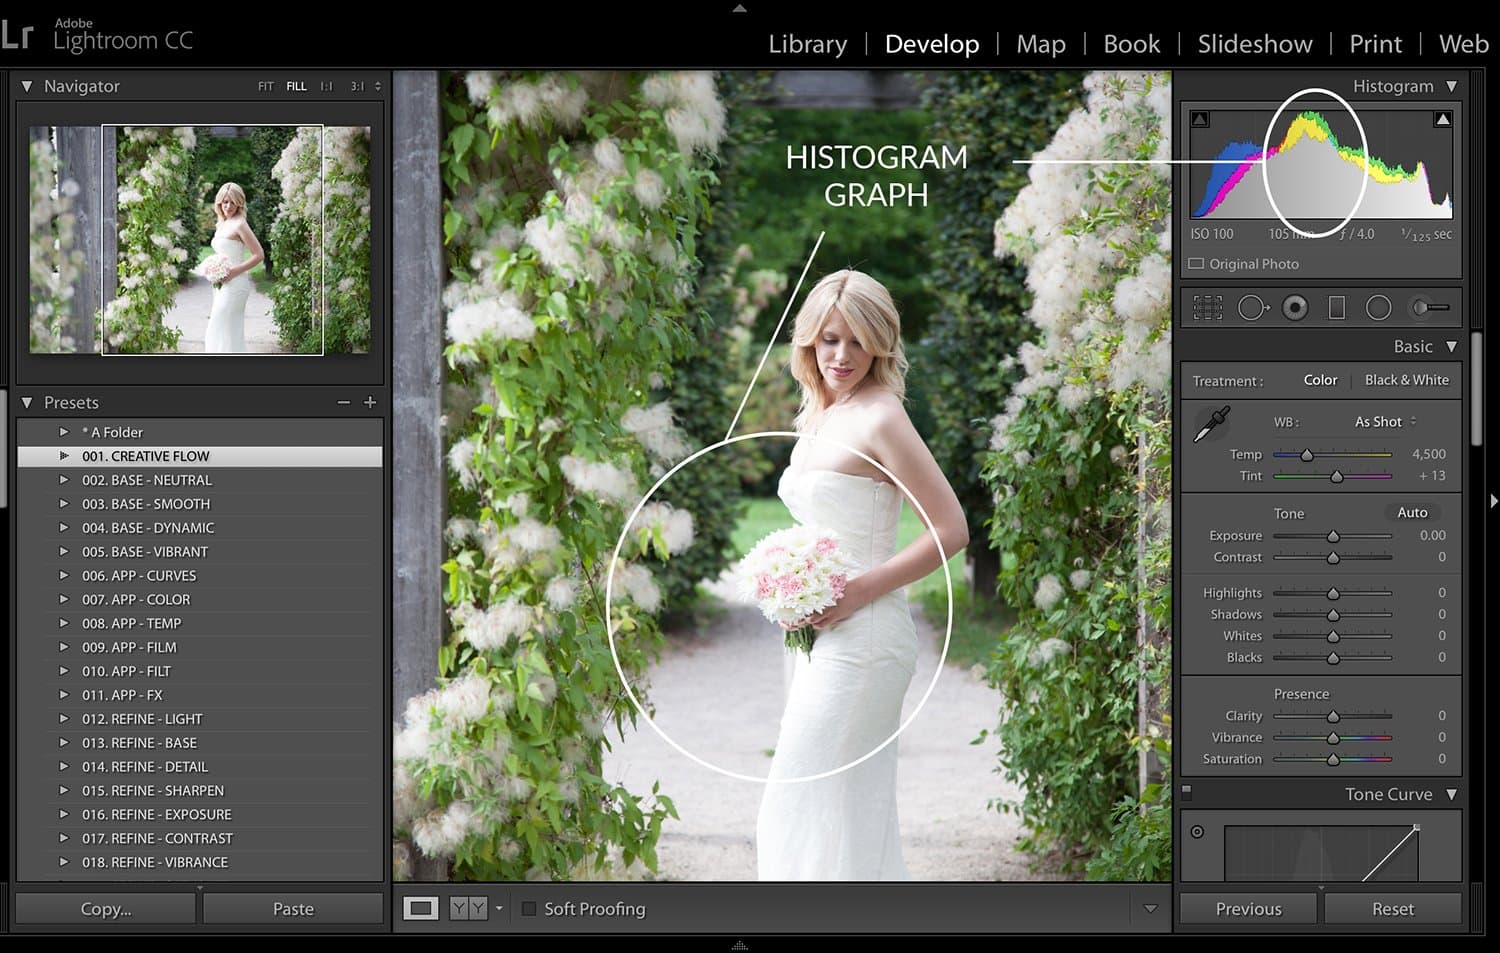
Quick Tip : Let’s suppose that you have multiple photos from the same series (Example: The kiss series) that were all taken with the same camera settings. Once adjusted one photo and you’ve found the right balance in your histogram, you can apply the adjusted settings to the rest of the series. You do this by selecting the adjusted photo + holding down the shift button + and using your cursor to select the rest of the photos in the series. Select the “Sync” button at the bottom of your control panel and all the photos you selected will now be adjusted to your specifications.
4. Lightroom Presets
Presets are a series of files that are set or adjusted beforehand to provide a specifically designed look when you load them on to your image. They are a fantastic way to speed up the editing process and create memorable images at the same time. As previously mentioned, wedding photographers take hundreds of photos and it can be quite taxing to create unique edits for each shot. This is where presets come in! You can use them to create beautiful looks with a few simple clicks. Wedding Presets are designed to compliment a number of common wedding scenarios such as outdoor shots and indoor photos. Looking for wedding presets? Check out The Wedding Collection here: Wedding Collection
5. Photoshop Retouching
Wedding photographers will often need to retouch and refine some of their images. This can include retouching skin, clothing, lighting etc. Most of this can be done in Adobe Lightroom through something called brushes. Many professionals also use a method called “Frequency Separation” in Adobe Photoshop for retouching skin. Check out this quick video to see the “Frequency Separation” technique in action:
6. Exporting
Once you’ve finished all of your edits and you’re satisfied with your final product, use the export feature to export them into JPEGs using a high resolution. Rename the album and you’re all set to distribute the photos to your clients.
Remember to think about efficiency and quality when you’re going through your editing process. The more practice you get, the better you’ll be! Thank you for joining us for this 8 part series! We hope that each article was useful and that you were able to take away some helpful tips. Always remember, every professional wedding photographer started out exactly where you are today. You can do this! Good luck with your new wedding photography business!
Looking for Wedding Lightroom Presets? Checkout the Creative Flow and enjoy over 1000 Lightroom Presets & Creative Brushes: The Creative Flow is the ultimate workflow and premium preset collection by Presetpro. The Creative Flow is your own personal preset “tool box” where you can swap out tone curves, change base settings or easily color tone your image with a few simple clicks. When you purchase the Creative Flow you get all of our premium collections (at a discounted price) plus the Creative Flow workflow and Creative Brushes. Enjoy the power of 1000 + Lightroom presets integrated into one simple and easy to use workflow!

