How to Make Vintage Light Leaks in Photoshop.
Hello and welcome to the Vintage Light Leak tutorial for Adobe Photoshop! In this tutorial, we will demonstrate how to create a realistic looking vintage light leak that gives your photos a nostalgic look. Follow along with this step by step tutorial and be sure to watch the video below! The video will provide you with simple and easy instructions. Once you have mastered this technique, you’ll have hours of fun adding cool light leaks to any photo!
Step 1. Gradient One
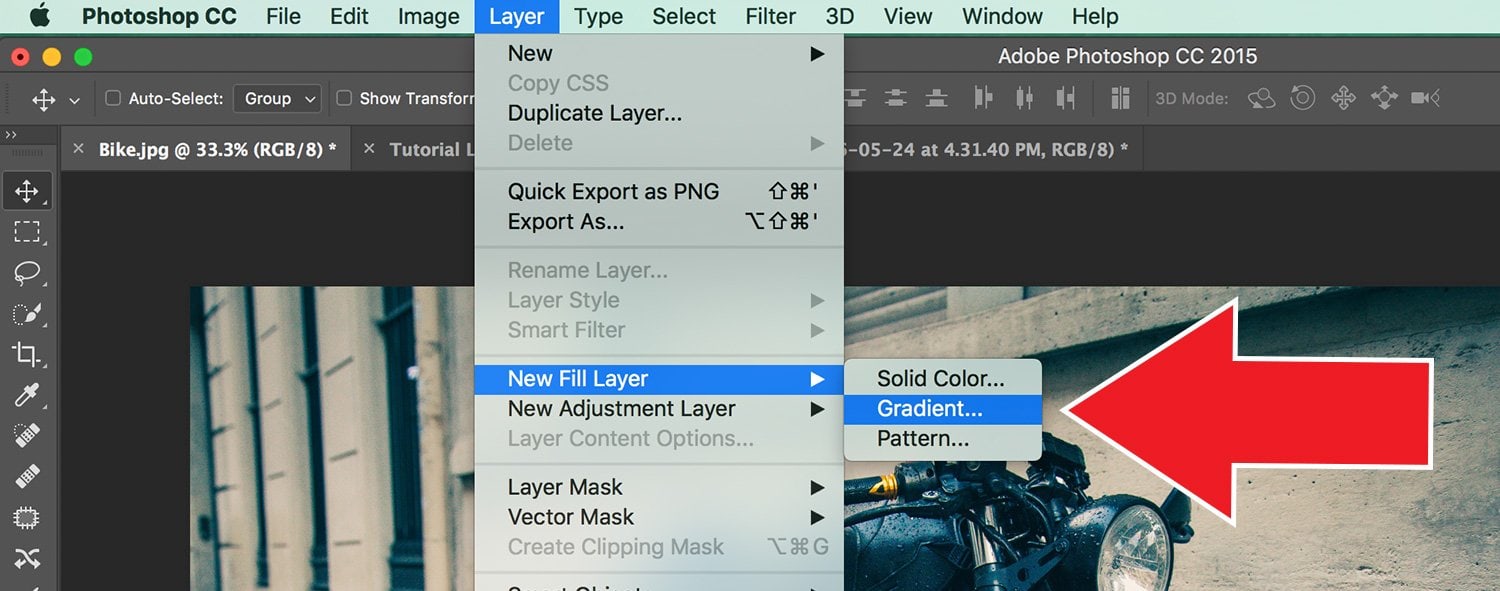
Load your image in Photoshop then select: Layer > New Fill Layer > Gradient. Now you should have a new Gradient in the layers panel.
Step 2. Set Gradient
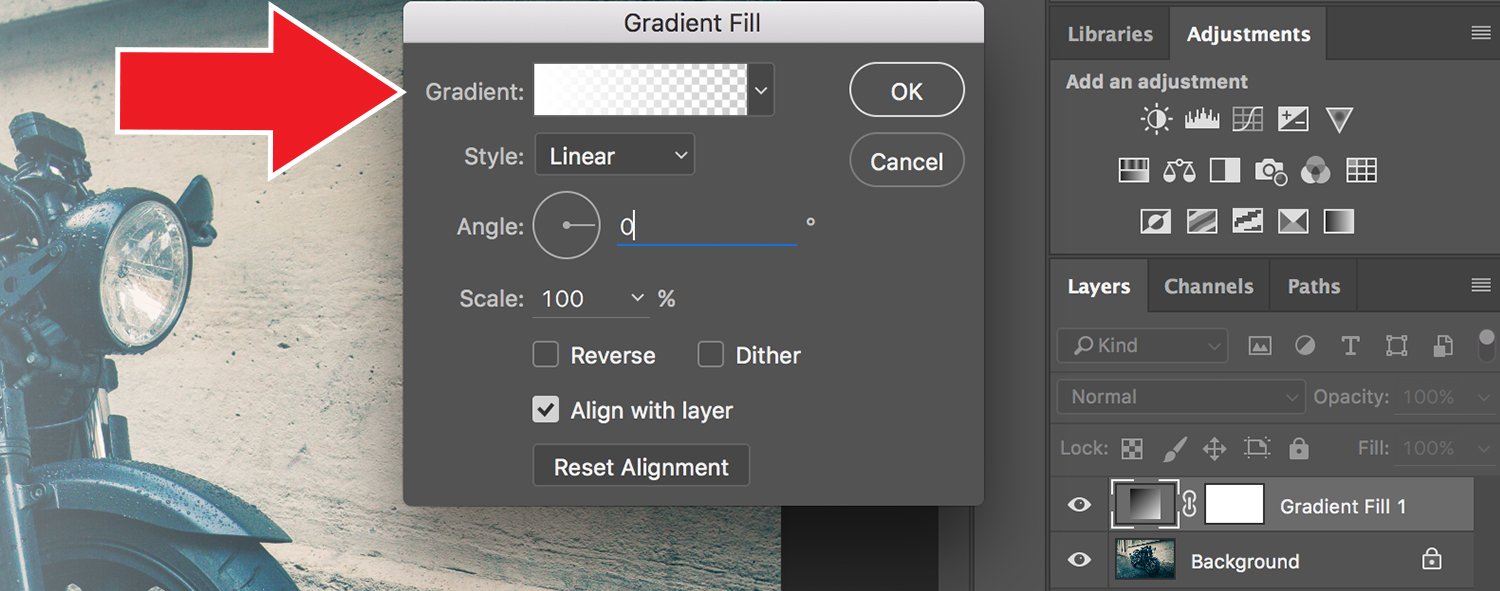
The gradient fill window will appear. Set the angle to “0” and double click the small gradient window as seen in the image below.
Step 3. Light Leak Base
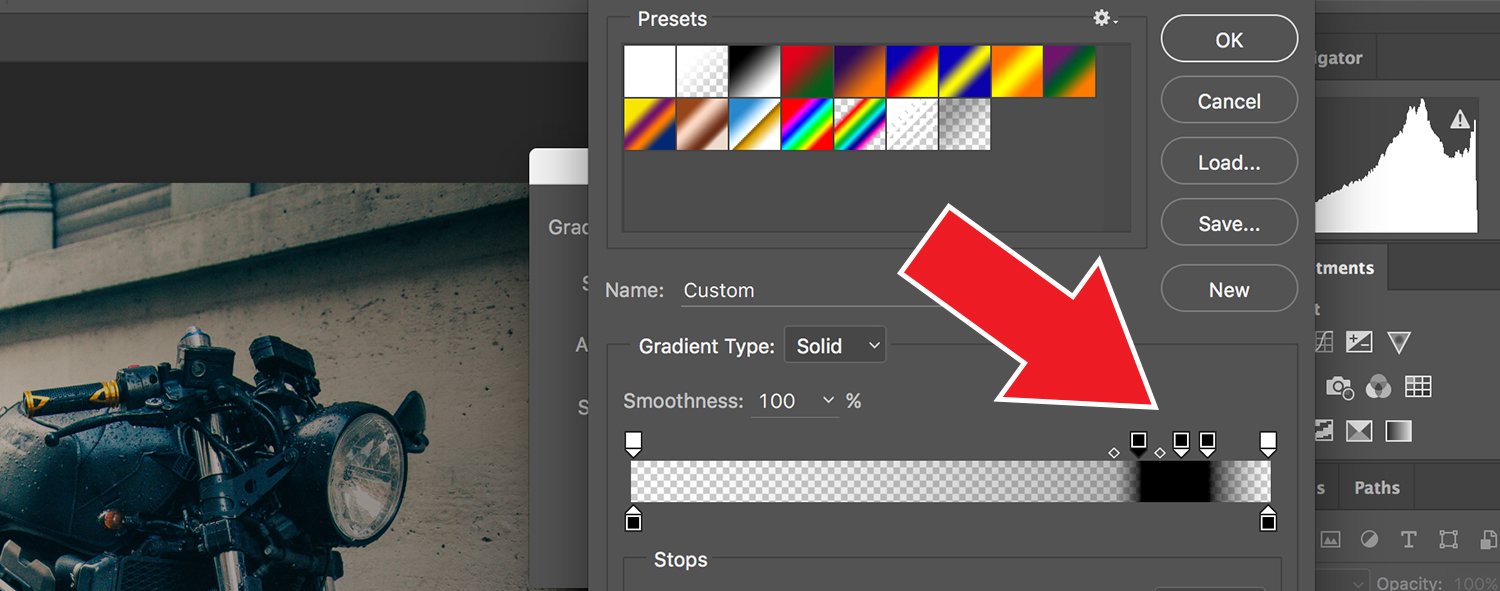
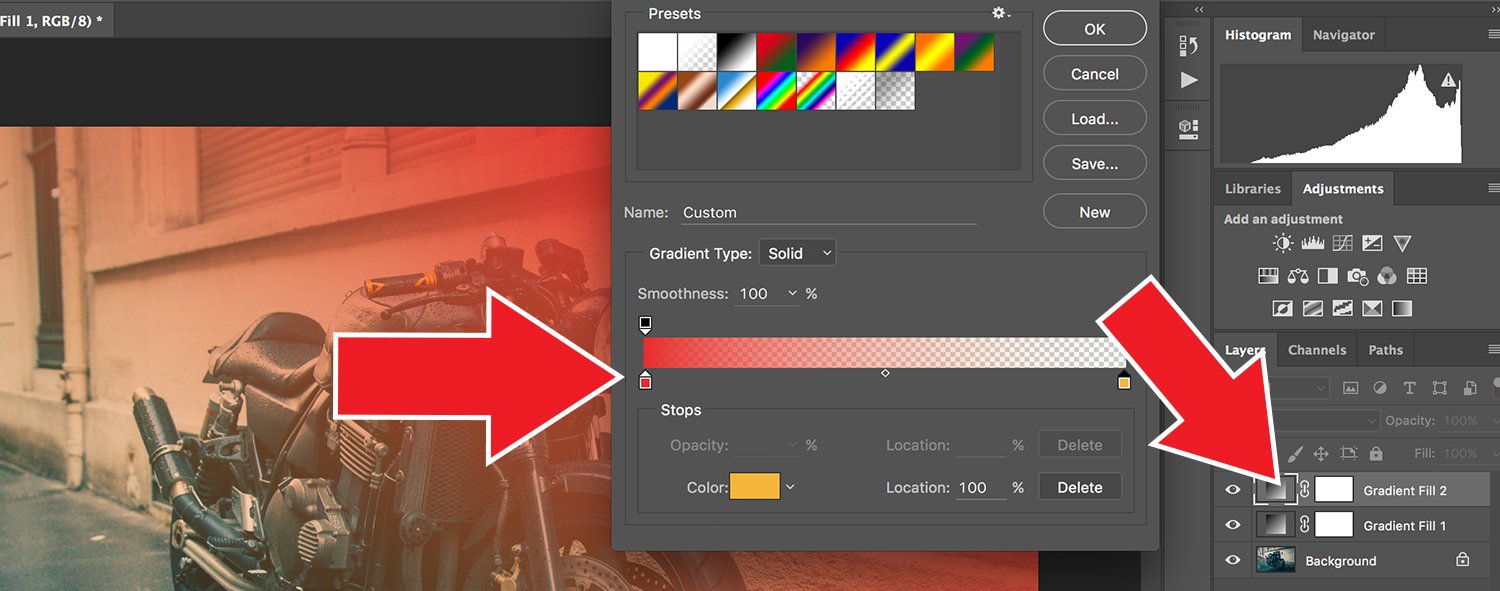
In the Gradient Editor you will need to set up the “color pins.” Set both bottom pins to black. Now drop a couple of black pins to the right as seen in image below. Click one of your “new pins” and you will notice a tiny diamond shape to the left and right of the selected pin, move the “diamonds” closer to the main pin (see video below for details.) Finally, click the Top left/right pin and set each to “0” opacity.
Step 4. Vertical Black Band
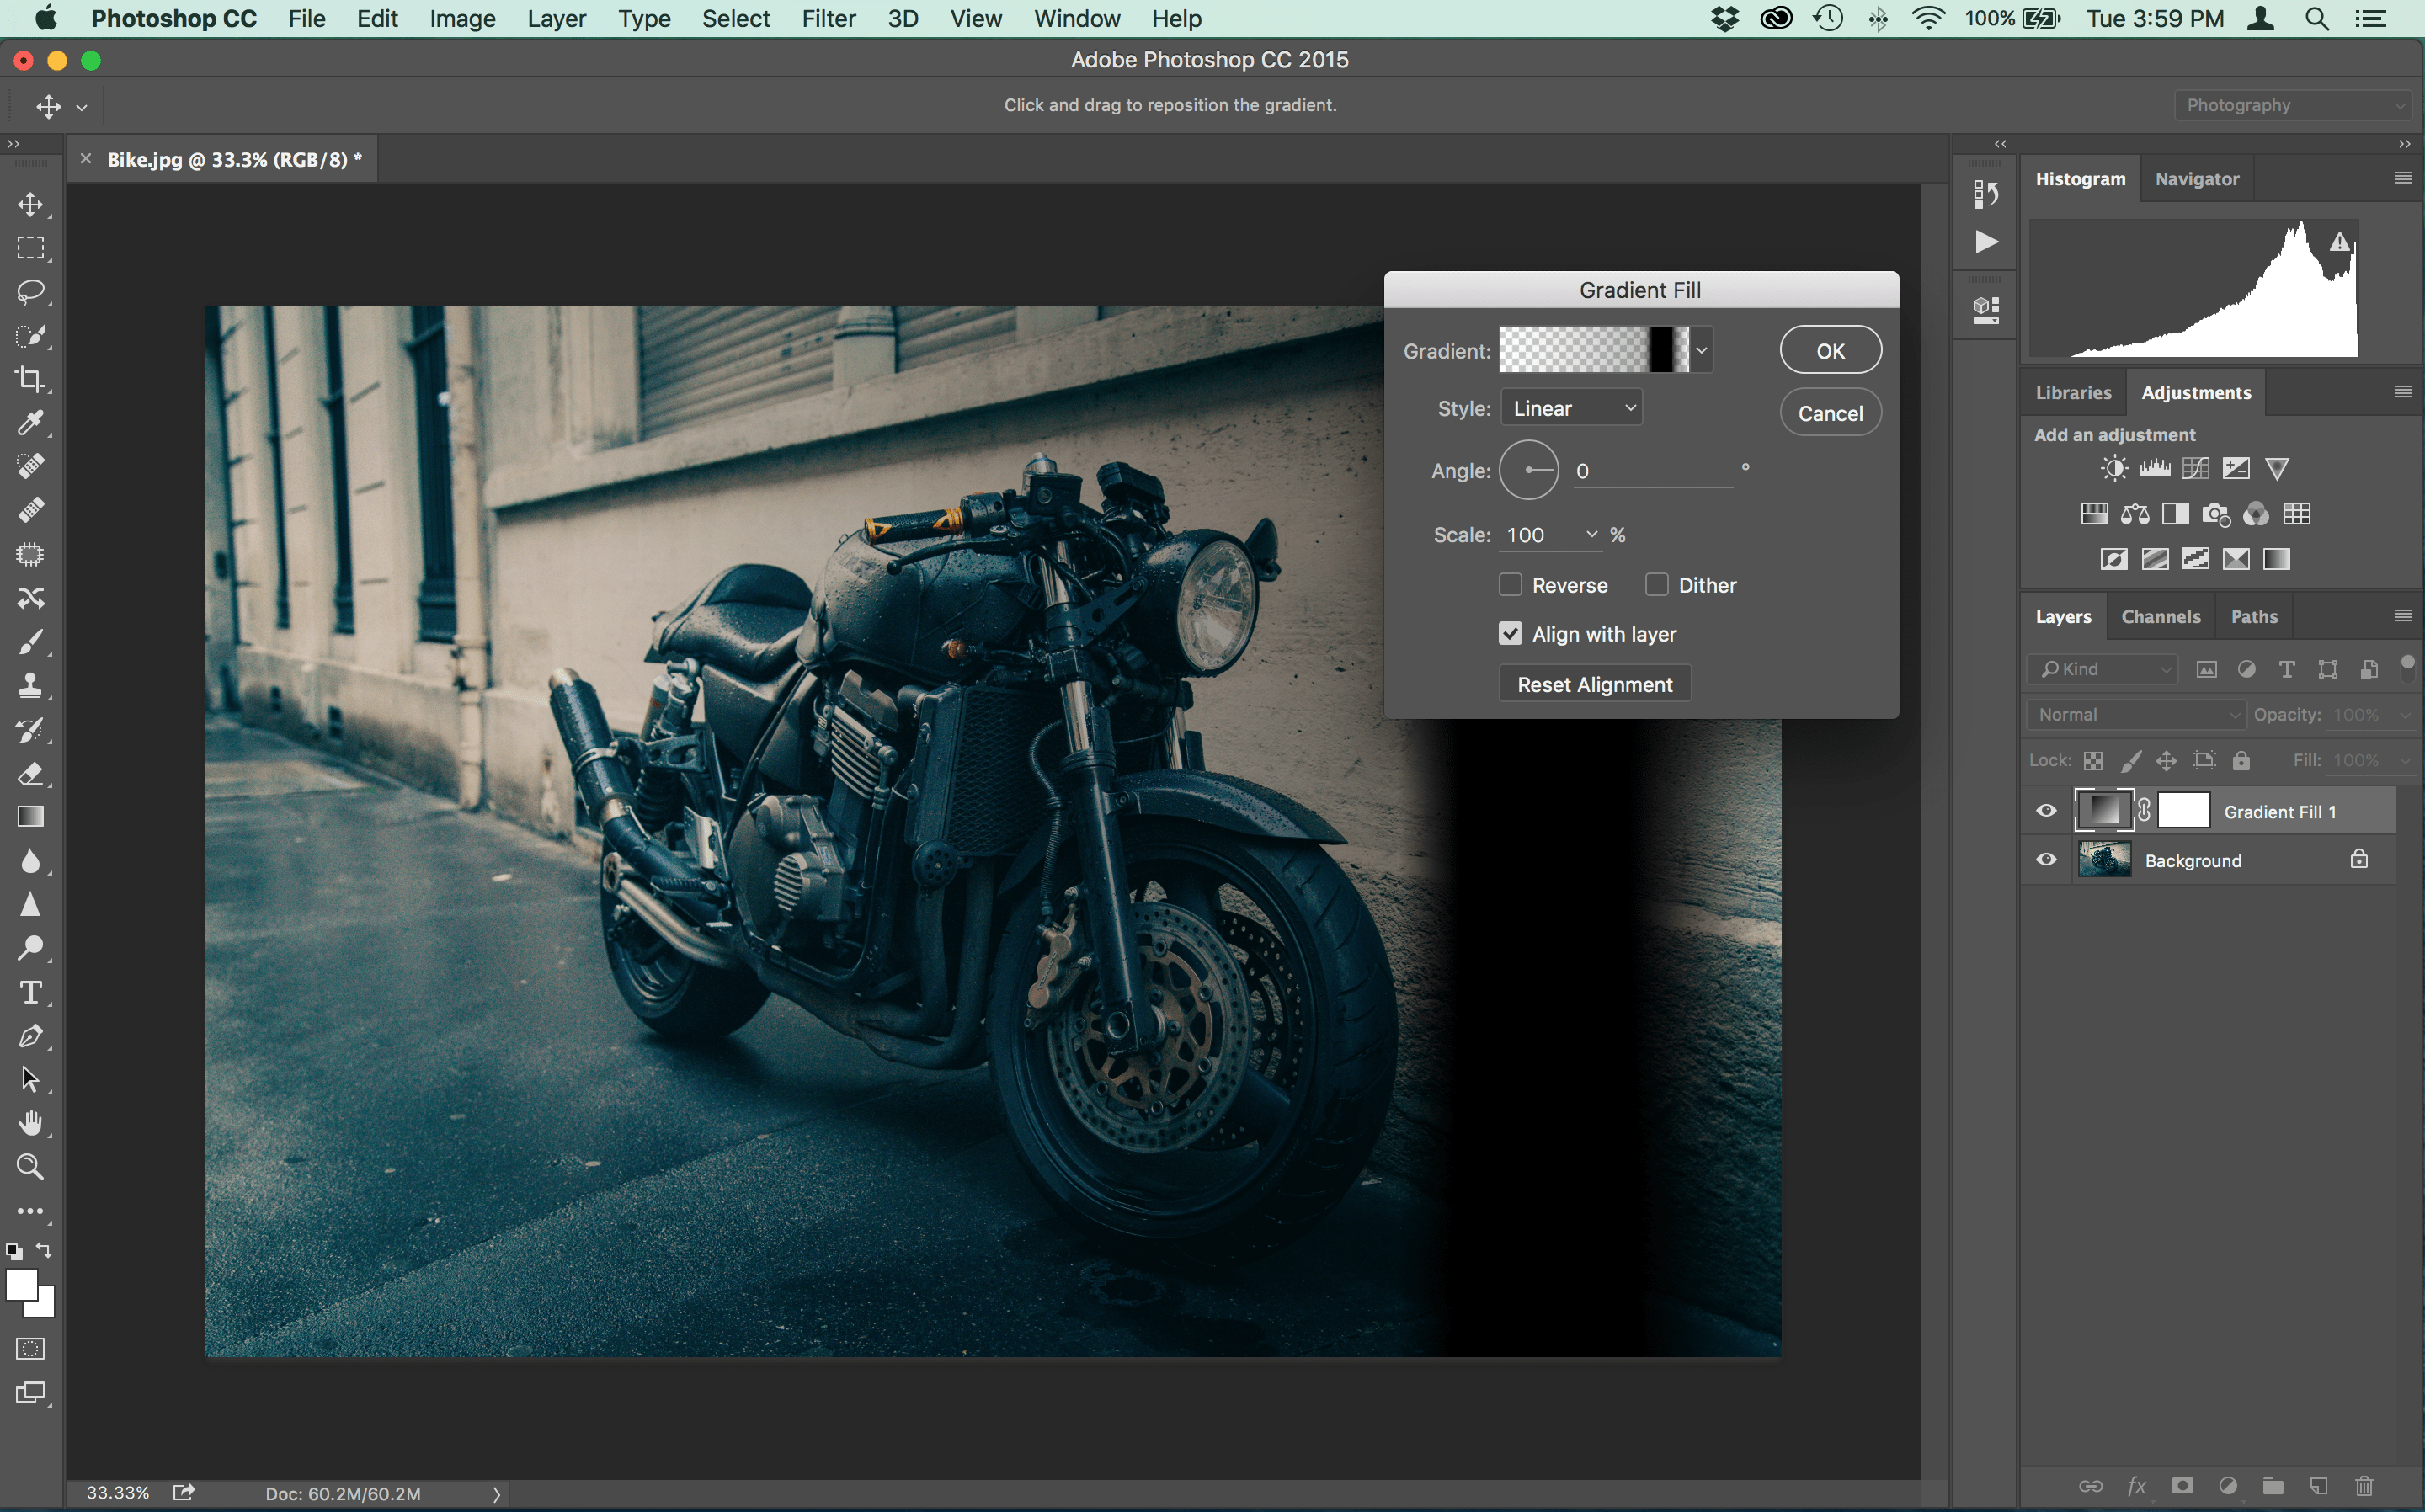
Click OK to get out of the Gradient Editor window. You should now see black band running vertically down your page. Now you can click OK out of the Gradient Fill window.
Step 5. Screen Blend Mode
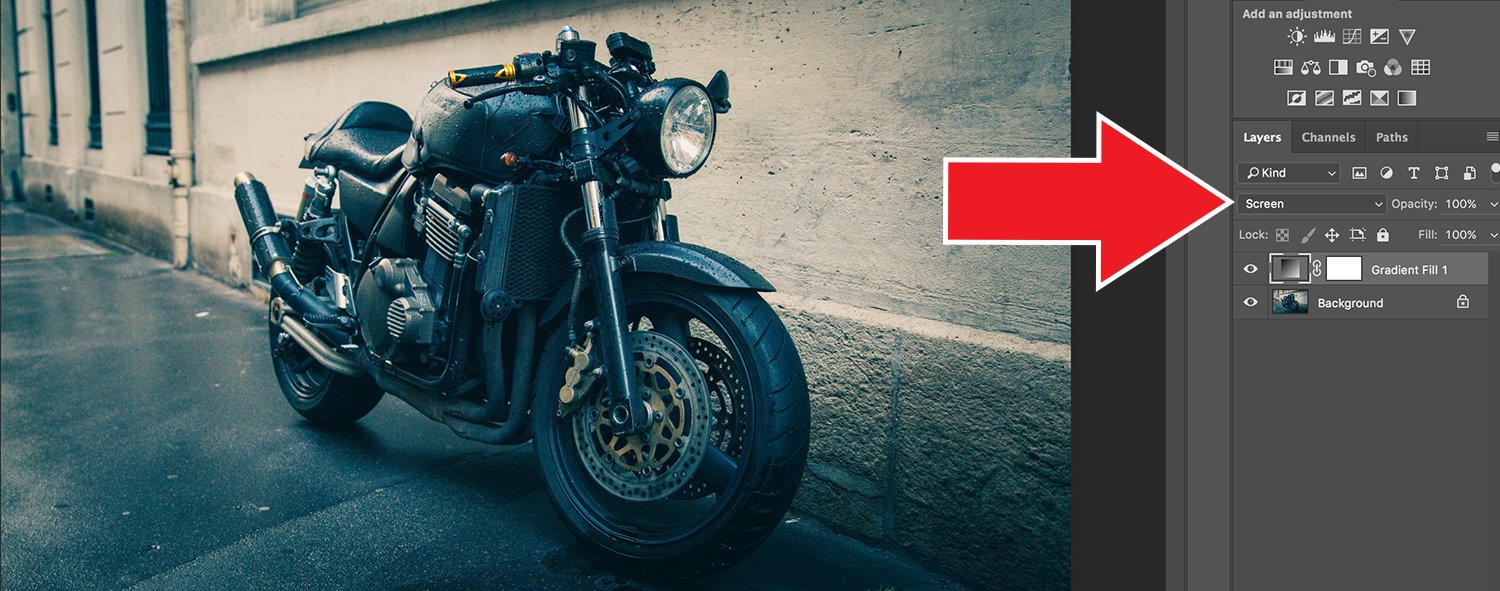
Set the blend mode to Screen and the black band will now disappear.
Step 6. Gradient Two
Create a second gradient by selecting: Layer > New Fill Layer > Gradient. Now in the Gradient Fill window, double click the small gradient window (same as step two) to get to the Gradient Editor window.
Step 7. Light Leak Color
Double click on the two bottom pins to select your light leak colors. Example: Bottom left pin we are using a red color and the bottom right pin we are using an orange color.
Step 8. Almost Done
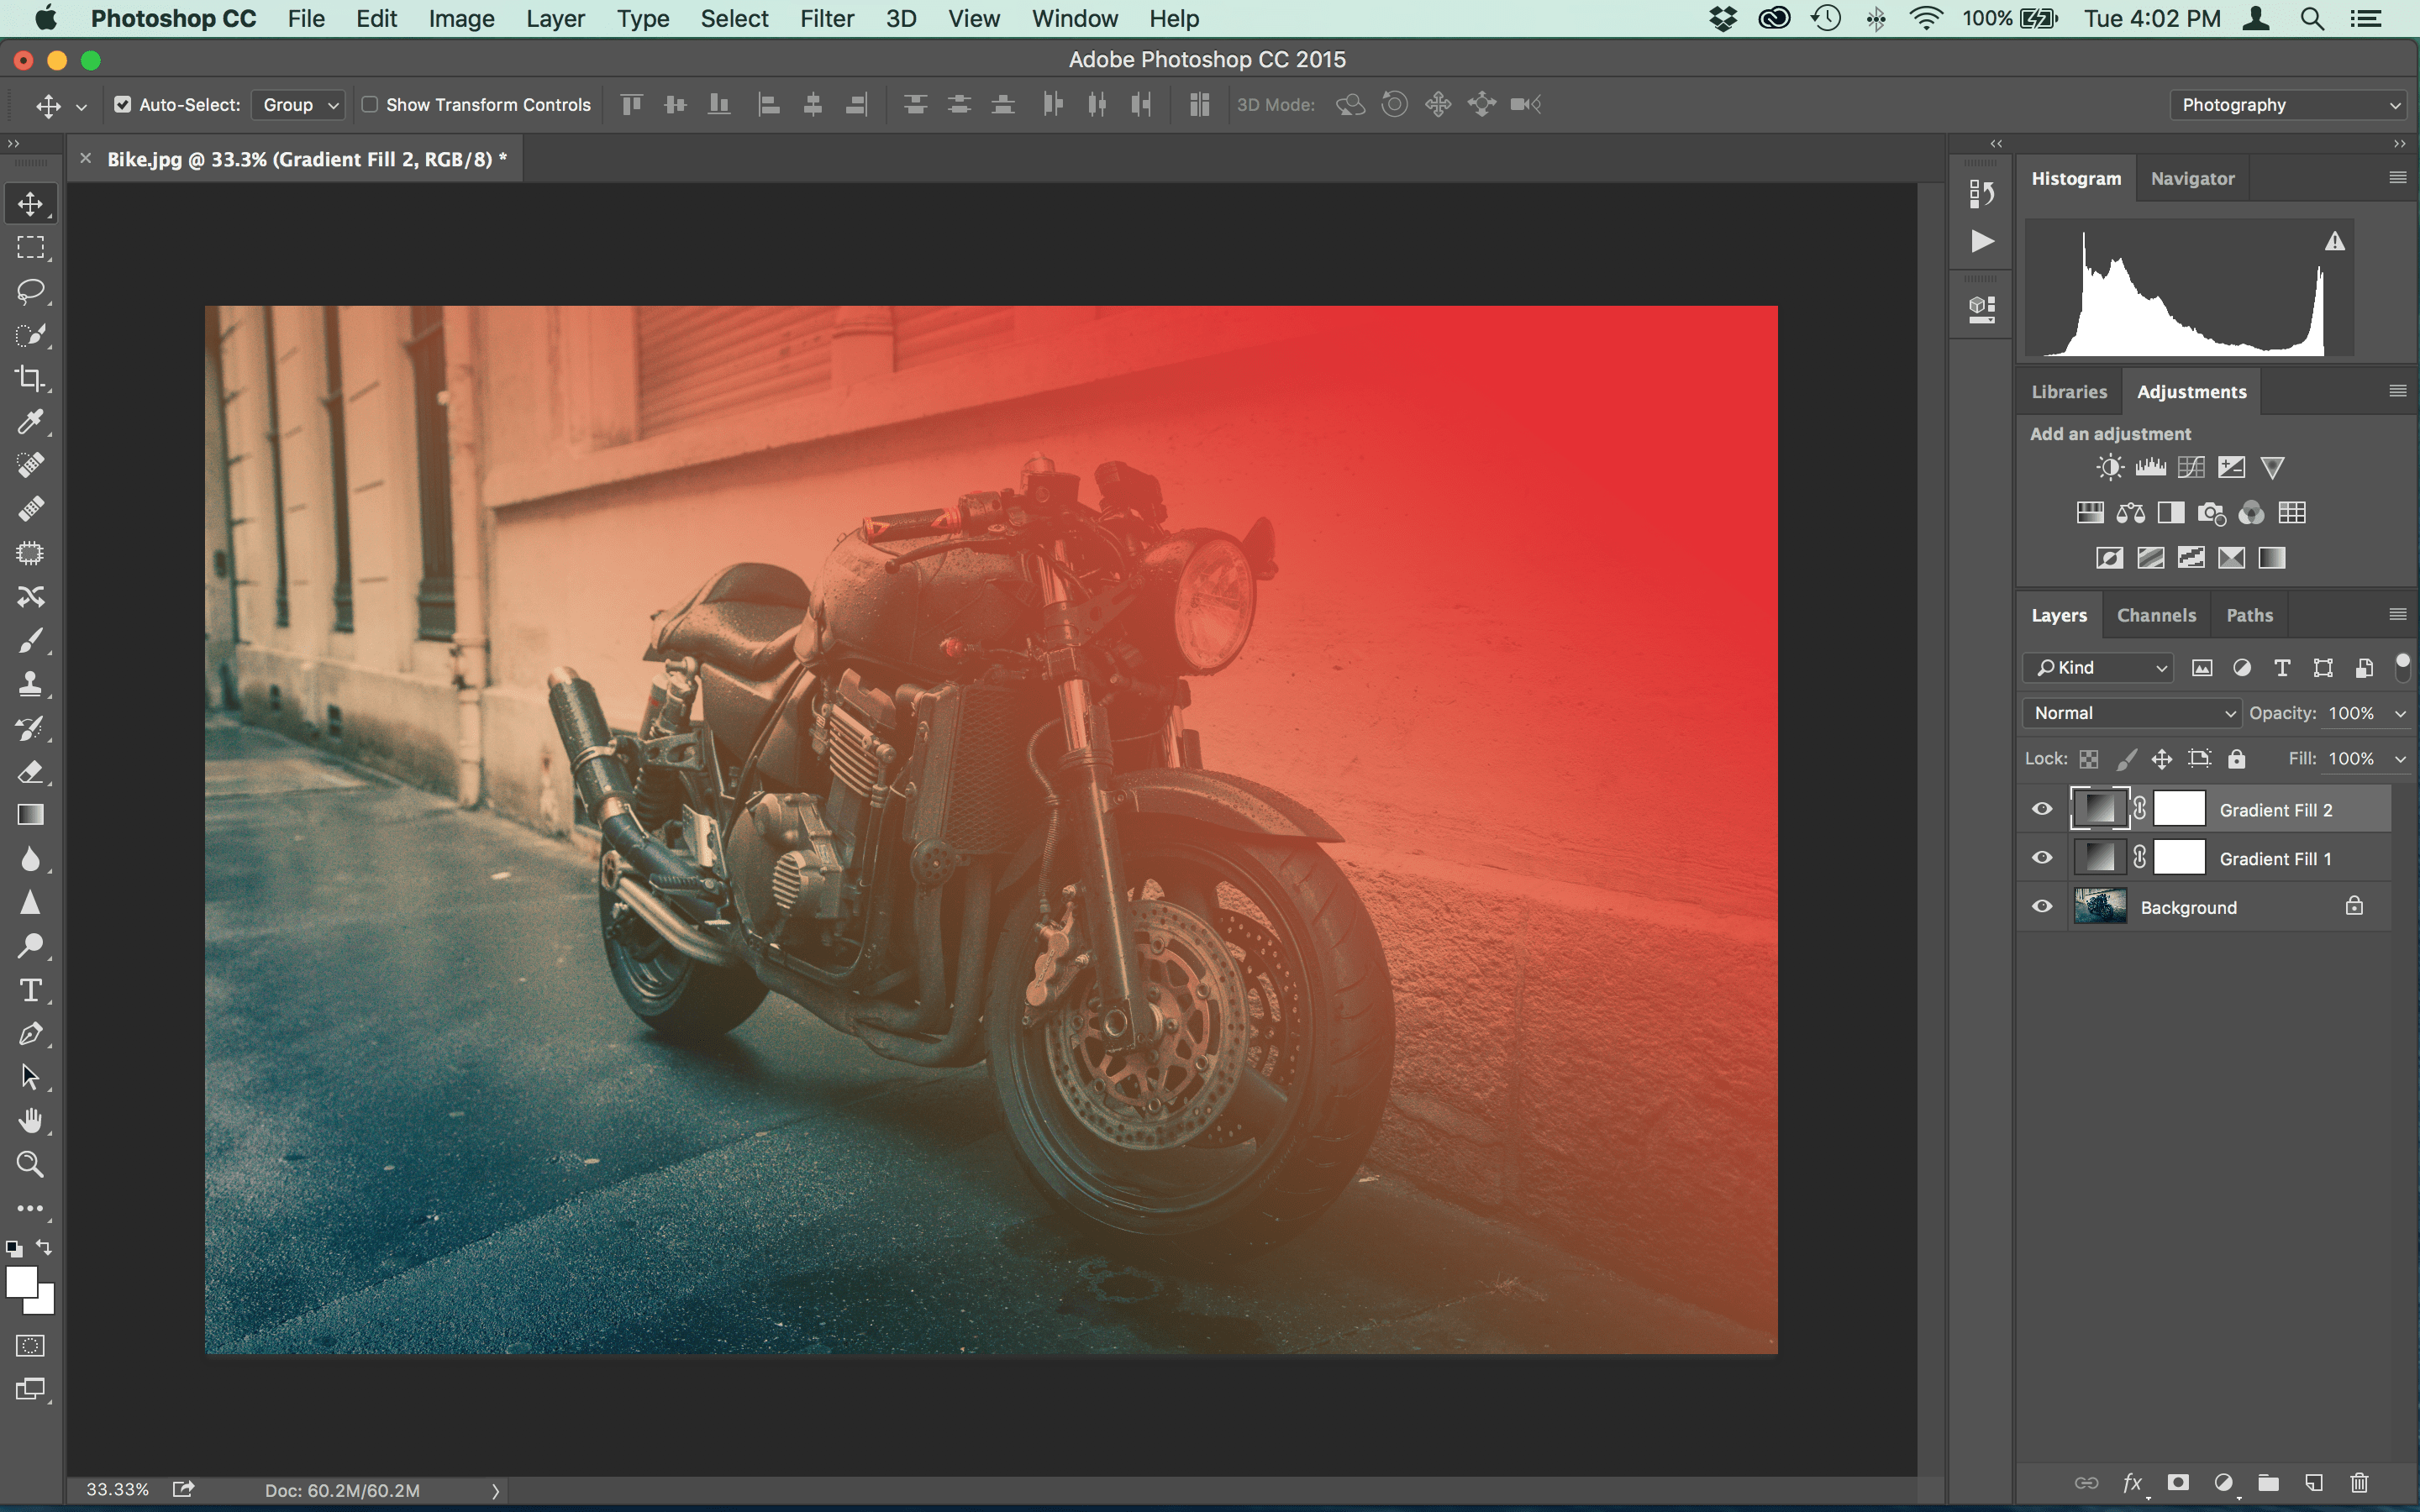
After clicking OK out of the Gradient Editor window, you can angle the light leak color in the Gradient Fill window. In the image below the light leak color is angled from the top right down to the left.
Step 9. The Alt Key Trick
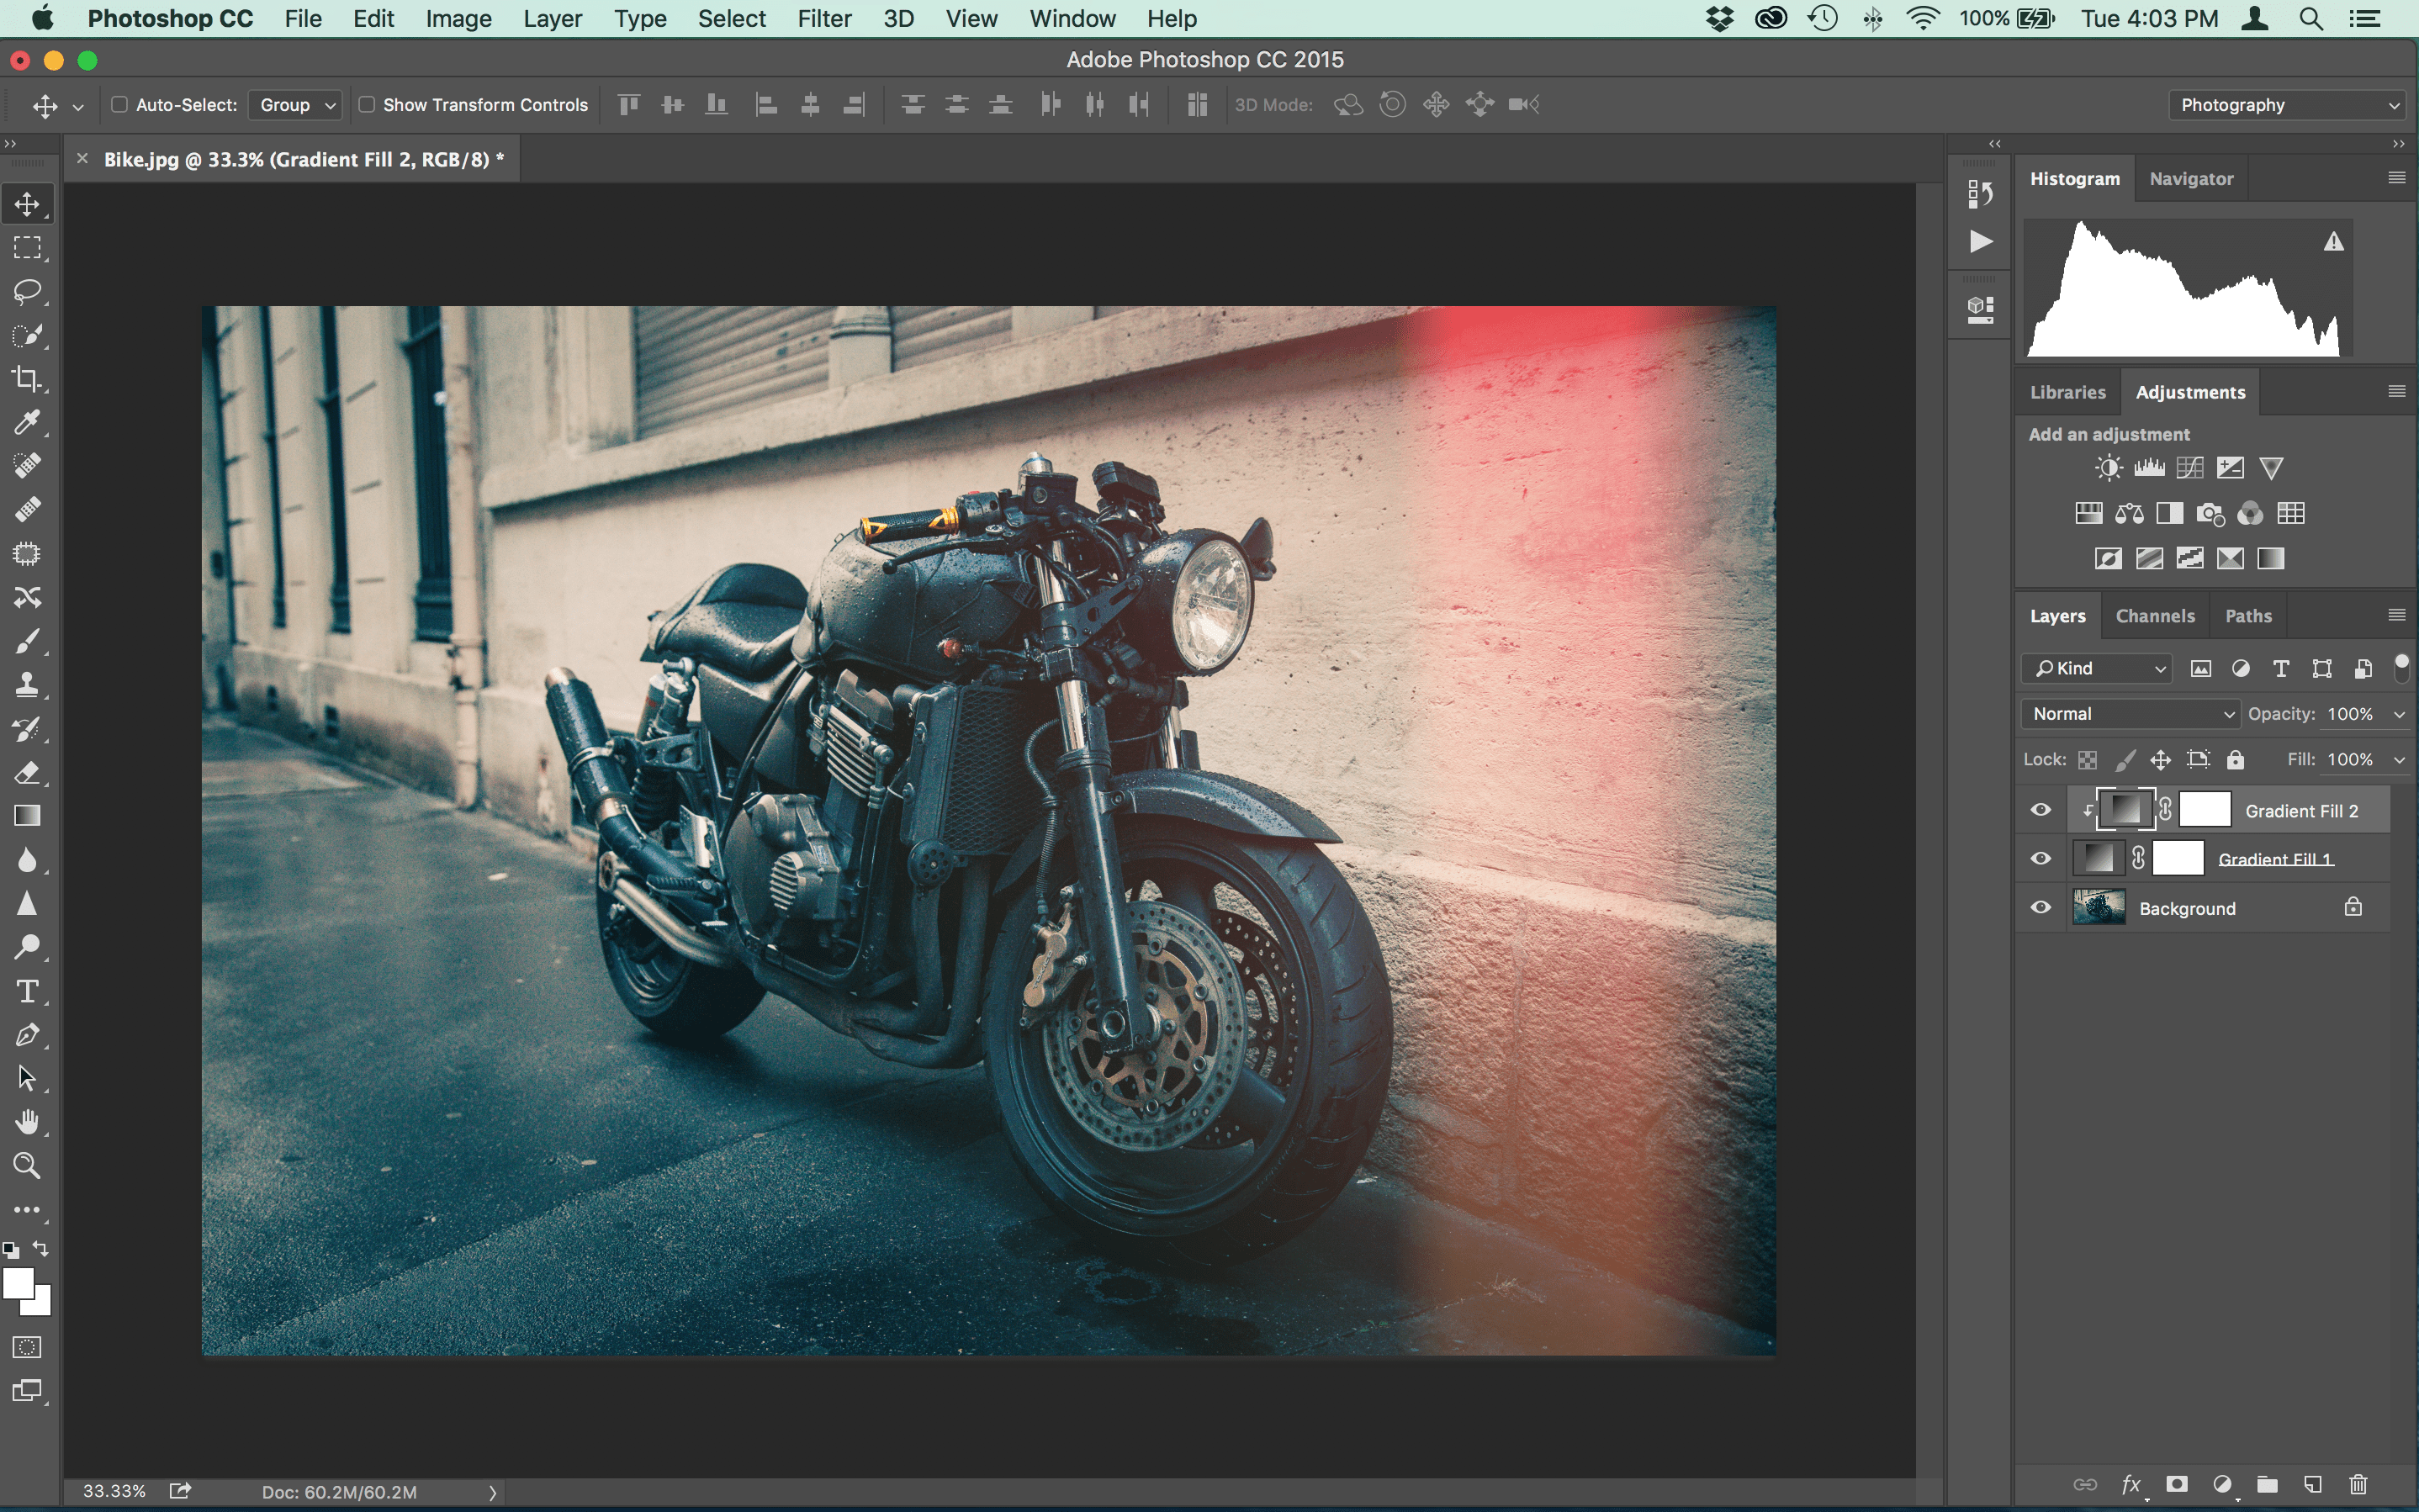
Finally, create your “Vintage Light Leak” by linking the two gradient layers. Hold down the Alt Key and hover between the two gradient layers. Once you see the “arrow and box” (as seen below) click your mouse while still holding down the alt key.
Step 10. Voila! All Done
Below you will see the final Vintage Light Leak. (Notice: Gradient Fill 2 is attached to Gradient Fill 1.)
Watch the How To Video Below!
Hope you enjoyed this Vintage Light Leak Tutorial. Please watch the video below to see the easy step by step instructions!
FREE Light Leak Photoshop Action!
Download a Free Photoshop Action “Light Leak” compliments of Presetpro.com Easily add a vintage styled light leak to your image! Get your free light leak Photoshop action here or click the button below!
Free Photoshop Action
Looking for More Photoshop Actions? Get over 300 Photoshop Actions together in one Complete Collection. Speed up your workflow and explore new looks with this awesome collection! Put the final touches to your image and easily mix and match actions to create your own unique look. Perfect for all types of photography!


