Lightroom’s New Color Grading Tool and Free Preset
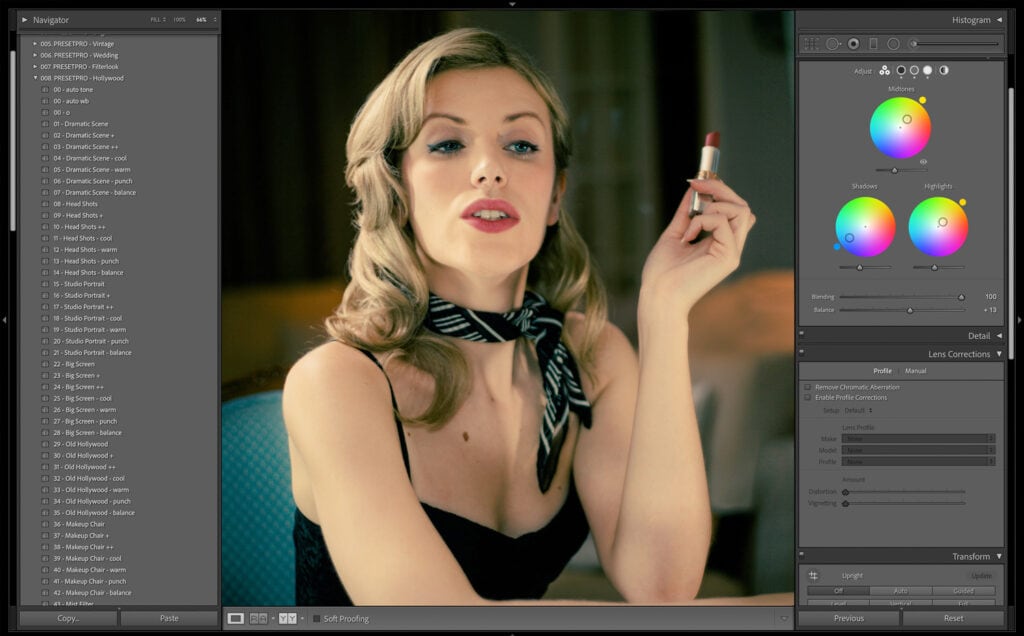
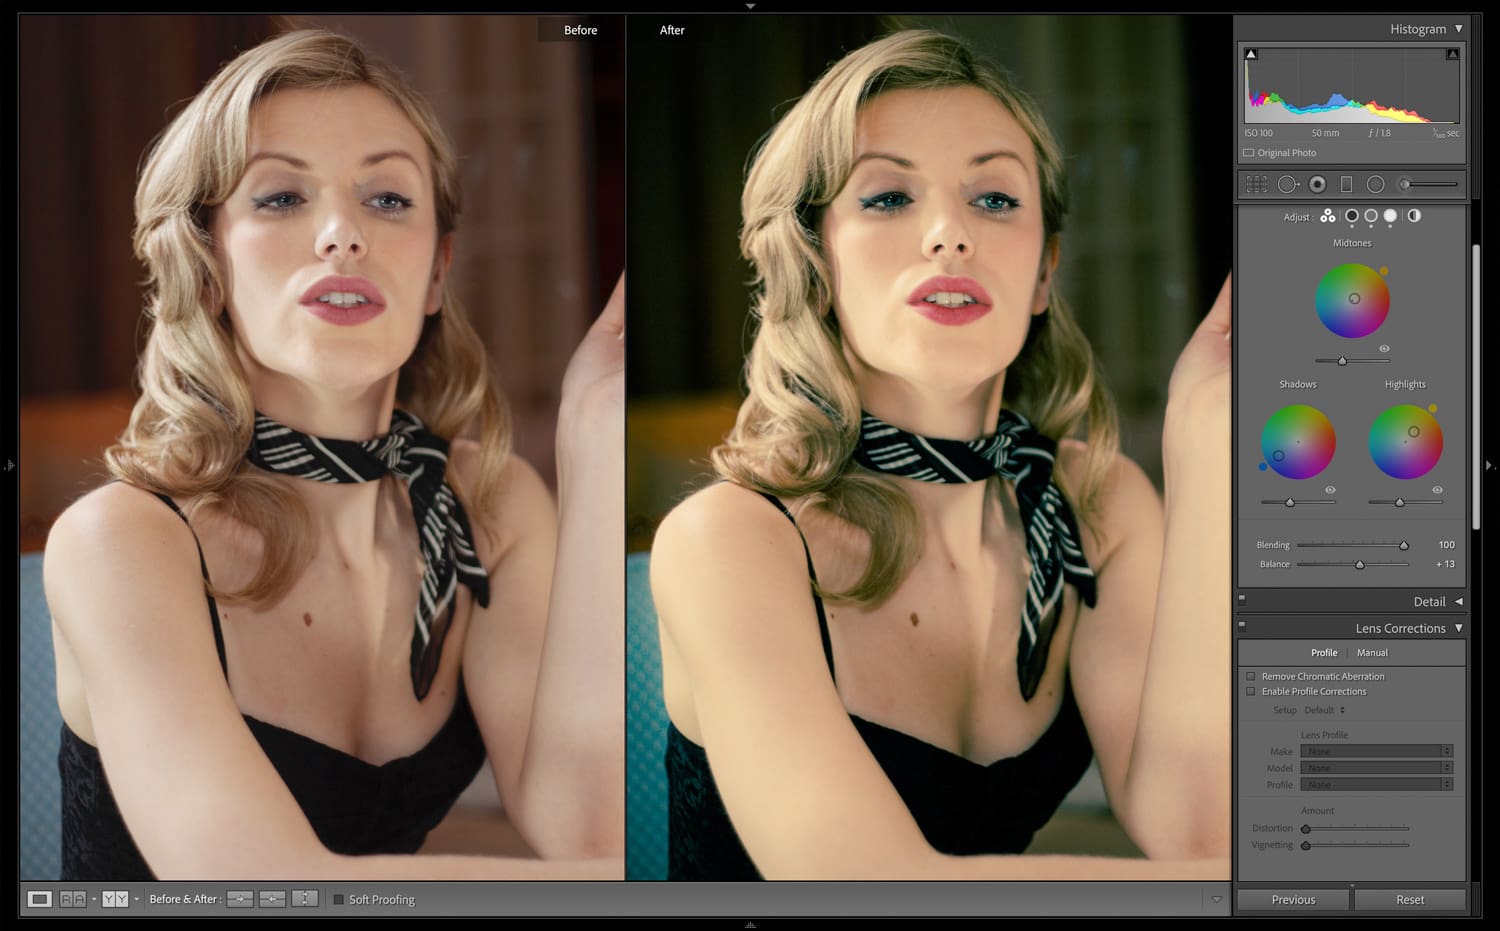
Yesterday Adobe launched their new color grading tool in Lightroom, Lightroom Classic, and Adobe Camera RAW along with a few more handy new features. Today I’m going to be reviewing the color grading tool. If you’re familiar with Adobe Premier, Capture One, or Davinci Resolve you understand just how powerful this new feature is. To have it available now in Lightroom is a game changer! I’ve used Lightroom since the beginning and it’s been my go-to software for all my photos including fine art prints. Adobe Lightroom has taken their split toning panel and converted it into color wheels. This adds a whole slew of possibilities to colorize your shadows, highlights, and now mid-tones. There are lots of new and exciting possibilities with this new feature. Below I will take you through a couple of RAW edits where I highlight how the split toning now translates into color wheels. If you have existing presets with split toning not to worry, they map over nicely and serve as a great starting point to familiarize yourself with color grading. If you are not familiar with color grading, simply play around with the color wheels and you’ll find that they are very intuitive and similar to Adobe Premiere. Make sure that you scroll down to download our free color grading preset for Lightroom so you can experience this new tool in action!
Lightroom Color Grading
Download the Free Lightroom Preset | Color Grading. Want more? Check out the ultimate Lightroom workflow – The Creative Flow
FREE Color Grading Preset
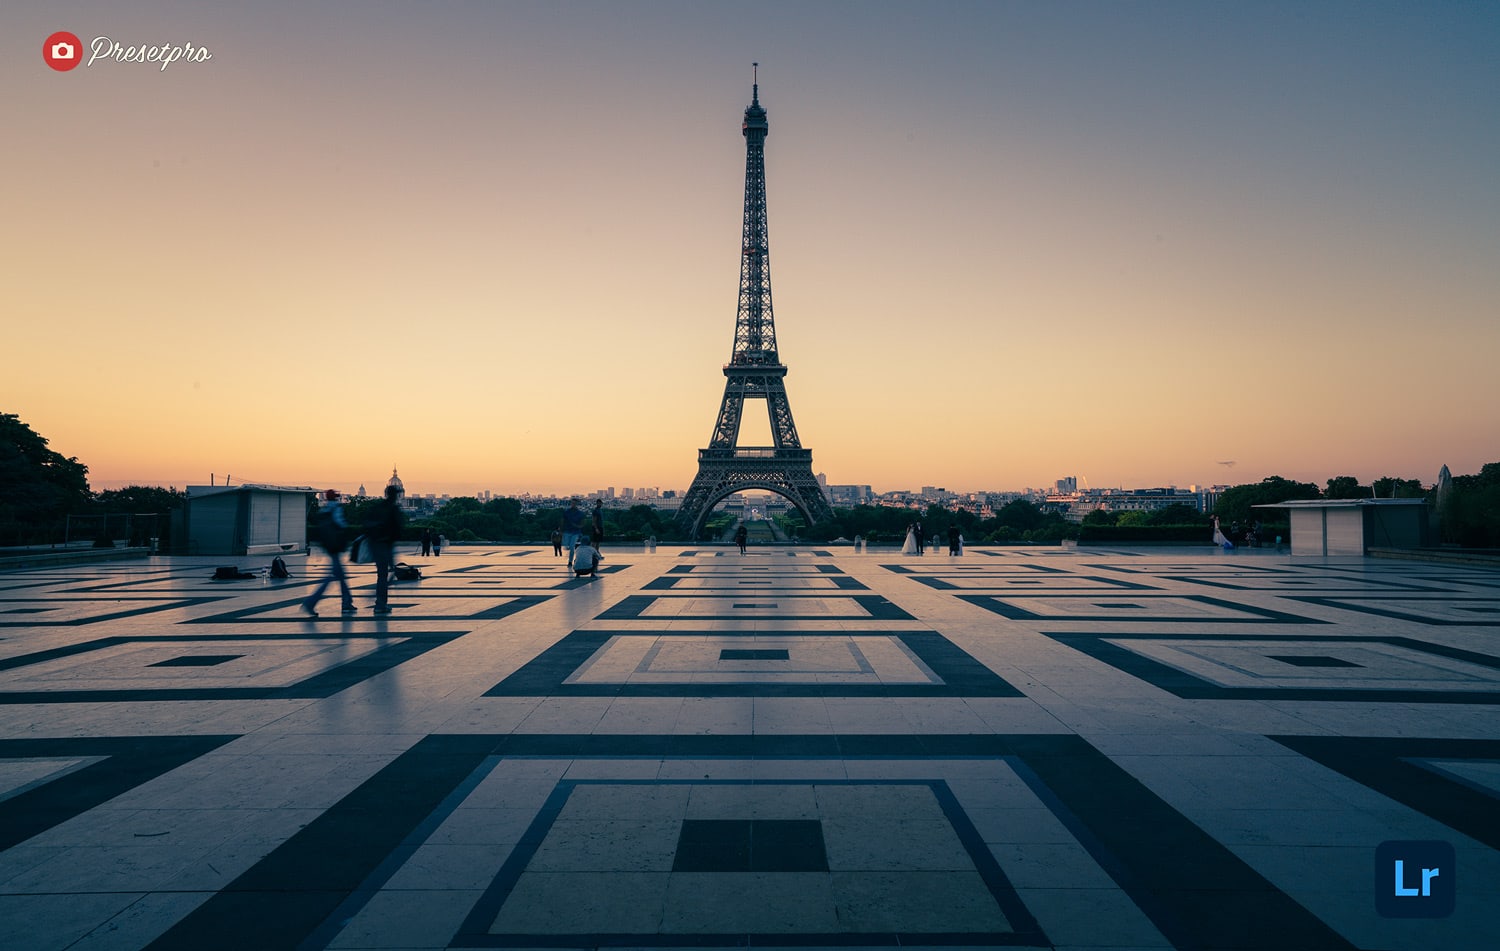
Free Lightroom Preset using the Color Grading tool that’s available in the latest version of Lightroom, Lightroom Classic, and Adobe Camera RAW
Before and After
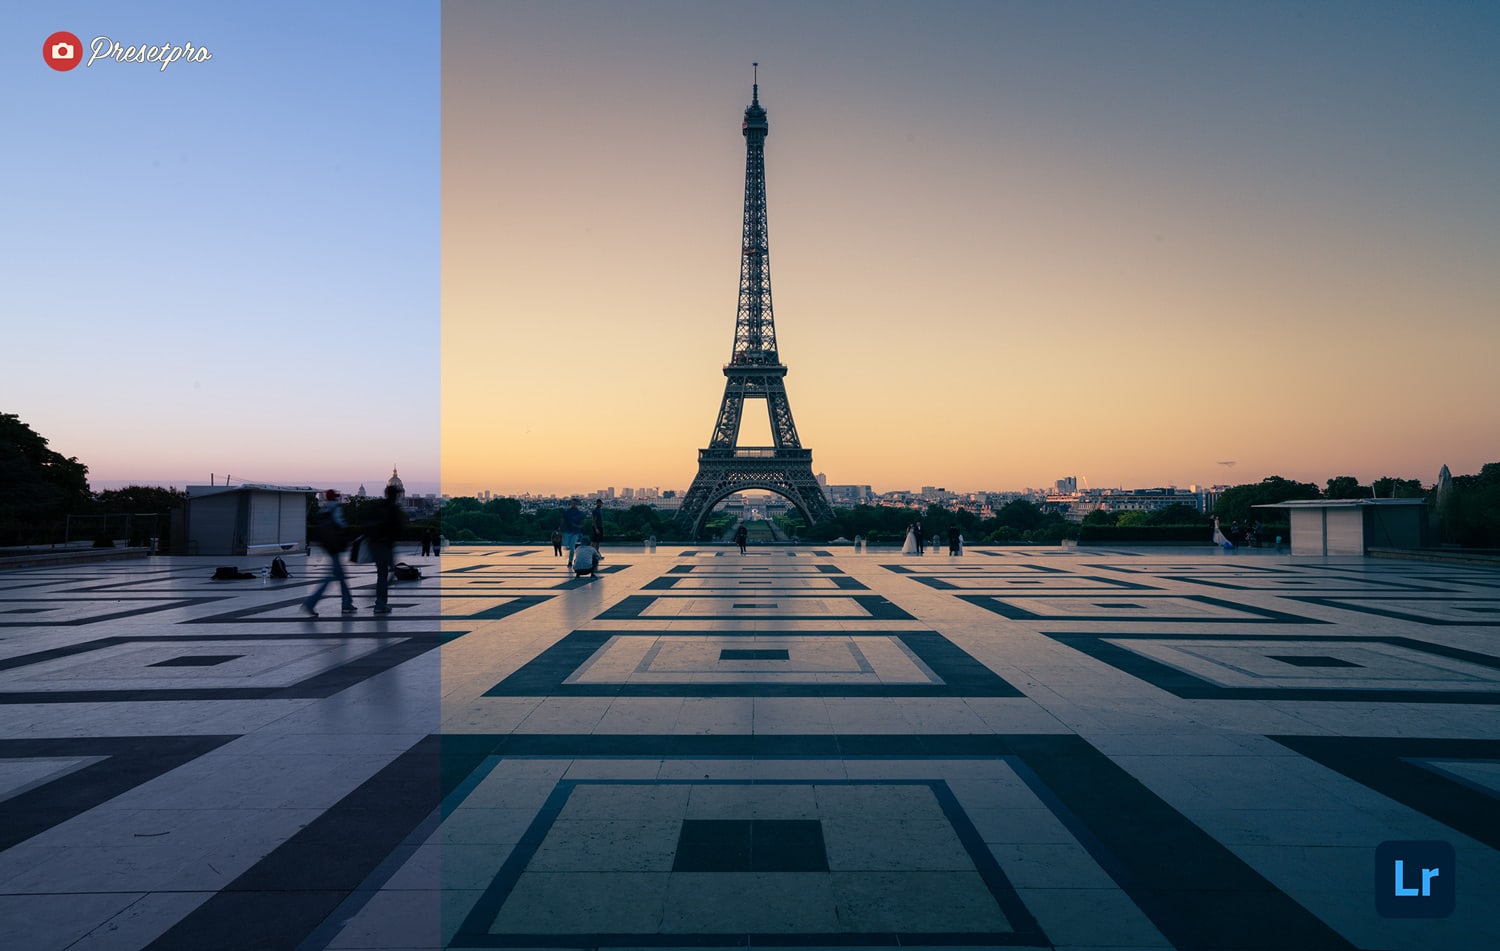
Free Lightroom Preset using the Color Grading tool that’s available in the latest version of Lightroom, Lightroom Classic, and Adobe Camera RAW
Lightroom Presets

Lightroom Presets

Lightroom Presets
Lightroom Presets
Lightroom Presets
Lightroom Presets
Lightroom Presets
Lightroom Presets

Lightroom Presets