How to Sharpen Images with a High Pass Filter: The 2026 Ultimate Guide
Want to make your images pop without the digital artifacts of standard sharpening? The High Pass Filter is a professional edge-detection tool that isolates high-frequency details (textures and lines) while ignoring flat areas like skies or skin. This method offers superior control over micro-contrast and halation, providing a cleaner, more organic look than the standard Unsharp Mask. In this guide, we will walk through the definitive 2026 non-destructive sharpening workflow.
Quick Reference: High Pass Sharpening Matrix
| Feature | Technical Recommendation |
|---|---|
| Optimal Blend Mode | Overlay (Subtle) or Soft Light (Very Subtle) |
| Standard Radius | 1.0 to 3.0 Pixels (depends on resolution) |
| Workflow Type | Non-Destructive (Layer-based) |
| Best For | Architecture, Portraits (Eyes/Hair), and Landscapes |
💡 Pro-Tip: Convert to Smart Object
Before applying the High Pass filter, Right-Click your duplicated layer and select Convert to Smart Object. This allows you to go back and double-click the High Pass filter name in your layers panel to adjust the radius at any time, even after saving the file.
Step-by-Step: High Pass Sharpening Workflow
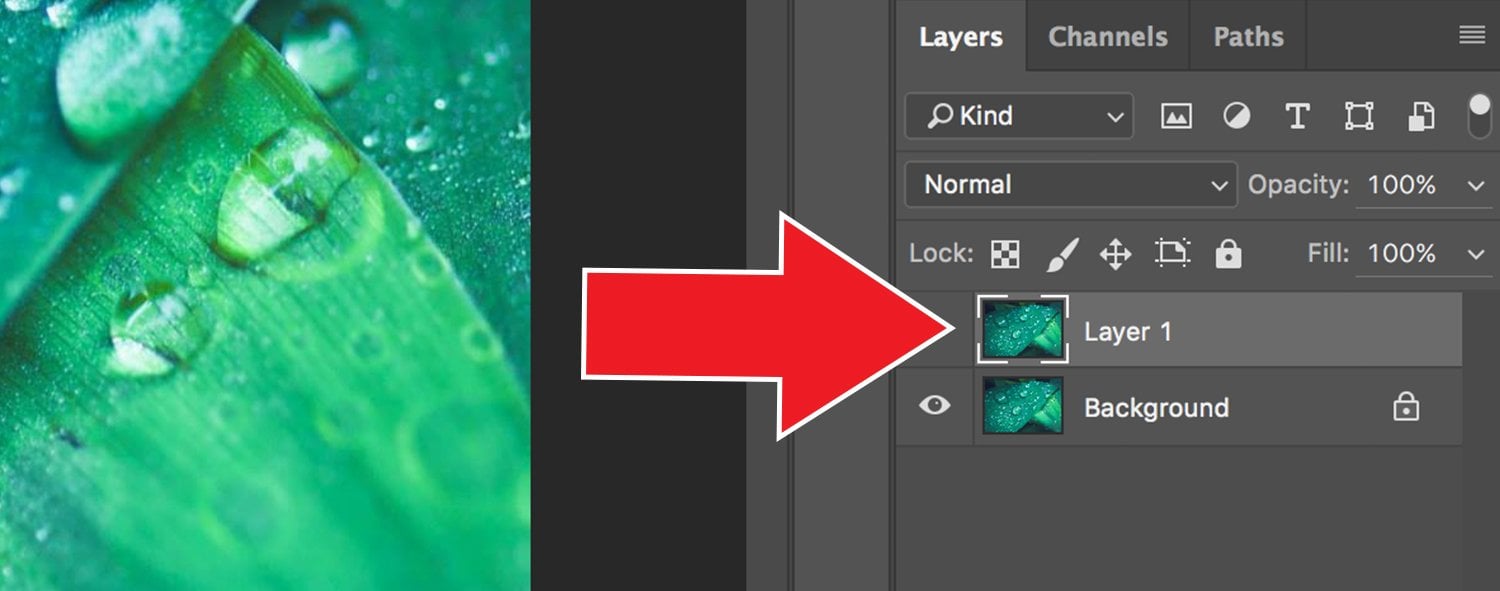
Step 1: Duplicate Your Base Layer
Open your image and duplicate the background layer using CMD + J (Mac) or Ctrl + J (PC). This ensures your sharpening remains on a separate layer, allowing for localized masking and opacity control.
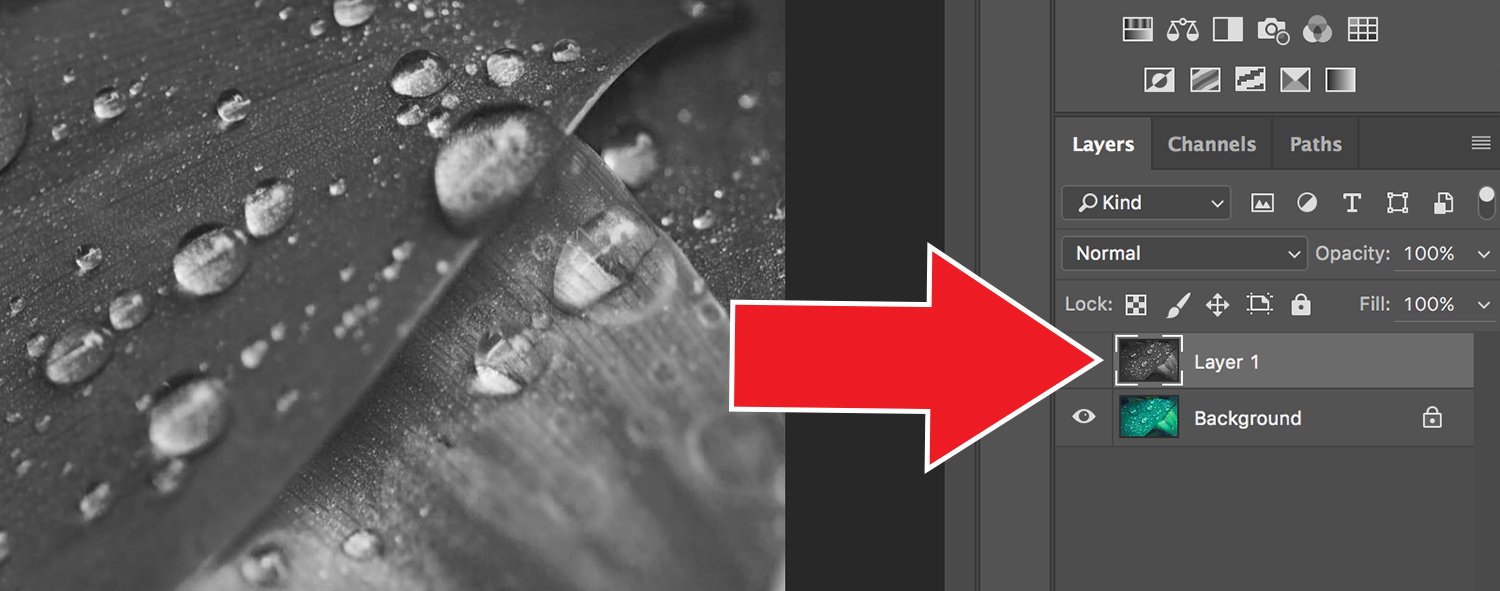
Step 2: Desaturate the Sharpening Layer
To prevent the filter from introducing color shifting or chromatic aberrations in high-contrast areas, desaturate the layer using CMD + Shift + U (Mac) or Ctrl + Shift + U (PC). This forces the sharpening to only affect luminance values.
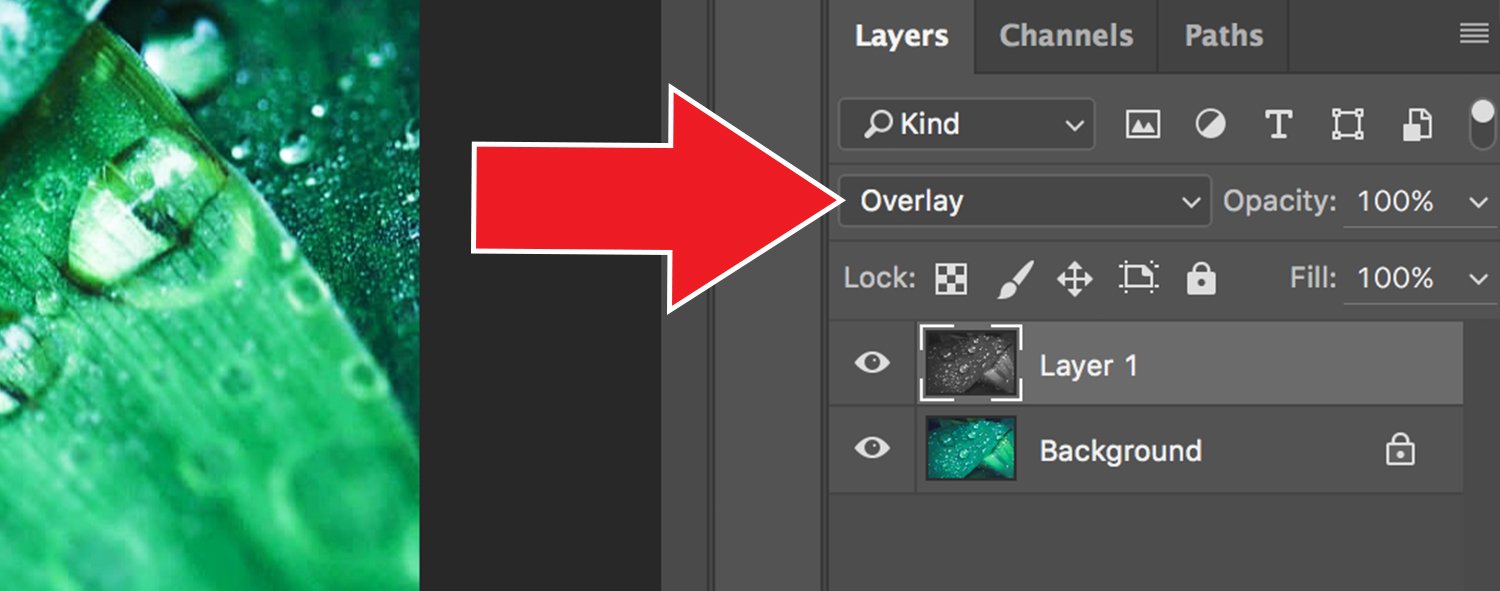
Step 3: Apply the Overlay Blend Mode
Change the layer blend mode from Normal to Overlay (or Soft Light for a more natural look). Your image will temporarily look over-contrasted or “plastic” until the filter is applied in the next step.
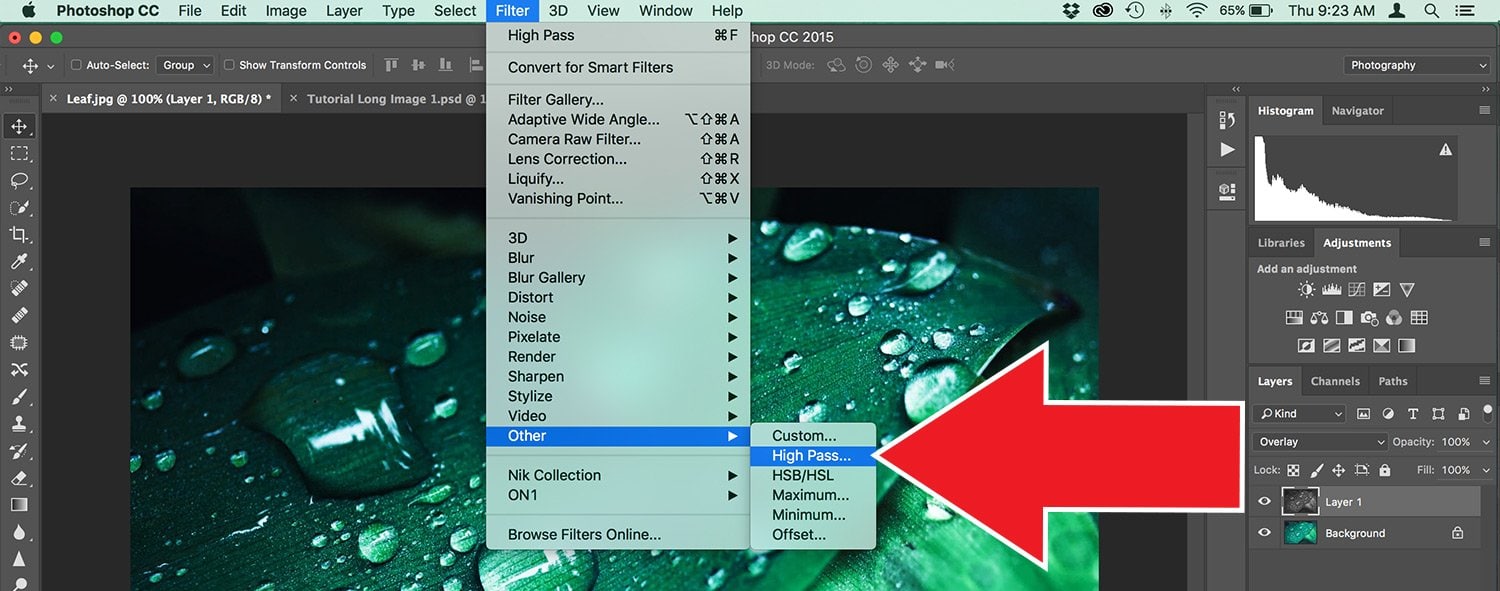
Step 4: Execute the High Pass Filter
Go to the top menu and select Filter > Other > High Pass. This is where the spatial frequency adjustment happens. Photoshop will turn the layer grey, leaving only the detected edges visible.
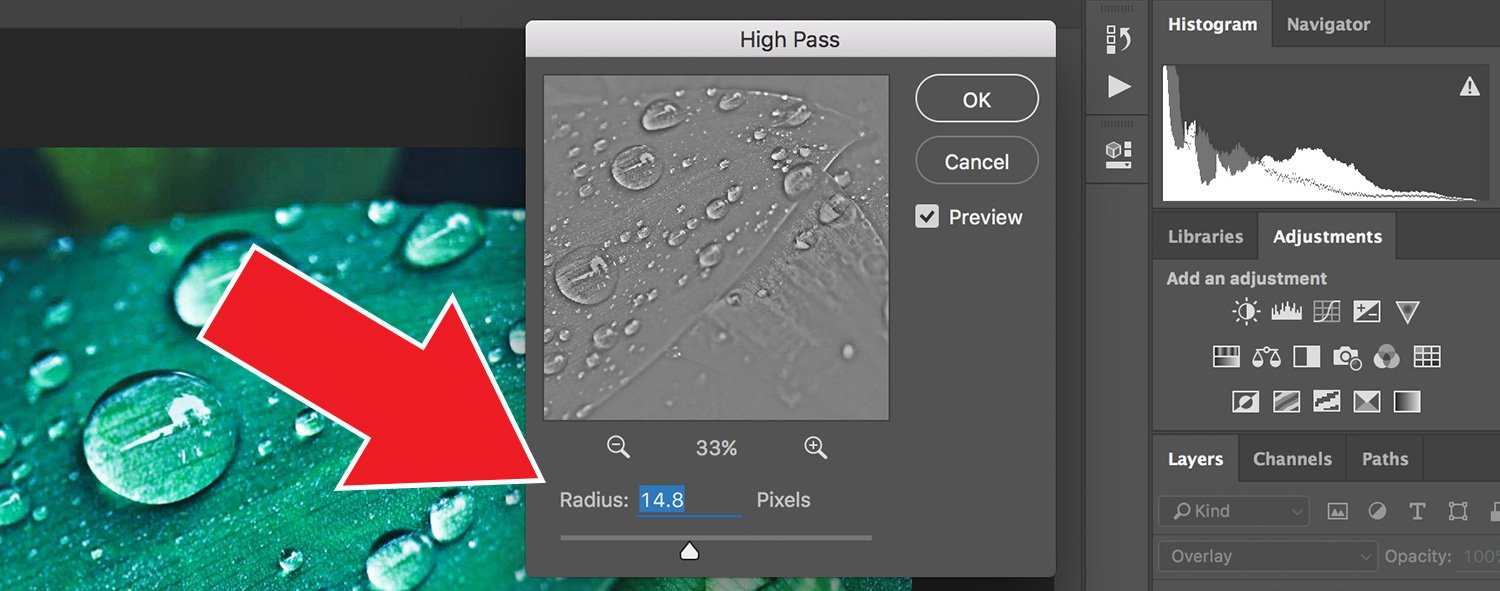
Step 5: Adjust Radius for Precision Edge Detection
Adjust the Radius slider. For most professional photography, a radius between 1.0 and 2.5 is ideal. You want to see the fine outlines of your subject without thick “halos” forming around the edges.
📁 Pro-Tip: Selective Sharpening
Add a Layer Mask to your sharpening layer and invert it (CMD+I). Now, use a soft white brush to “paint” the sharpening only where it’s needed—such as the eyes of a portrait or the foreground of a landscape—while keeping skin and skies perfectly smooth.
Conclusion
Mastering the High Pass filter is a game-changer for professional retouching. Unlike destructive sharpening methods, this workflow allows you to maintain the linear response and tonal integrity of your file. If you want to automate this process, you can download our Free High-Pass Sharpening Photoshop Action here.
Do you want to take your photography skills to the next level? With The Creative Flow, you’ll have access to more than 1200 Beautiful Lightroom Presets, 1200 Lightroom Profiles, and 200 brushes that will spark your creativity and bring your photos to the next level! Designed for the photographer who wants the ultimate workflow and premium Lightroom collection. The Creative Flow is your own personal preset “toolbox” where you can swap out a variety of different looks with a few simple clicks. Whether you’re a professional or just starting out, this all-in-one collection was created for you! You won't find another product like this anywhere else online - trust us when we say it's worth every penny! Click here right now and get started with The Creative Flow today!
The Creative Flow | Presetpro.com


Lightroom Presets

Lightroom Presets

Lightroom Presets
Lightroom Presets
Lightroom Presets

Lightroom Presets

Lightroom Presets
Lightroom Presets
The film names above are the brands and trademarks of their respective holders. None of the film producers listed endorse or sponsor this film emulation collection or any other content. The film producers are not affiliated with Presetpro.com and all trademarks and copyrights are the exclusive property of their respective owners. Adobe®, Photoshop®, Adobe® Lightroom® are either registered trademarks or trademarks of Adobe Systems Incorporated in the United States and/or other countries.