How to Master Tone Curves in Lightroom. Mastering tone curves can make a big difference in your photography. Tone curves allow you to adjust the brightness, contrast and saturation of an image. This can be used to correct problems with your photos or to give them a specific look that you are going for. In this tutorial, we will show you how to use tone curves to improve your photos. We will also give you some tips on how to get the most out of them. So let’s get started!
The (Point) Tone Curve
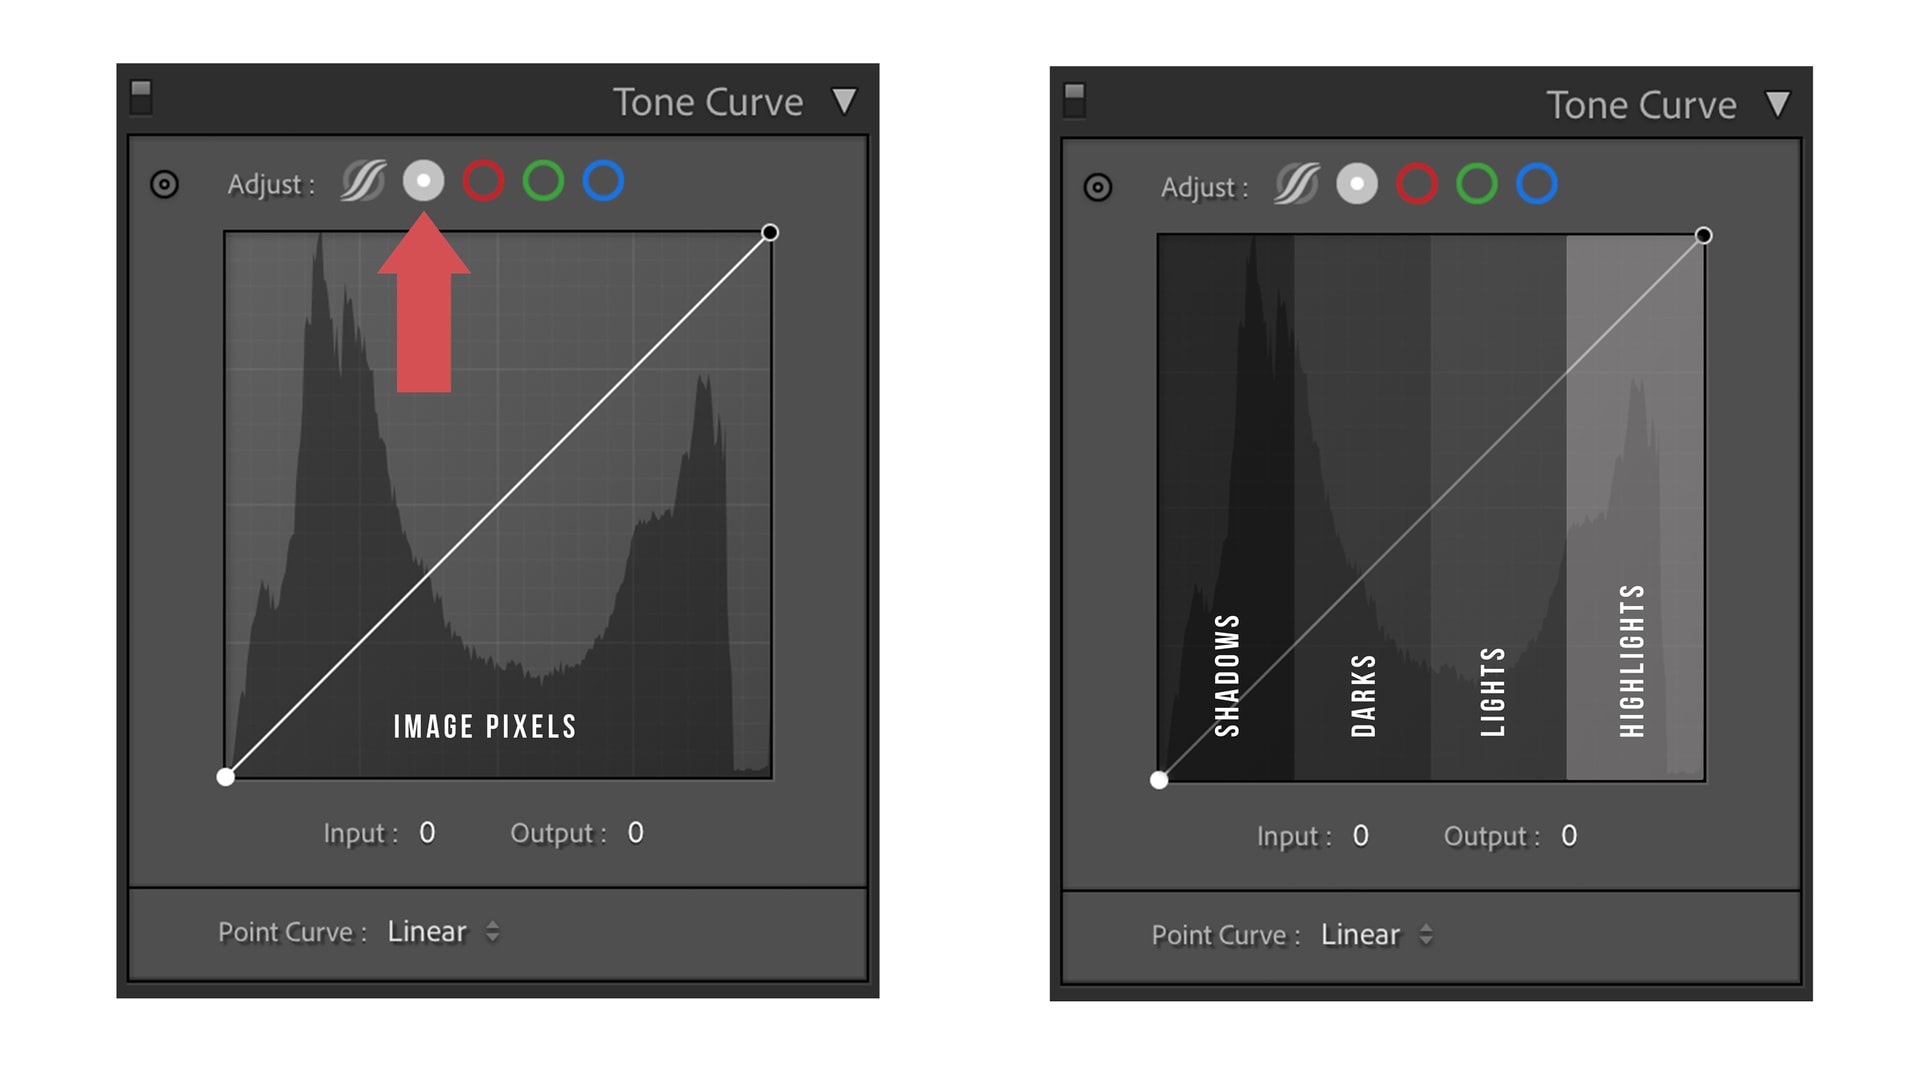
The (Point) Tone Curve allows you to make precise adjustments to your photograph by clicking and dragging any point on the graph to adjust the shadows, darks, lights, and highlights of your image. The graph displayed in the tone curve window represents your image’s pixel information along the X-axis (horizontal axis) or Input. You will notice the pixels are broken down into four main sections, shadows, darks, lights, and highlights.
Tone Curves and Contrast.
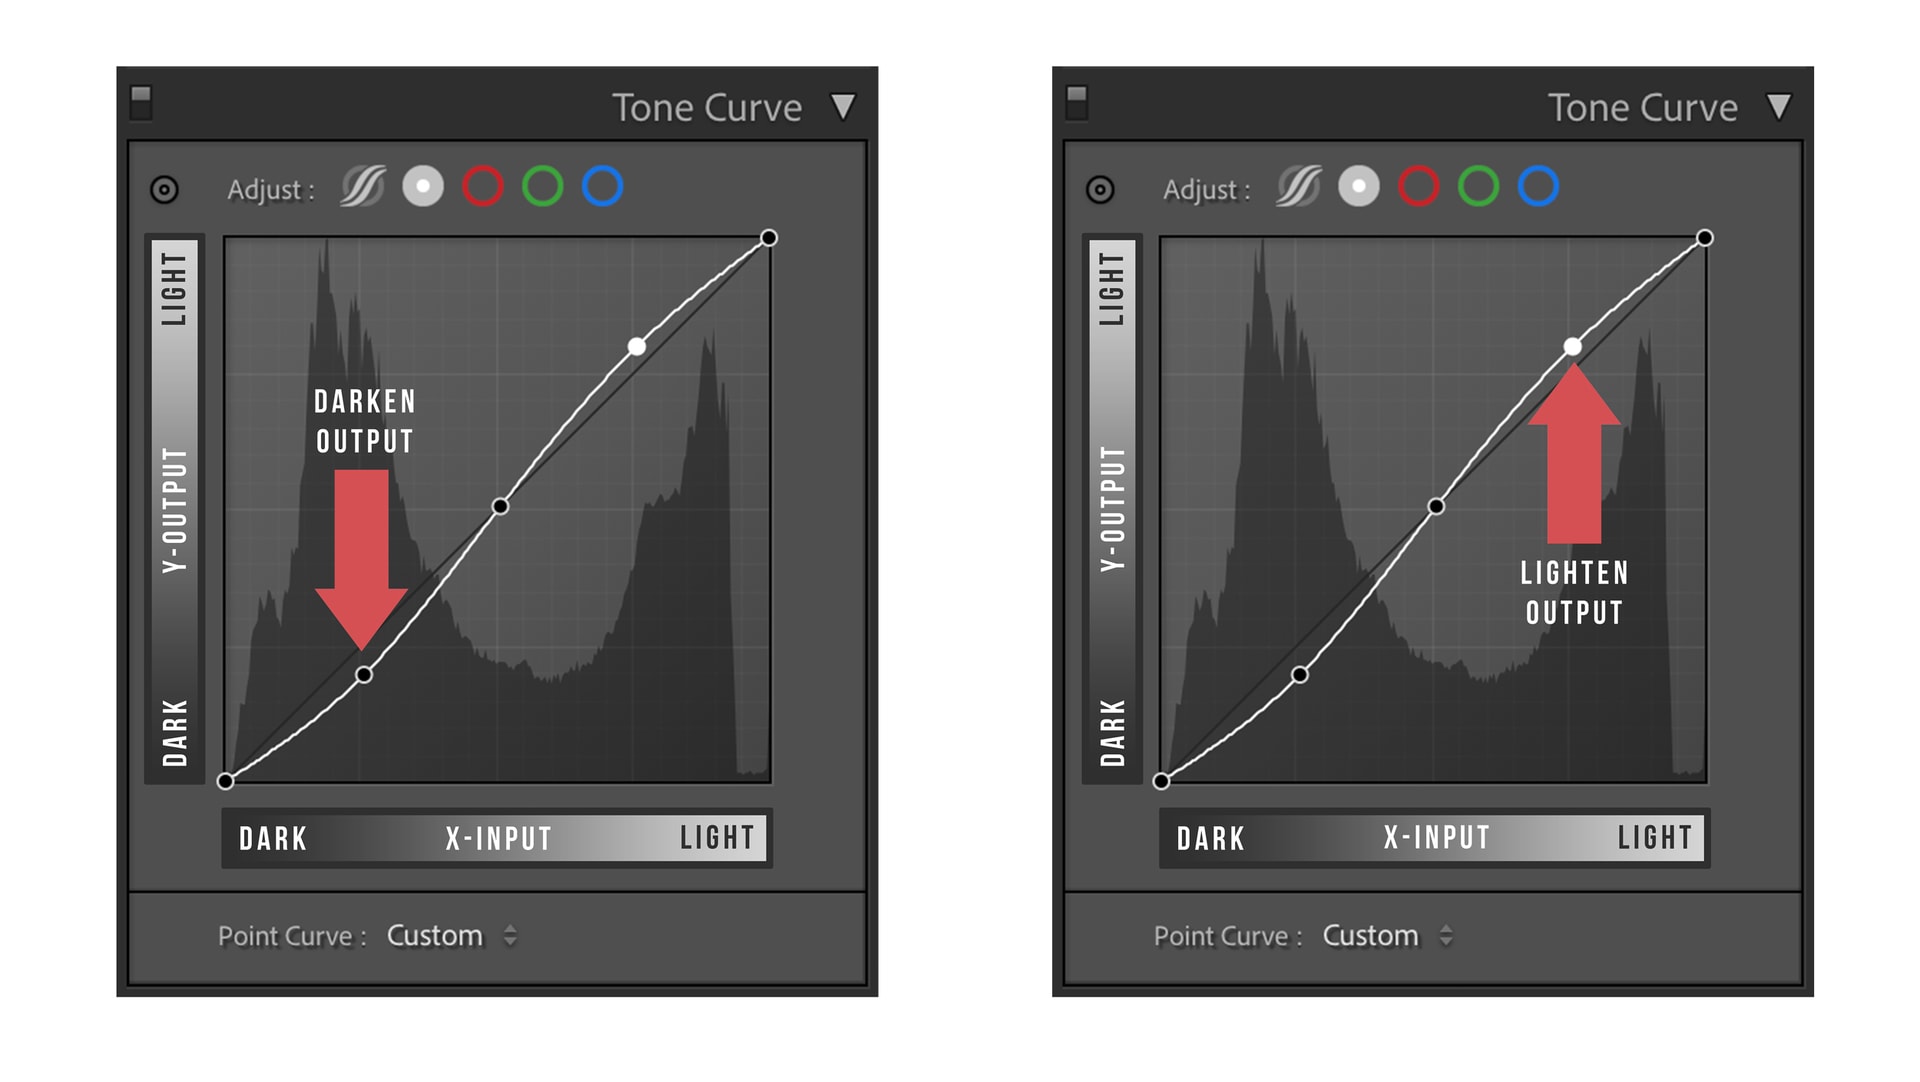
Since the input values (on the X-axis) are plotted against the corresponding output values (on the Y-axis) we can adjust the output values to give us more contrast. If you move down the Y-axis, the output is decreased/darkened. If you move up the Y-axis, the output is increased/lightened. We are adding contrast by decreasing the output of the shadows (darkening) and increasing the output of the lighter areas (lightening).
RGB Color Curves.
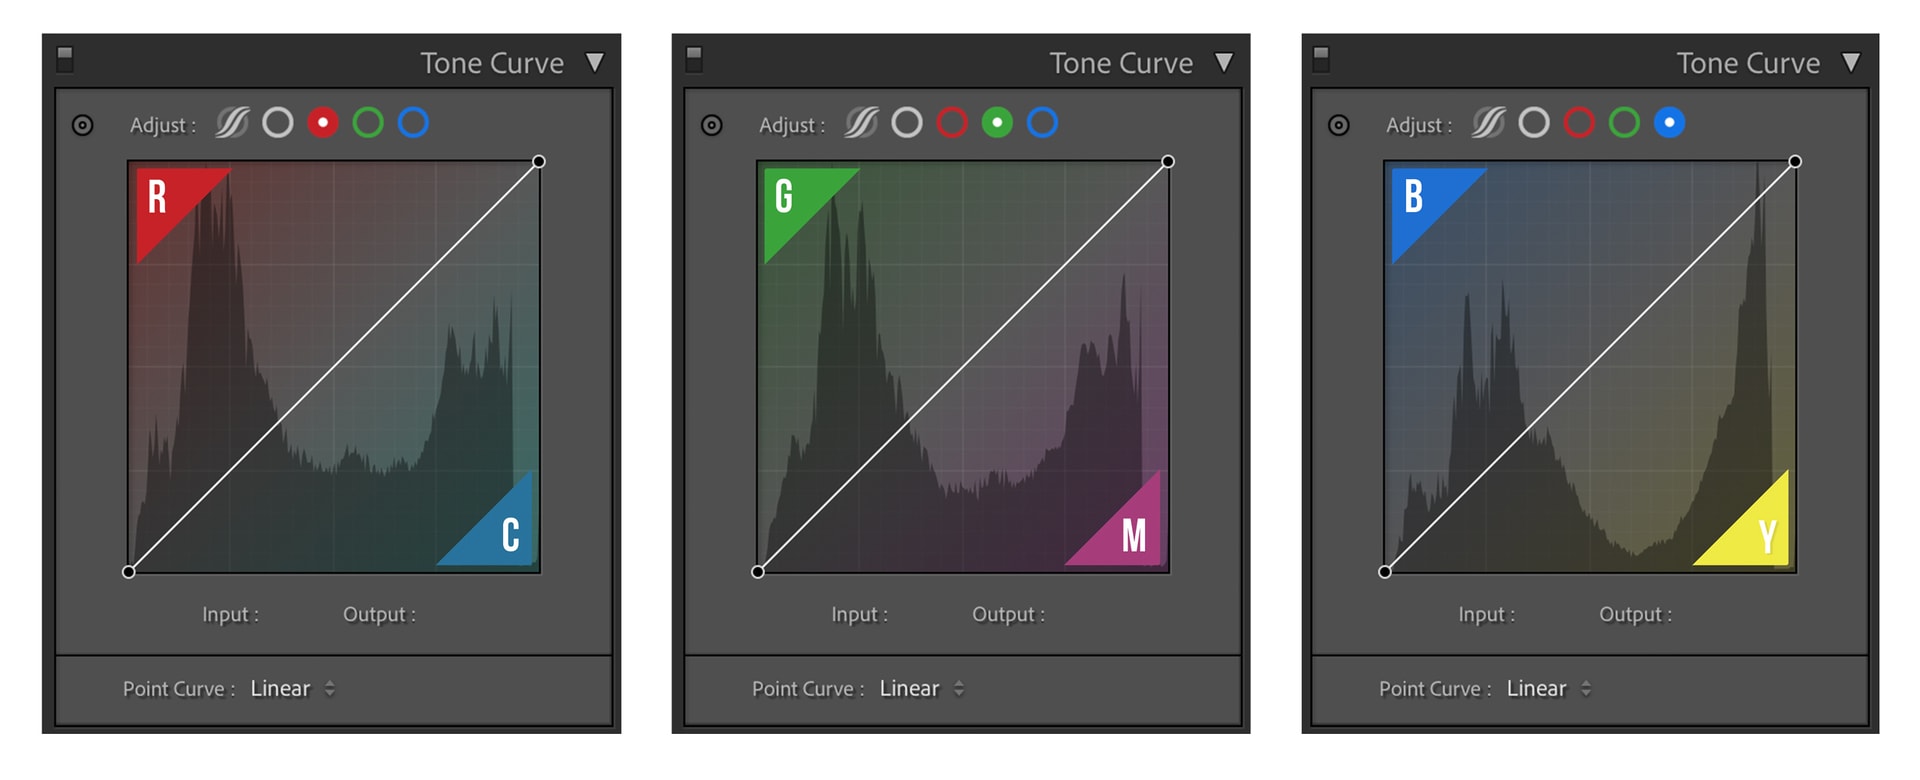
The RGB color space has three channels (Red, Green, and Blue) and the opposite color of the RGB color space is CMY (Cyan, Magenta, and Yellow). You will notice that Lightroom has a subtle RGB and CMY color overlay on each curve, this is handy for beginners and professionals when adjusting colors. We will take a closer look at this in the next example below.
RGB and CMY
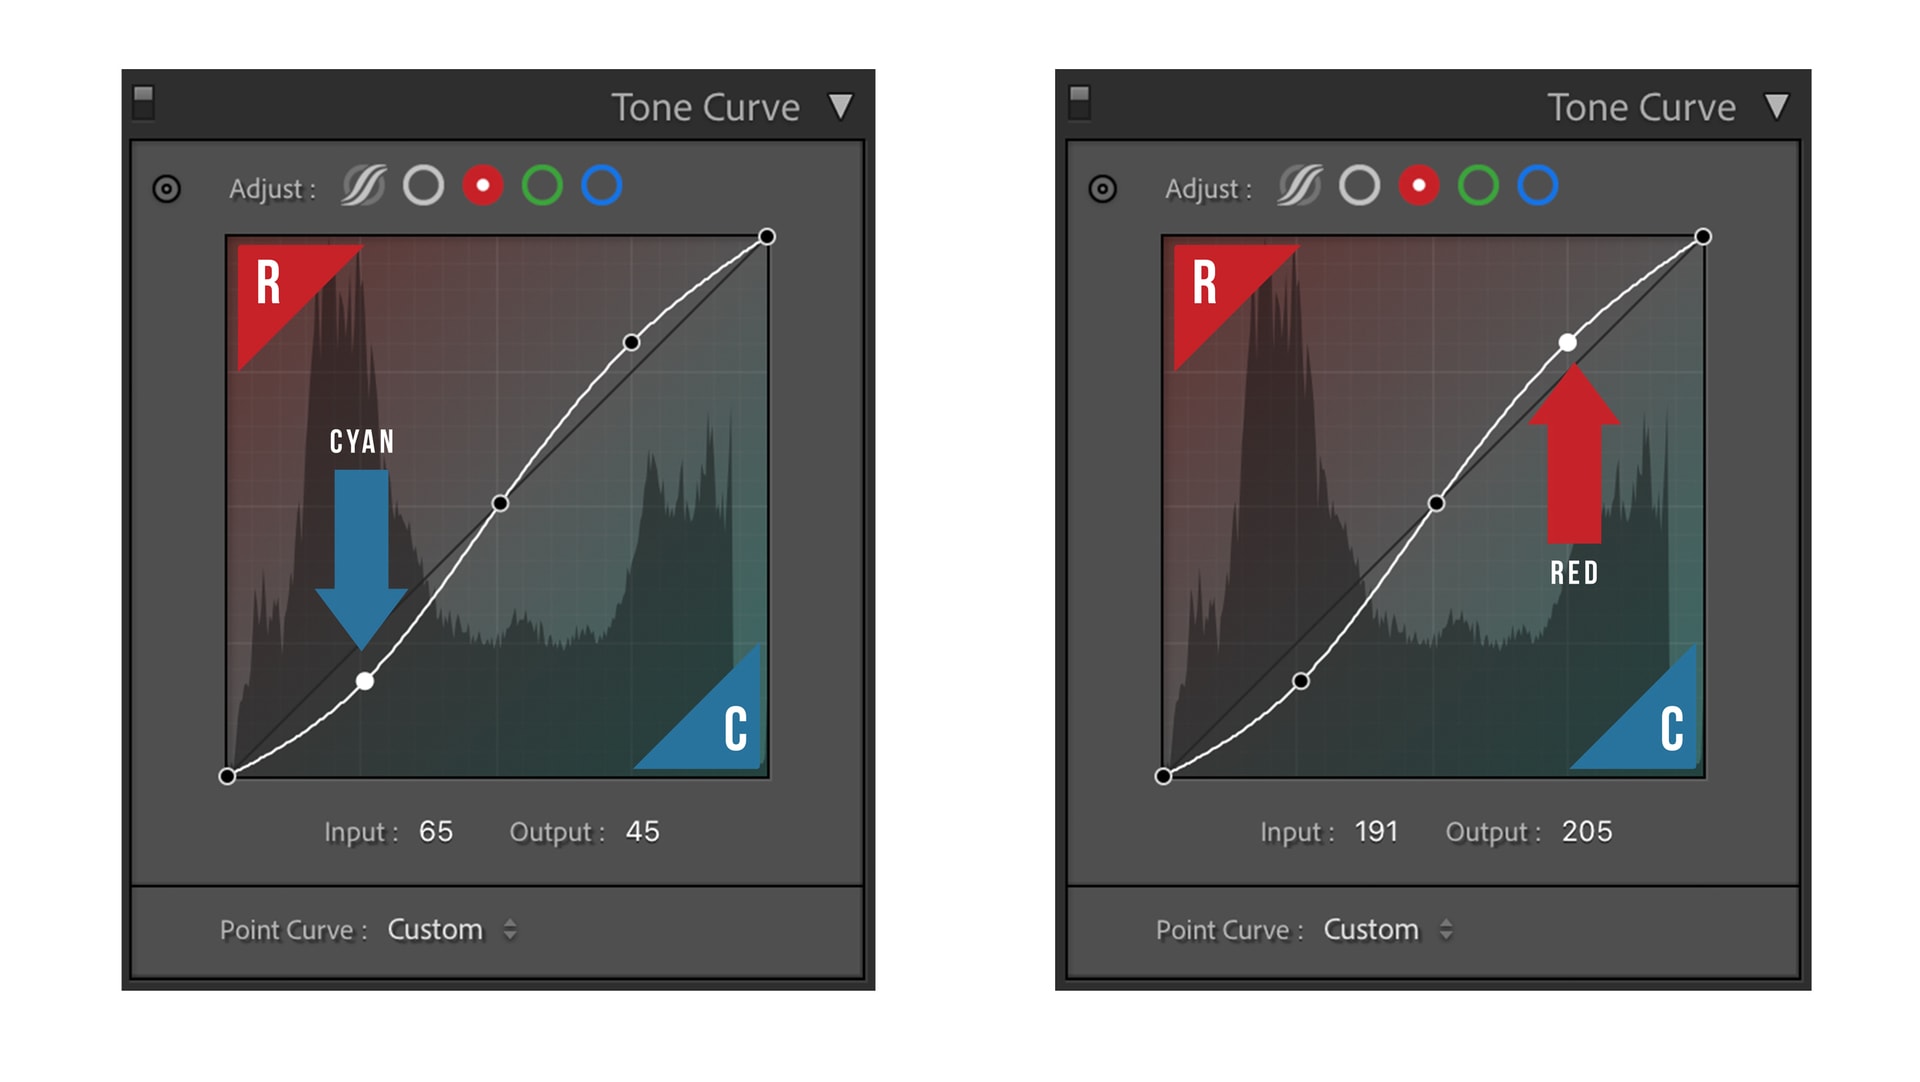
In this example, we are working with the RED tone curve and If you move down the Y-axis, the output is decreased, shifting our shadows towards CYAN. If you move up the Y-axis, the output is increased, shifting our highlights towards RED. You can think of it as adding or subtracting color. RED is subtracted or neutralized with the opposite color CYAN.
The (Parametric) Tone Curve
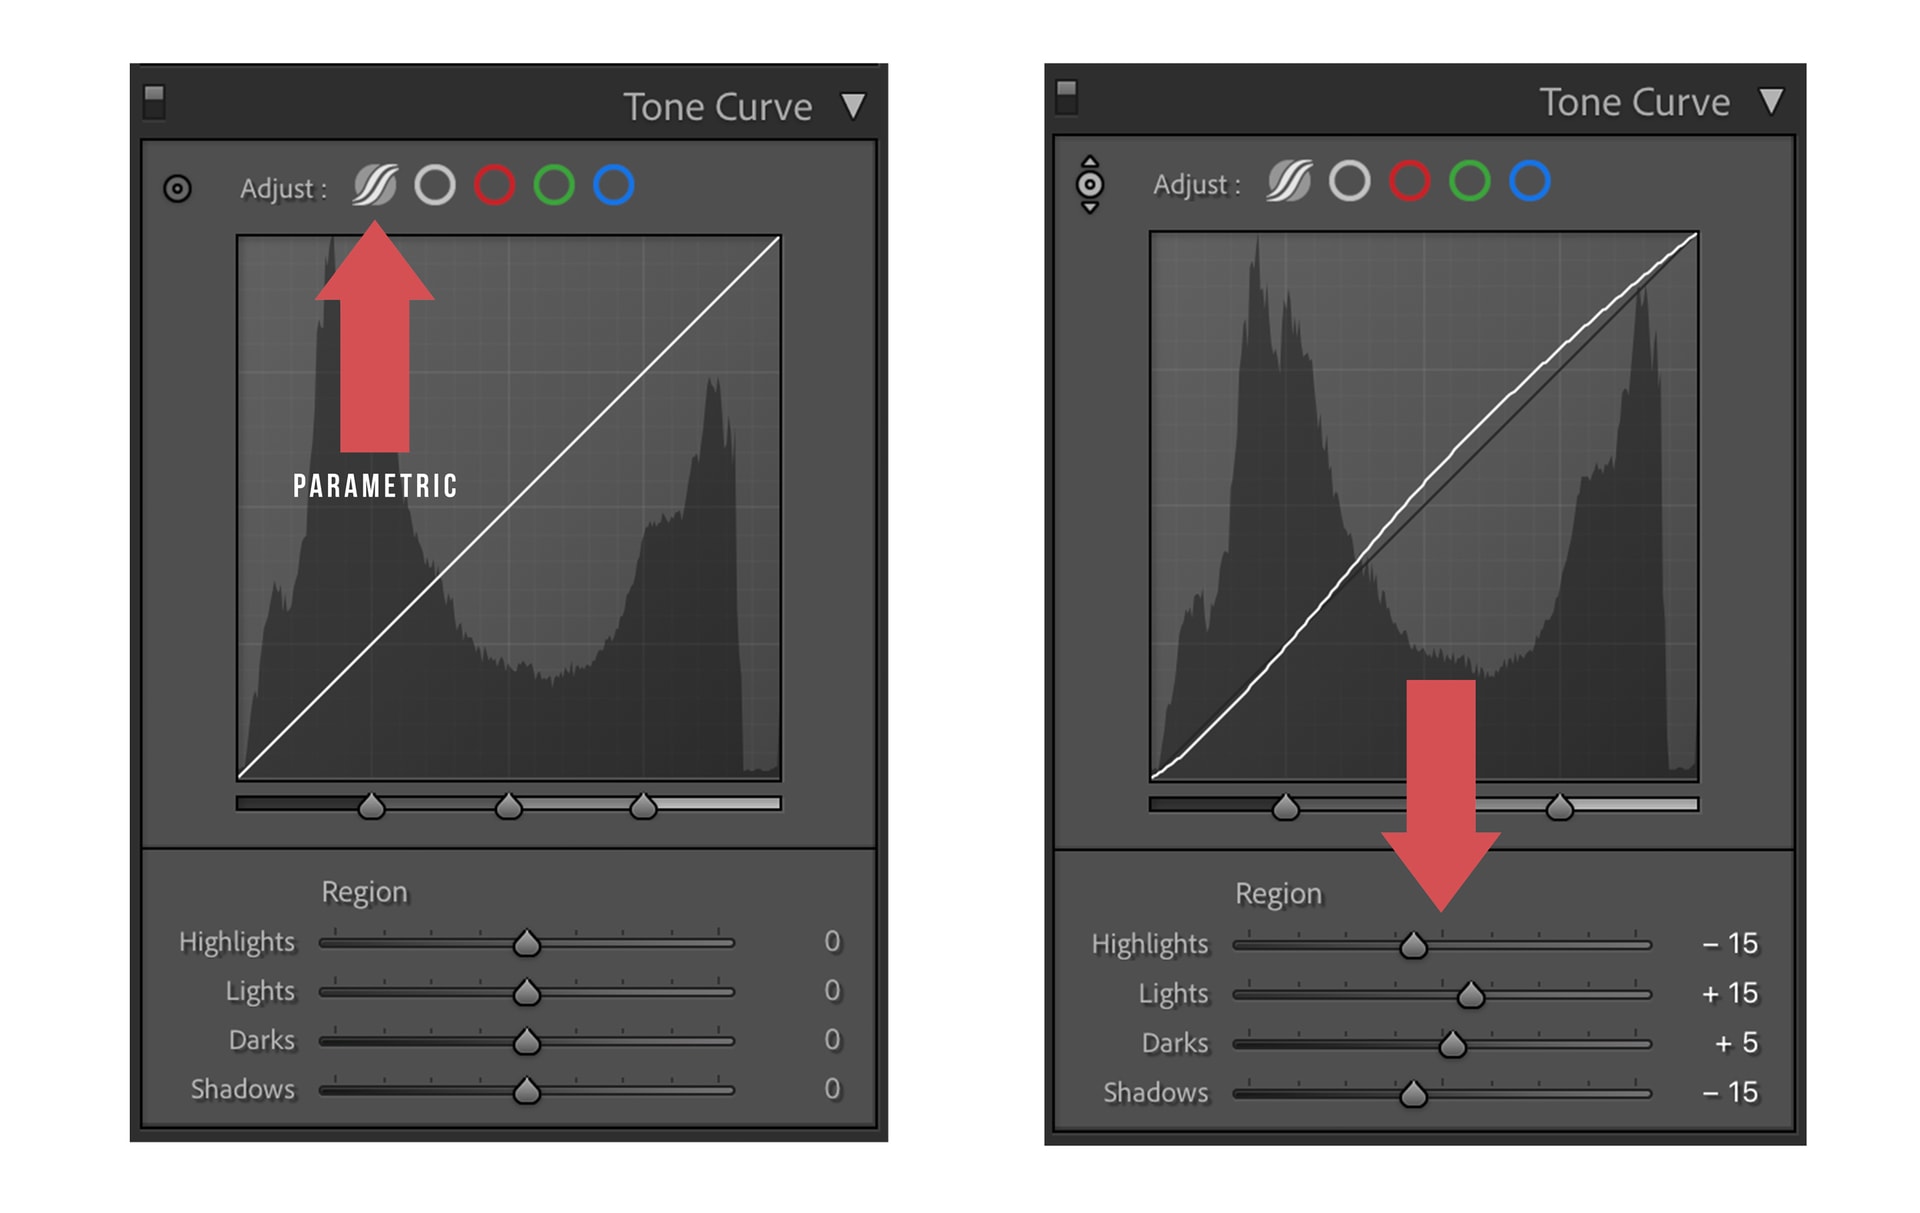
The Parametric curve (points are determined by parameters) gives you a lot more power when trying to make a single part of an image stand out without affecting other parts. Essentially you get smoother transitions between the highlights, lights, darks, and shadows, and it’s very easy to use! Another great feature of the parametric curve is that it works independently or in tandem with the point curve.
Adjust by Dragging
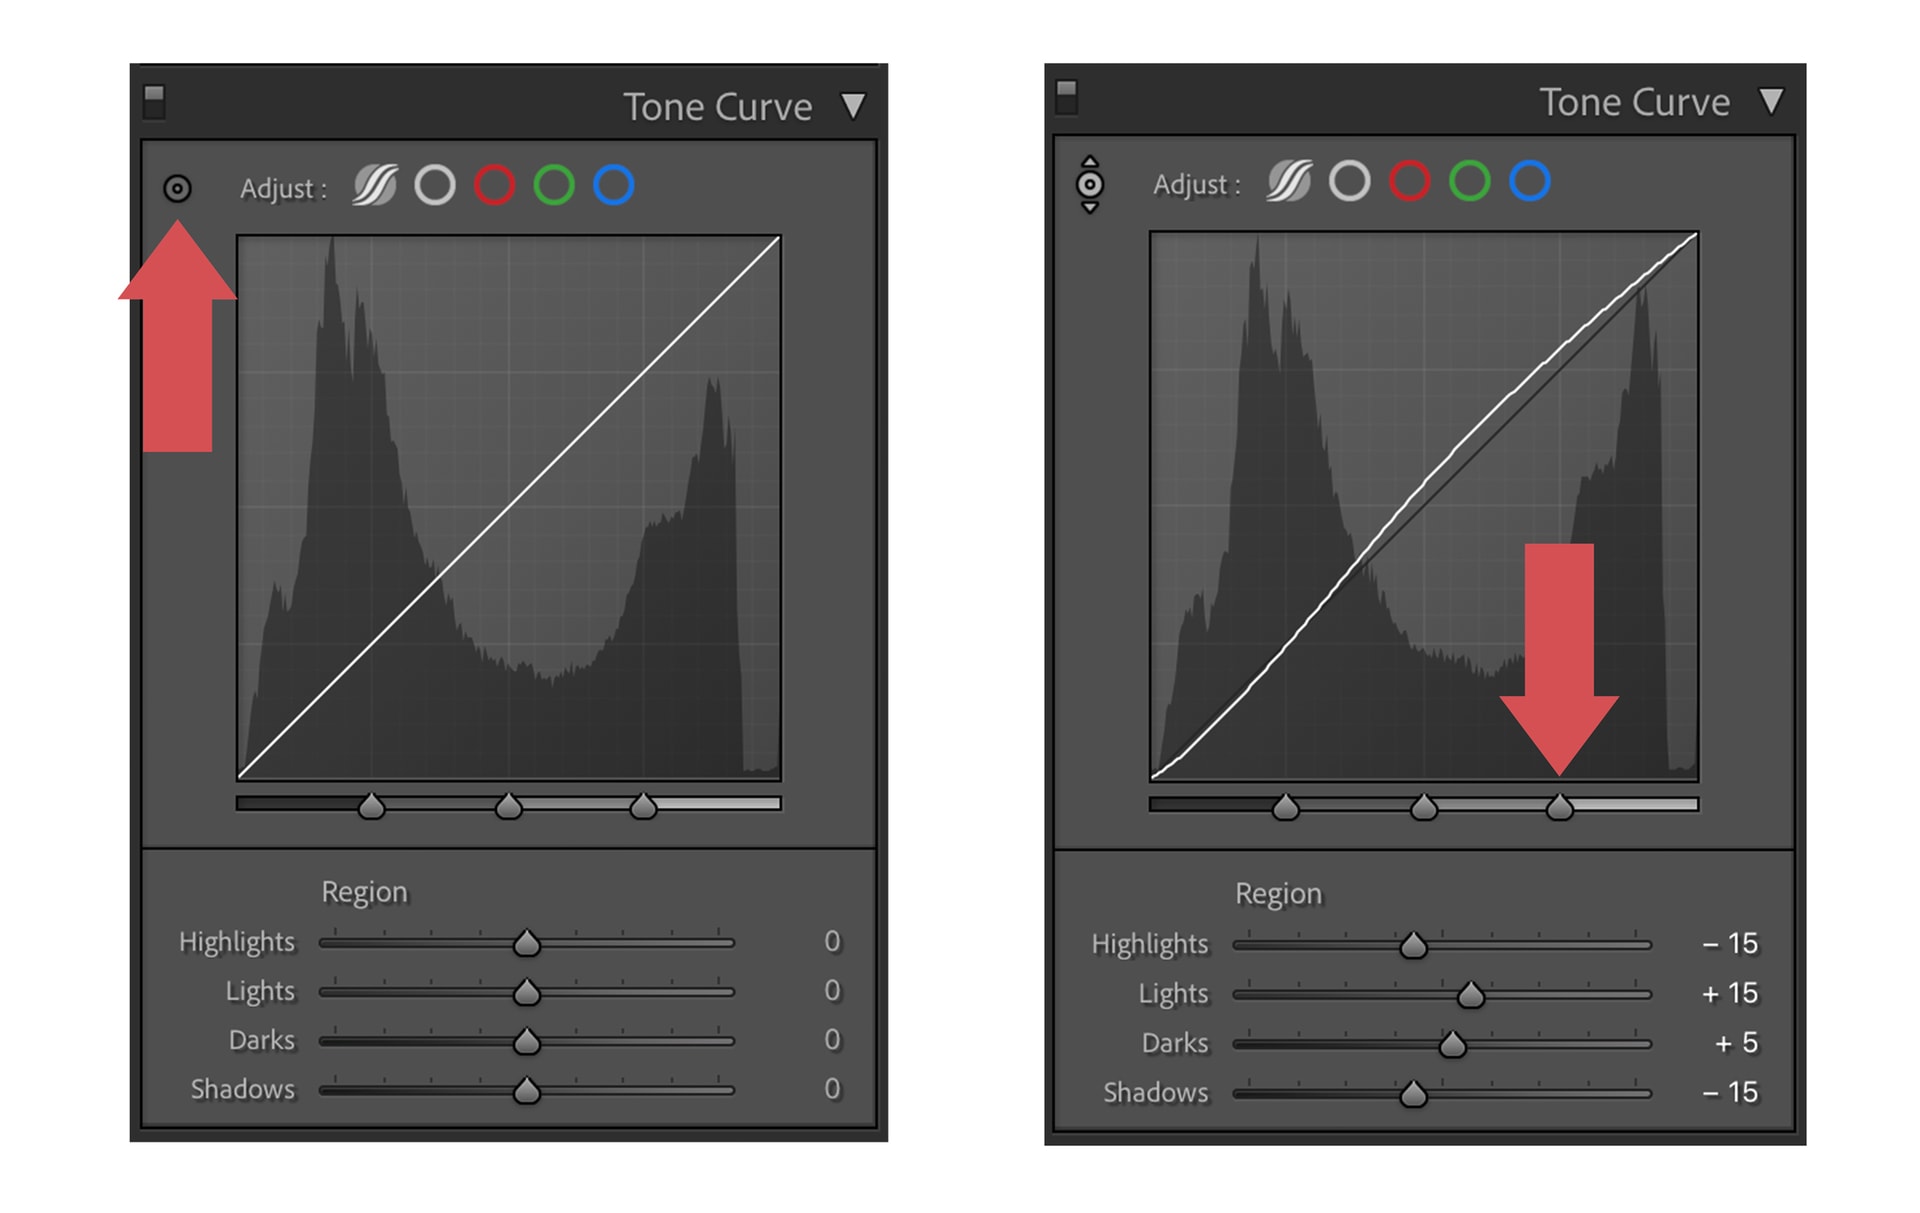
This handy little tool can be used on the Point or Parametric curve. By clicking on this node you can select any part of your photo and drag your cursor up or down to adjust your curve! I find this tool works best with the Parametric curve because you get smooth transitions between the highlights, lights, darks, and shadows.
Conclusion.
We hope this blog post has helped you better understand how to use tone curves, point curves, and parametric curves. Make sure you check out our video below, we’ll take a look at some different ways that tone curves can be used for better photo editing. If you have any questions about the different types of curves or want help with your next project, don’t hesitate to reach out!
PRESETPRO.comDo you want to take your photography skills to the next level? With The Creative Flow, you’ll have access to more than 1200 Beautiful Lightroom Presets, 1200 Lightroom Profiles, and 200 brushes that will spark your creativity and bring your photos to the next level! Designed for the photographer who wants the ultimate workflow and premium Lightroom collection. The Creative Flow is your own personal preset “toolbox” where you can swap out a variety of different looks with a few simple clicks. Whether you’re a professional or just starting out, this all-in-one collection was created for you! You won't find another product like this anywhere else online - trust us when we say it's worth every penny! Click here right now and get started with The Creative Flow today!
The Creative Flow | Presetpro.com
The film names above are the brands and trademarks of their respective holders. None of the film producers listed endorse or sponsor this film emulation collection or any other content. The film producers are not affiliated with Presetpro.com and all trademarks and copyrights are the exclusive property of their respective owners. Adobe®, Photoshop®, Adobe® Lightroom® are either registered trademarks or trademarks of Adobe Systems Incorporated in the United States and/or other countries.

