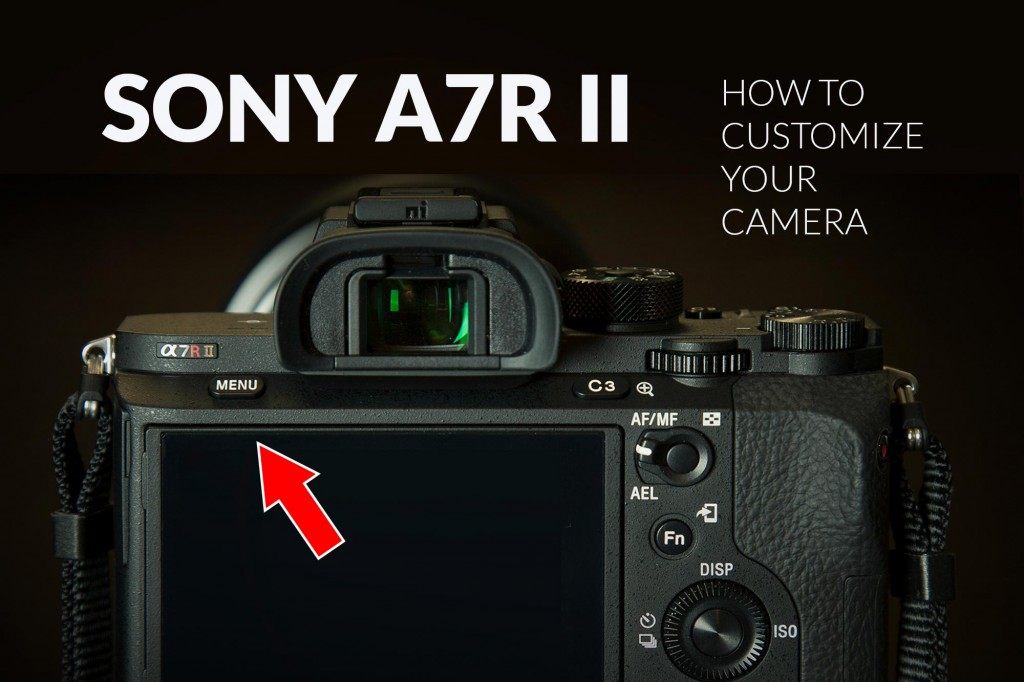
How To Customize Your Sony A7R II Camera
I’ve received a few emails asking how to set up the Sony a7r ii for HDR Photography. I decided to share a few of my favorite settings and show you how I quickly access the features that I use the most. If you’re new to Sony, or you simply want to get the most out of the a7r ii, then you may find some of these tips useful. Follow along for a quick overview of some of the functions and settings!
Maximize Display Quality (EVF)
While on location, I like to review my images to ensure that everything is in focus. When reviewing my photos, I like to see them at the highest resolution possible! The Sony a7r ii has the option to maximize the EVF (Electronic View Finder) resolution by setting the display quality to “High”. The trade-off is that your camera will chew up a bit more battery life but it’s worth it in my opinion.
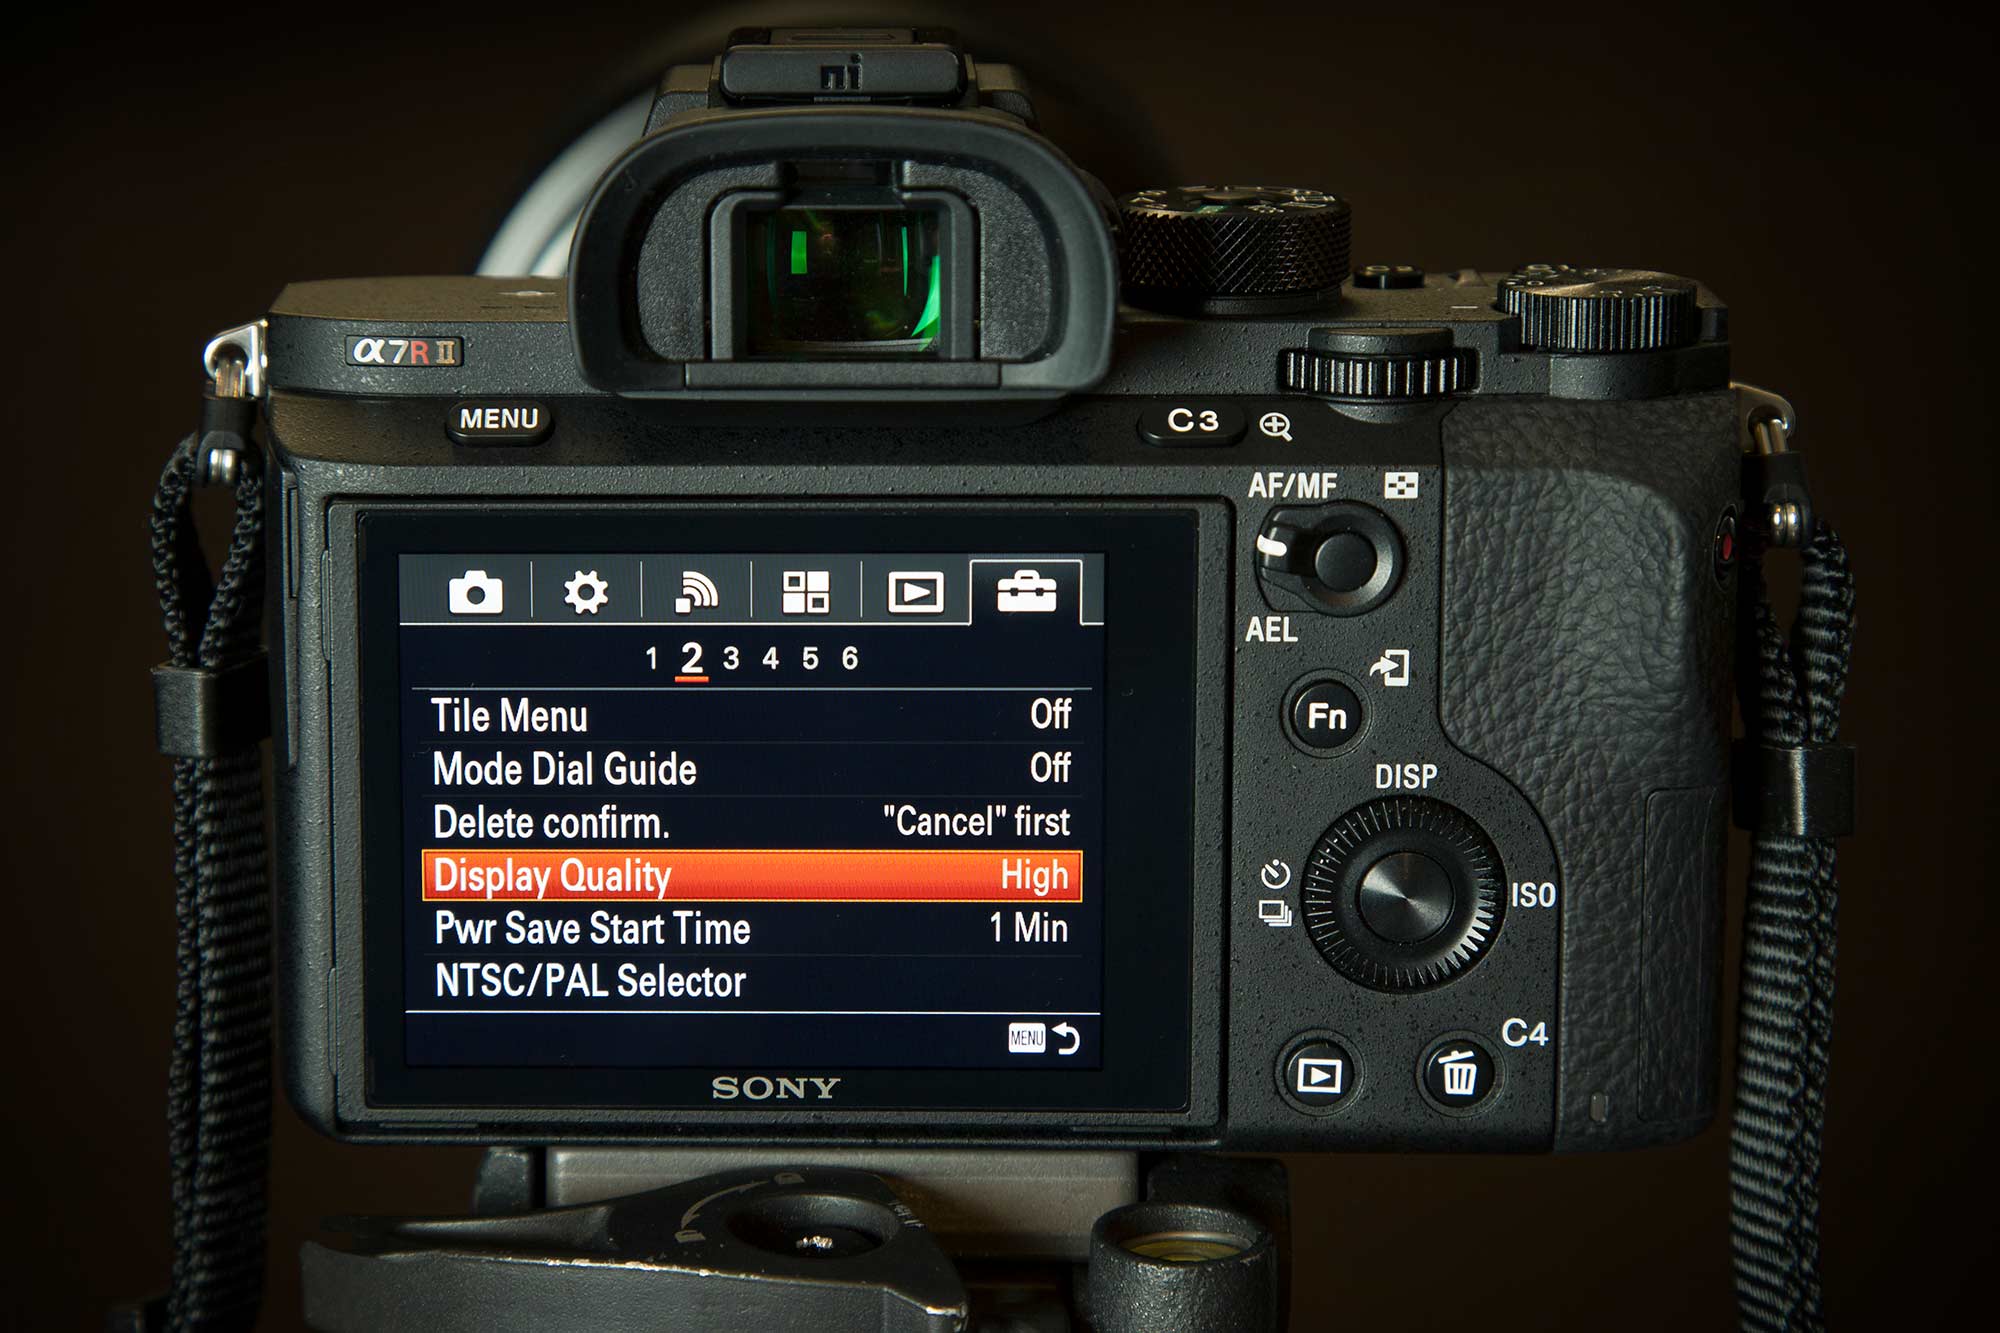
Set Up: 1. Press the menu button and go to the Toolbox Icon. 2. Scroll sideways to the 2nd section #2 and scroll down to “Display Quality.” 3. Here you can change from Standard to High.
Unleash the Power of RAW
Anyone who wants to get the most out of their images will want to shoot in RAW. I personally shoot in RAW because JPG files give me extreme F.O.M.O (Fear Of Missing Out.) I don’t want to miss out on any of the RAW information that this impressive 42mp sensor has to offer!
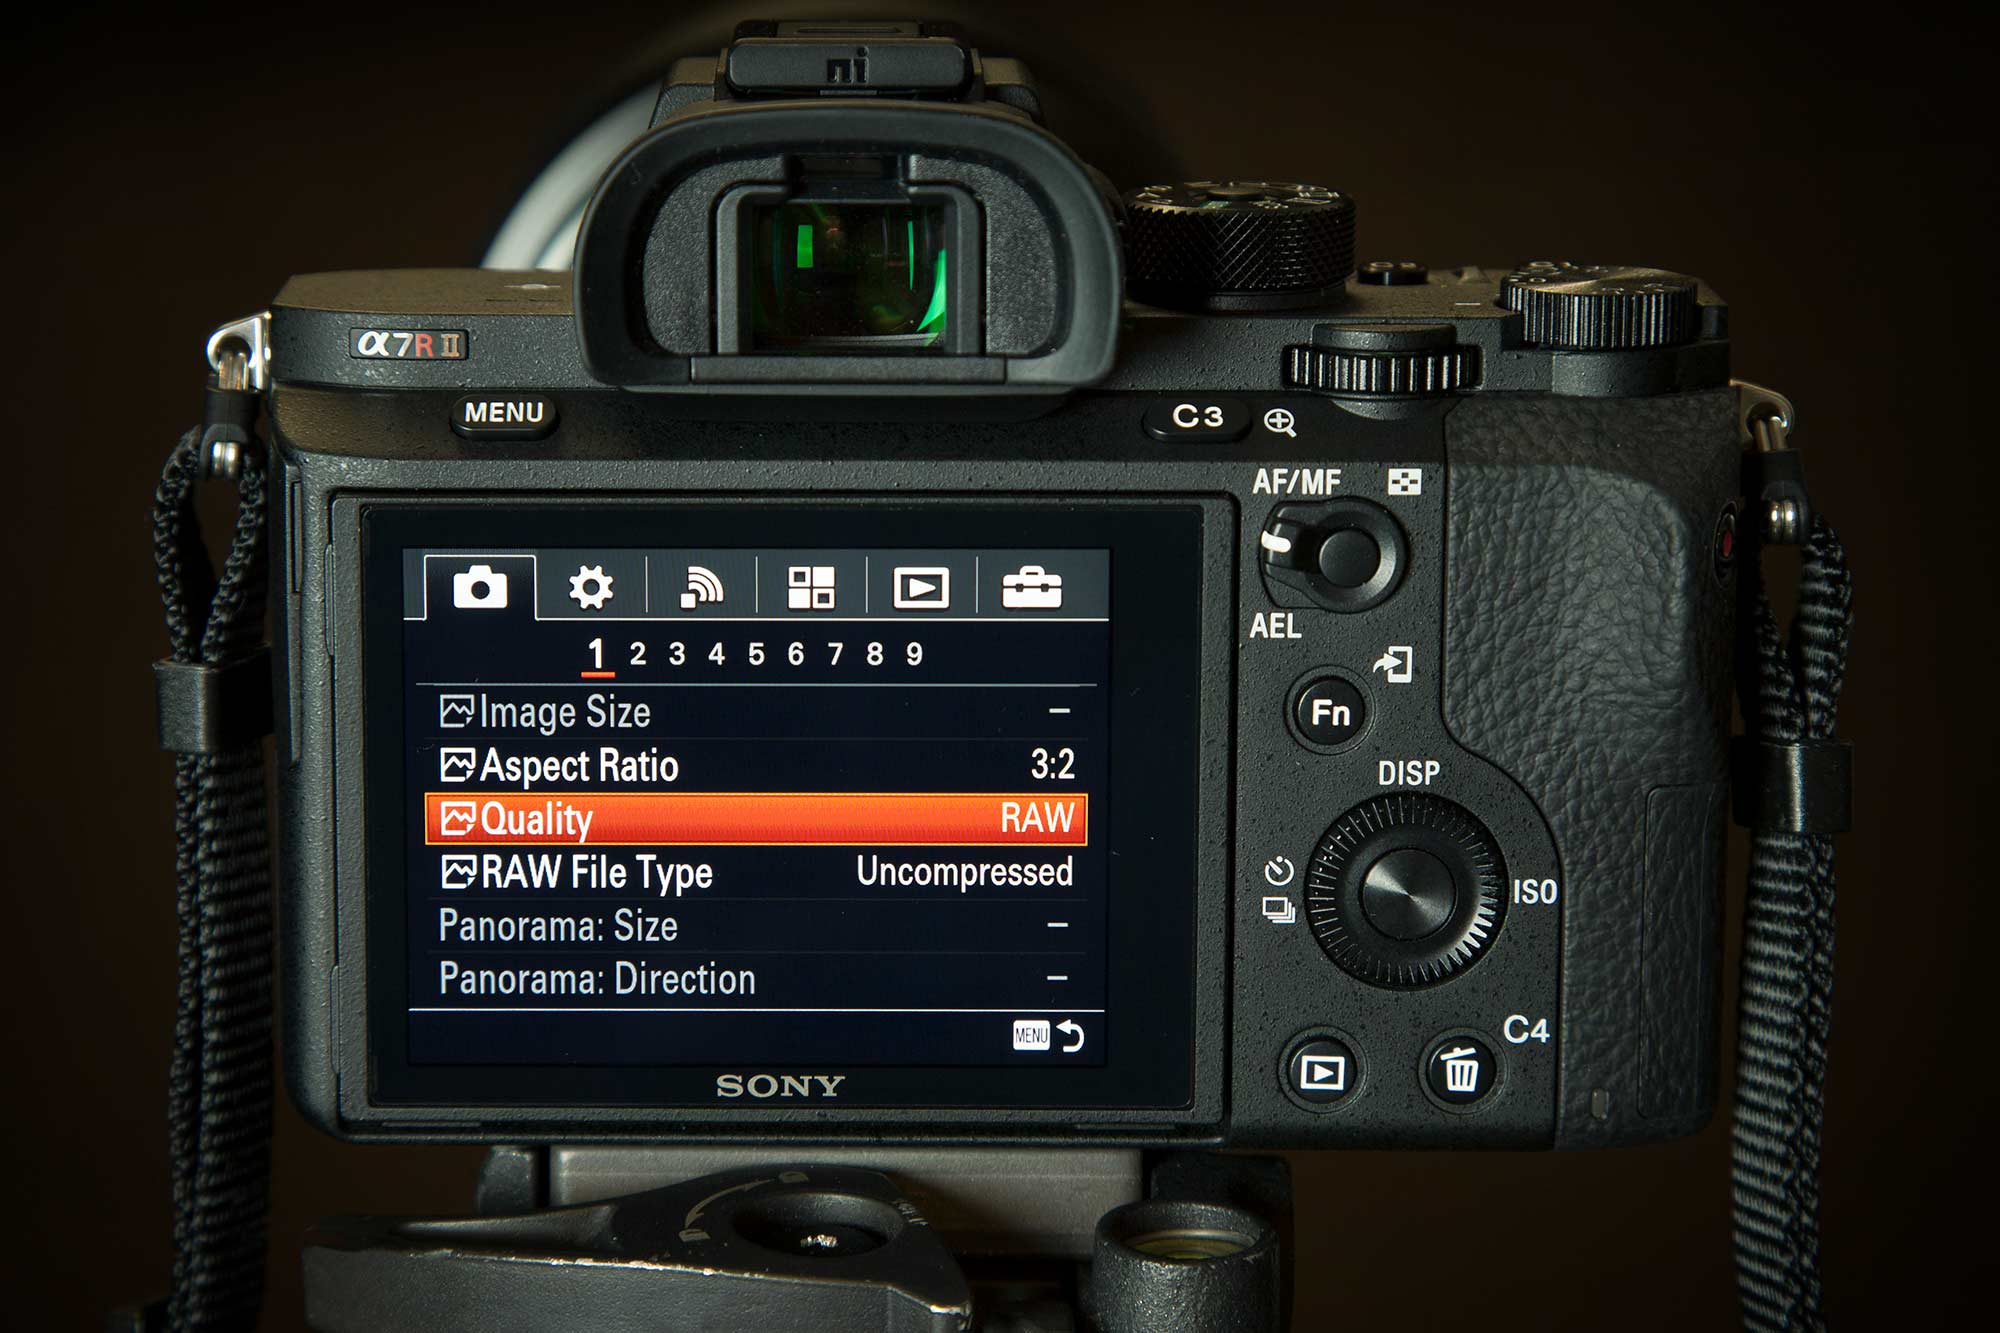
Set Up: 1. Press the Menu button and go to the Camera icon. 2. Go to the 1st section #1 and scroll down to “Quality.” 3. Here you can change from JPG to RAW or RAW + JPG.
Focus Peaking for Manual Focusing
What initially sold me on Sony cameras is a feature called “Focus Peaking.” When you’re in Manual Focus mode you can turn on Focus Peaking and set a color overlay (Red White or Yellow.) This color overlay will highlight the focus area of your image in live view. It’s really cool to watch the “twinkling” color wash over your scene as you change your focus!
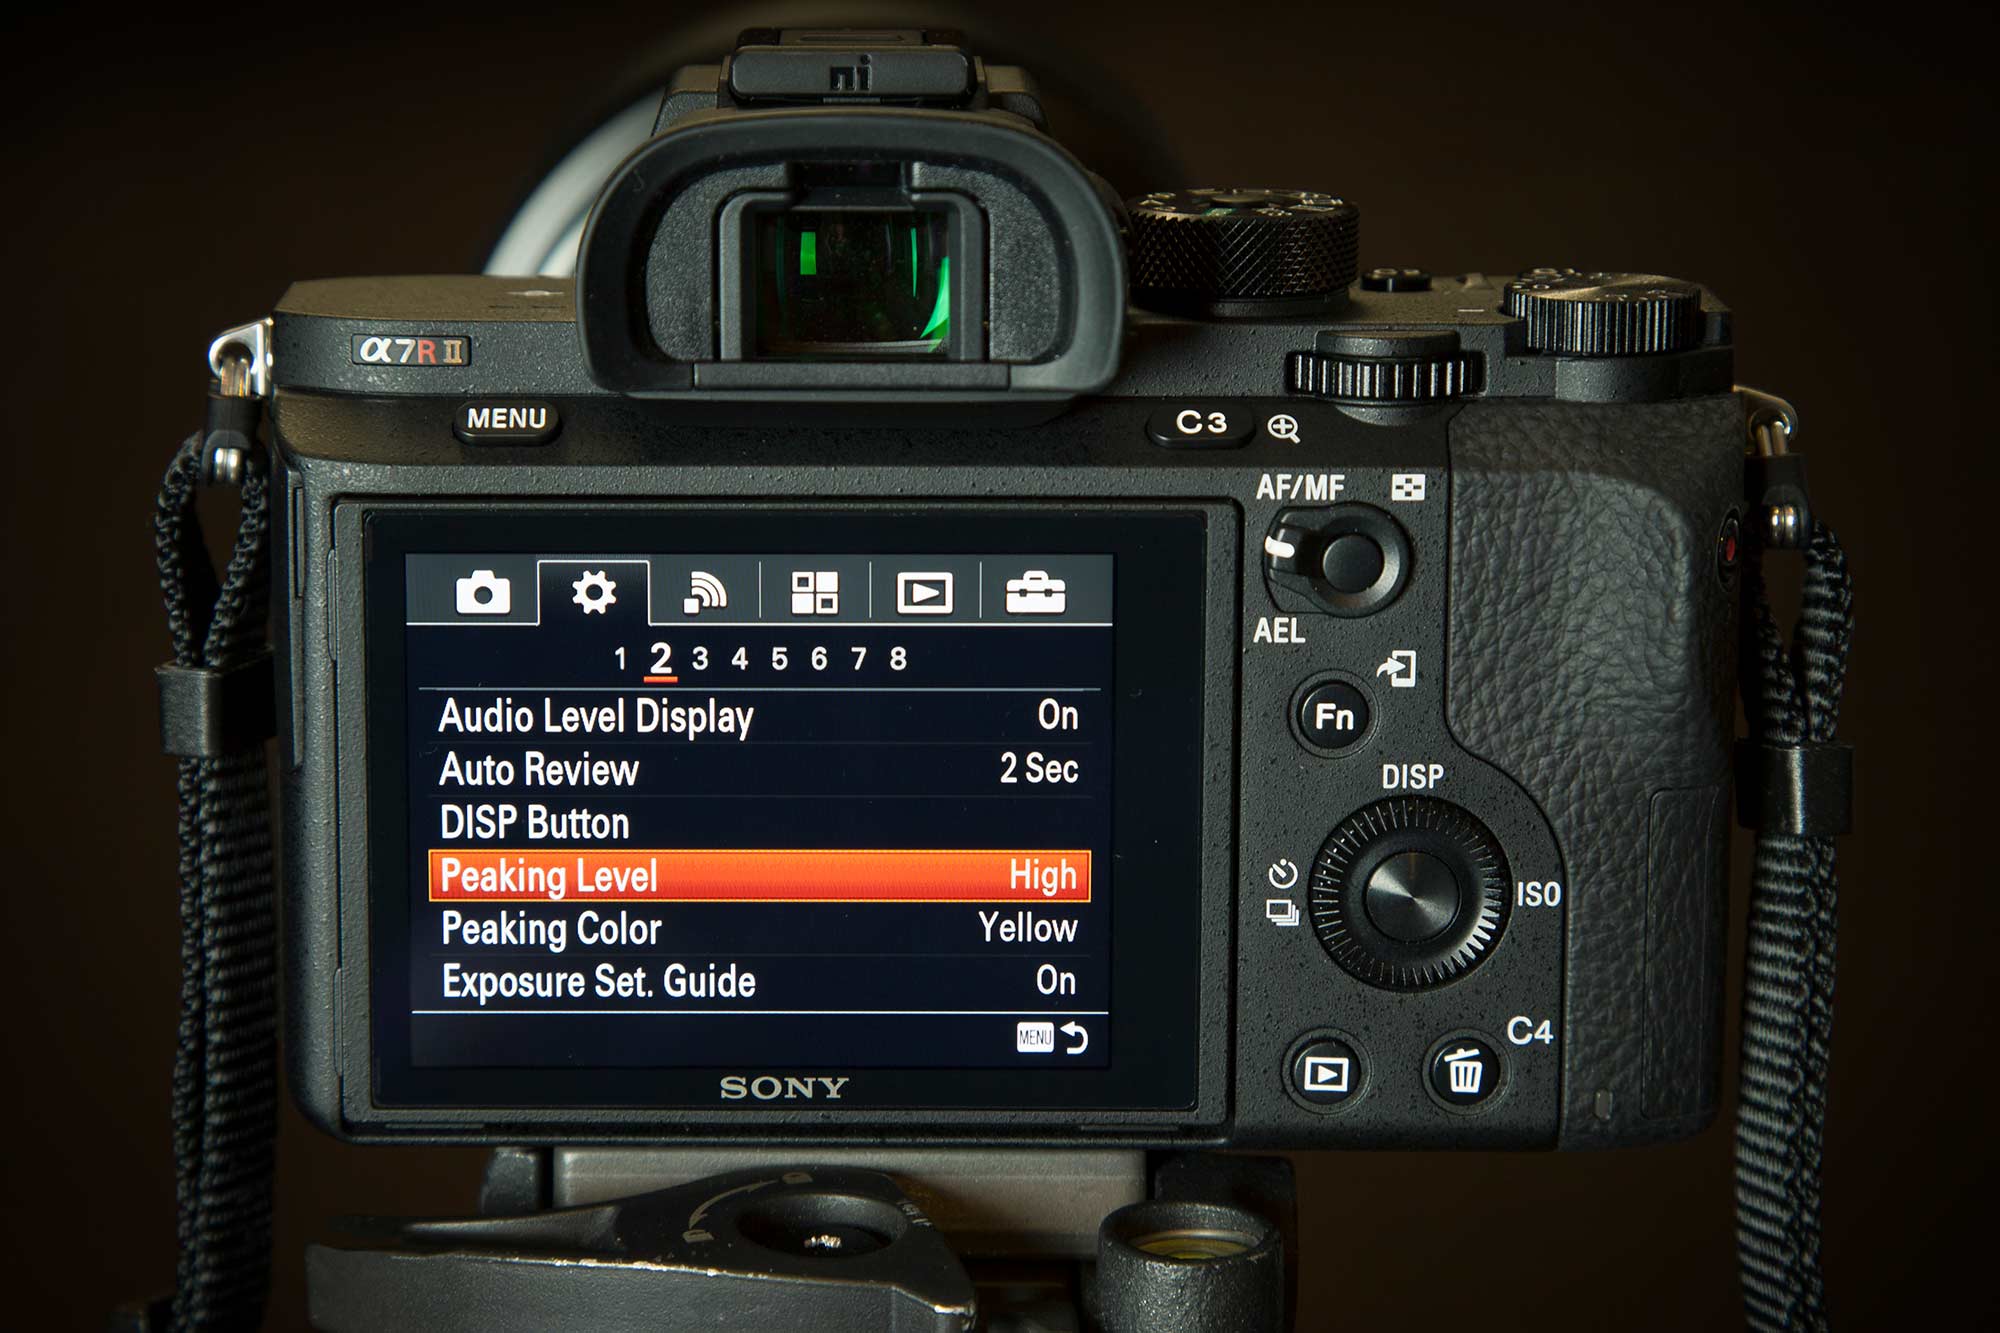
Set Up: 1. Press the Menu button and go to the Gear icon. 2. Scroll sideways to the 2nd section #2, then scroll down to “Peaking Level.” If you want to change the peaking color, scroll one step down to “Peaking Color.”
Setting up a Wireless Remote
The main reason that I use a wireless remote is to avoid camera shake! The other reason is… you may find yourself in tight or awkward places where it may be difficult to press the shutter button! For example: While photographing Antelope Canyon, I found myself tight against the canyon walls and I could not comfortably reach the shutter release button. Luckily, the wireless remote allowed me to trigger the shutter and capture the angle that I wanted! Remotes that I use: Sony RMT- DSLR2 remote and the Foto & Tech wireless IR remote.
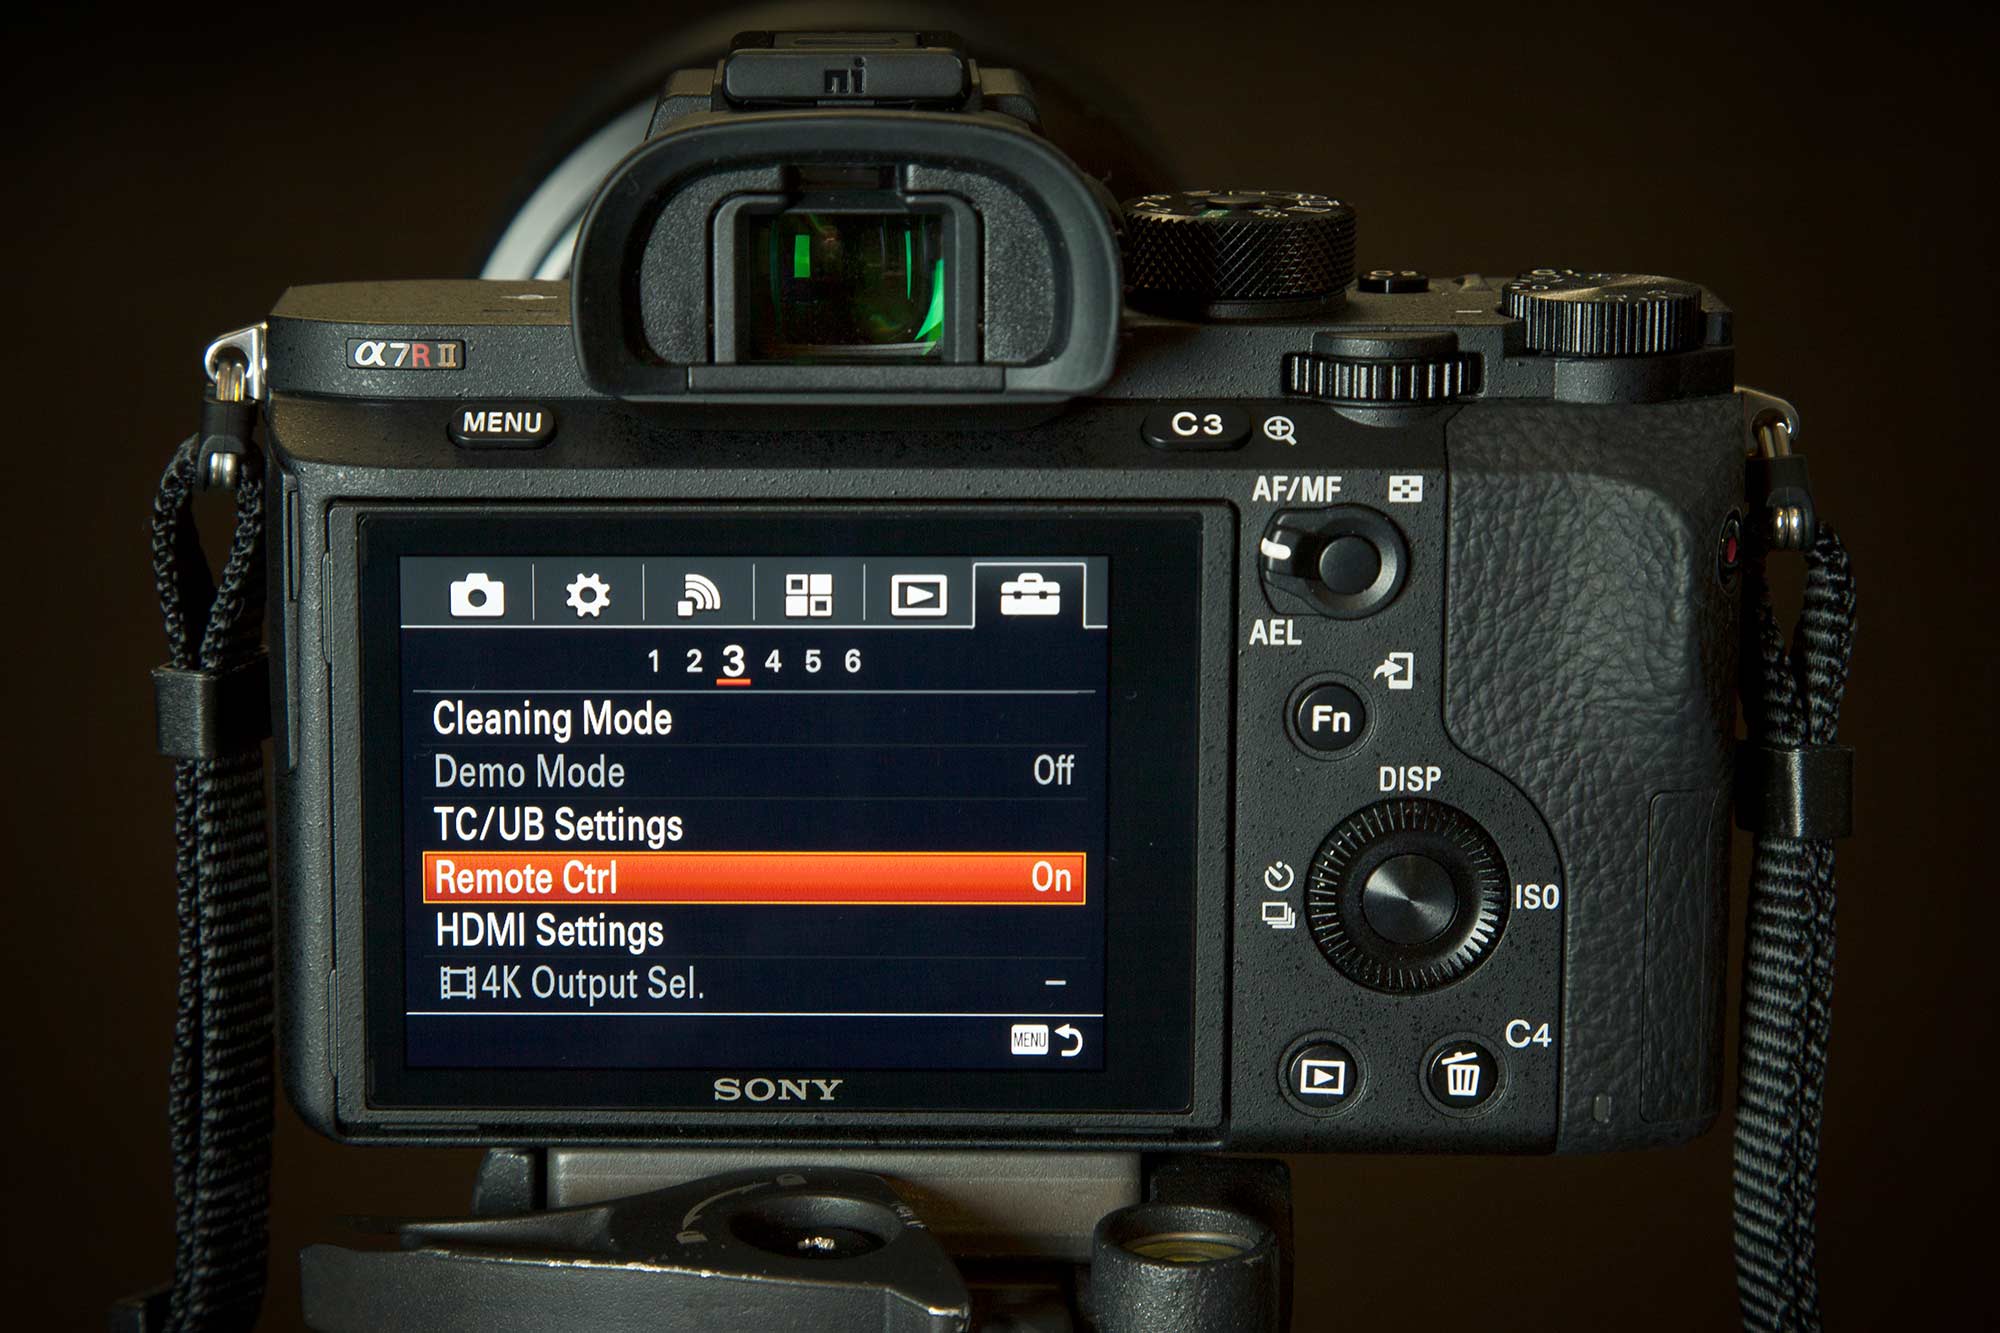
Set Up: 1. Press the menu button and go to the Toolbox icon. 2. Scroll sideways to the 3rd section #3, then scroll down to “Remote Ctrl.” 3. Make sure it is set to “On”.
No Wireless Remote? Set the Timer for Image Bracketing
I started using a wireless remote because my old camera (Sony a7r) did not have the option for a self-timer when using auto bracketing. Luckily, Sony stepped up their game and added this feature on the Sony a7r ii. It’s nice to know, that in the event that I lose or forget my wireless remote, I can simply set the self-timer for image bracketing!
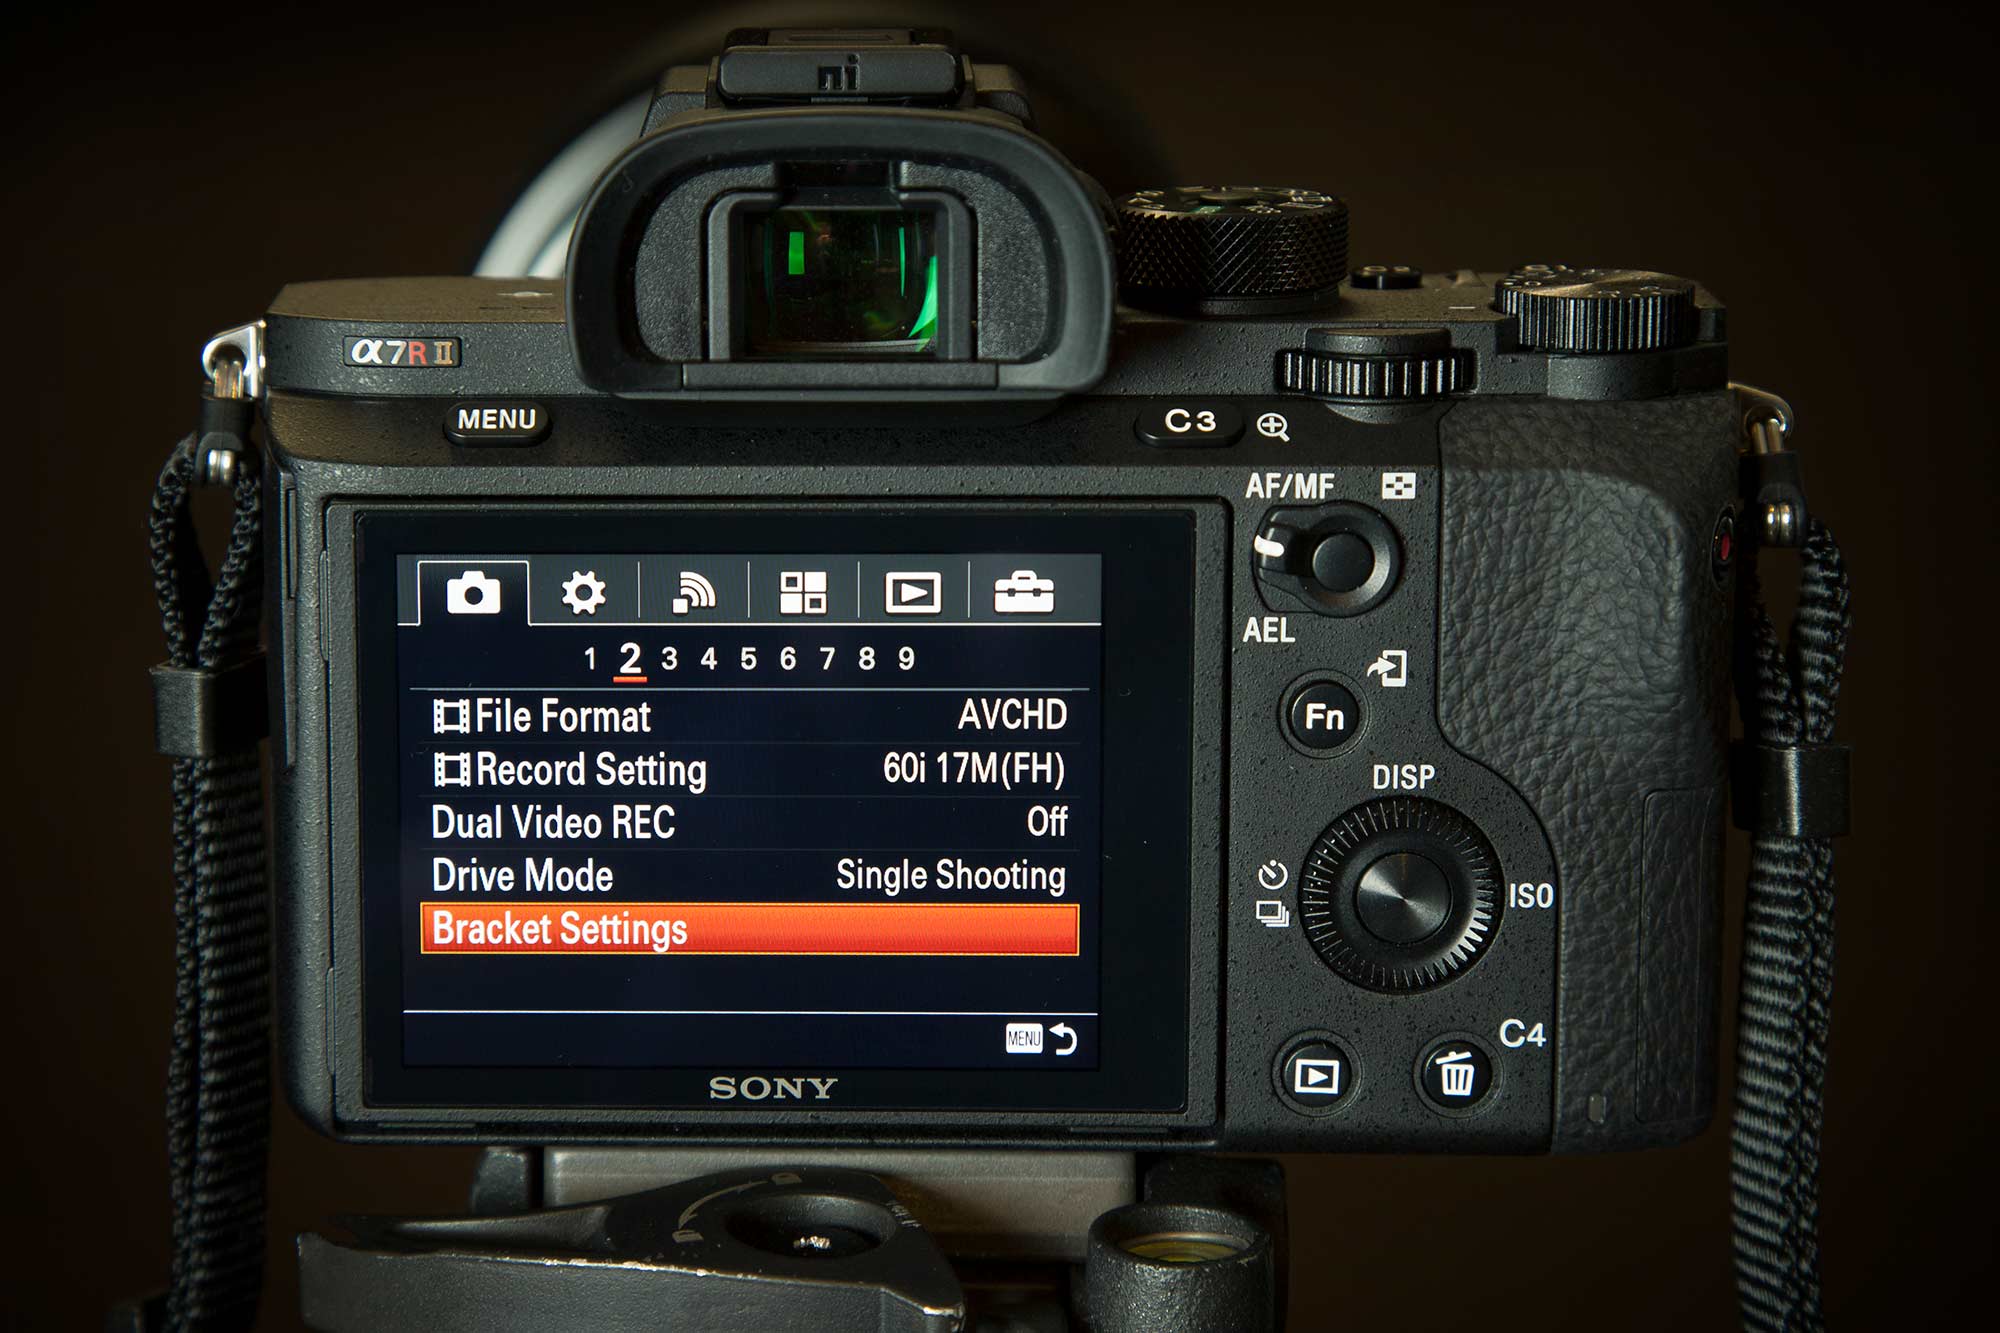
Set Up: 1. Press the menu button and go to the Camera icon. 2. Scroll sideways to the 2nd section #2, then scroll down to “Bracket Settings”. 3. You can now set the desired time, 2 seconds, 10 seconds, etc.
Customize Your Buttons
Customizing your camera is a great way to explore the menu system and set all your favorite features to be quickly accessible. Remember this is your customization, so set it up according to the features that you use the most!
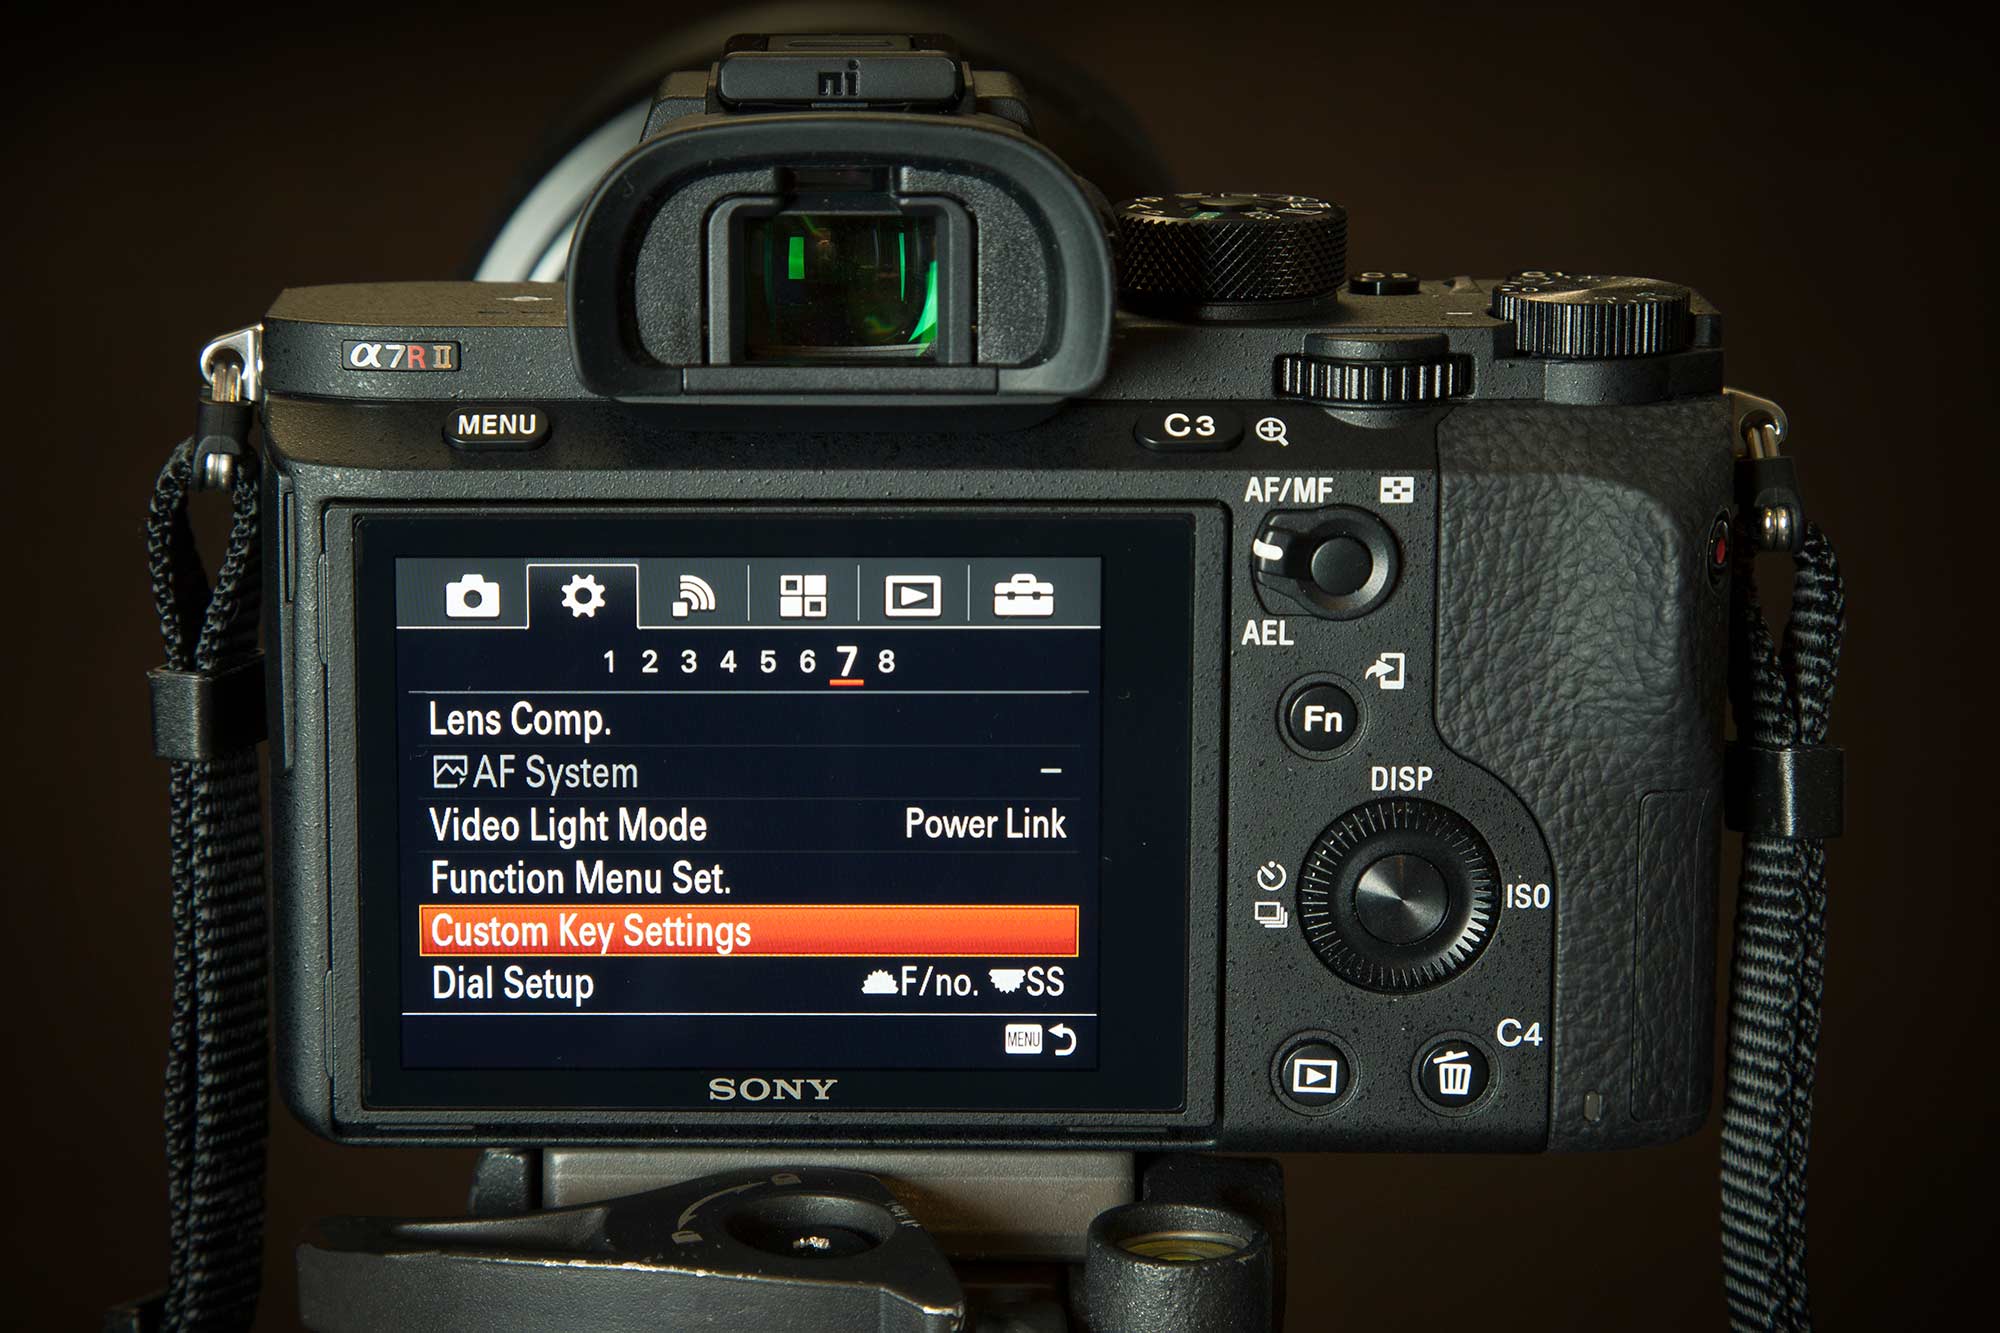
Set Up: 1. Press the menu button and go to the Gear icon. 2. Scroll sideways to the 7th section #7, then scroll down to “Custom Key Settings.” 3. Here you can customize most of your buttons! Below are examples of how I customized my buttons: C1, C2, C3 and C4.
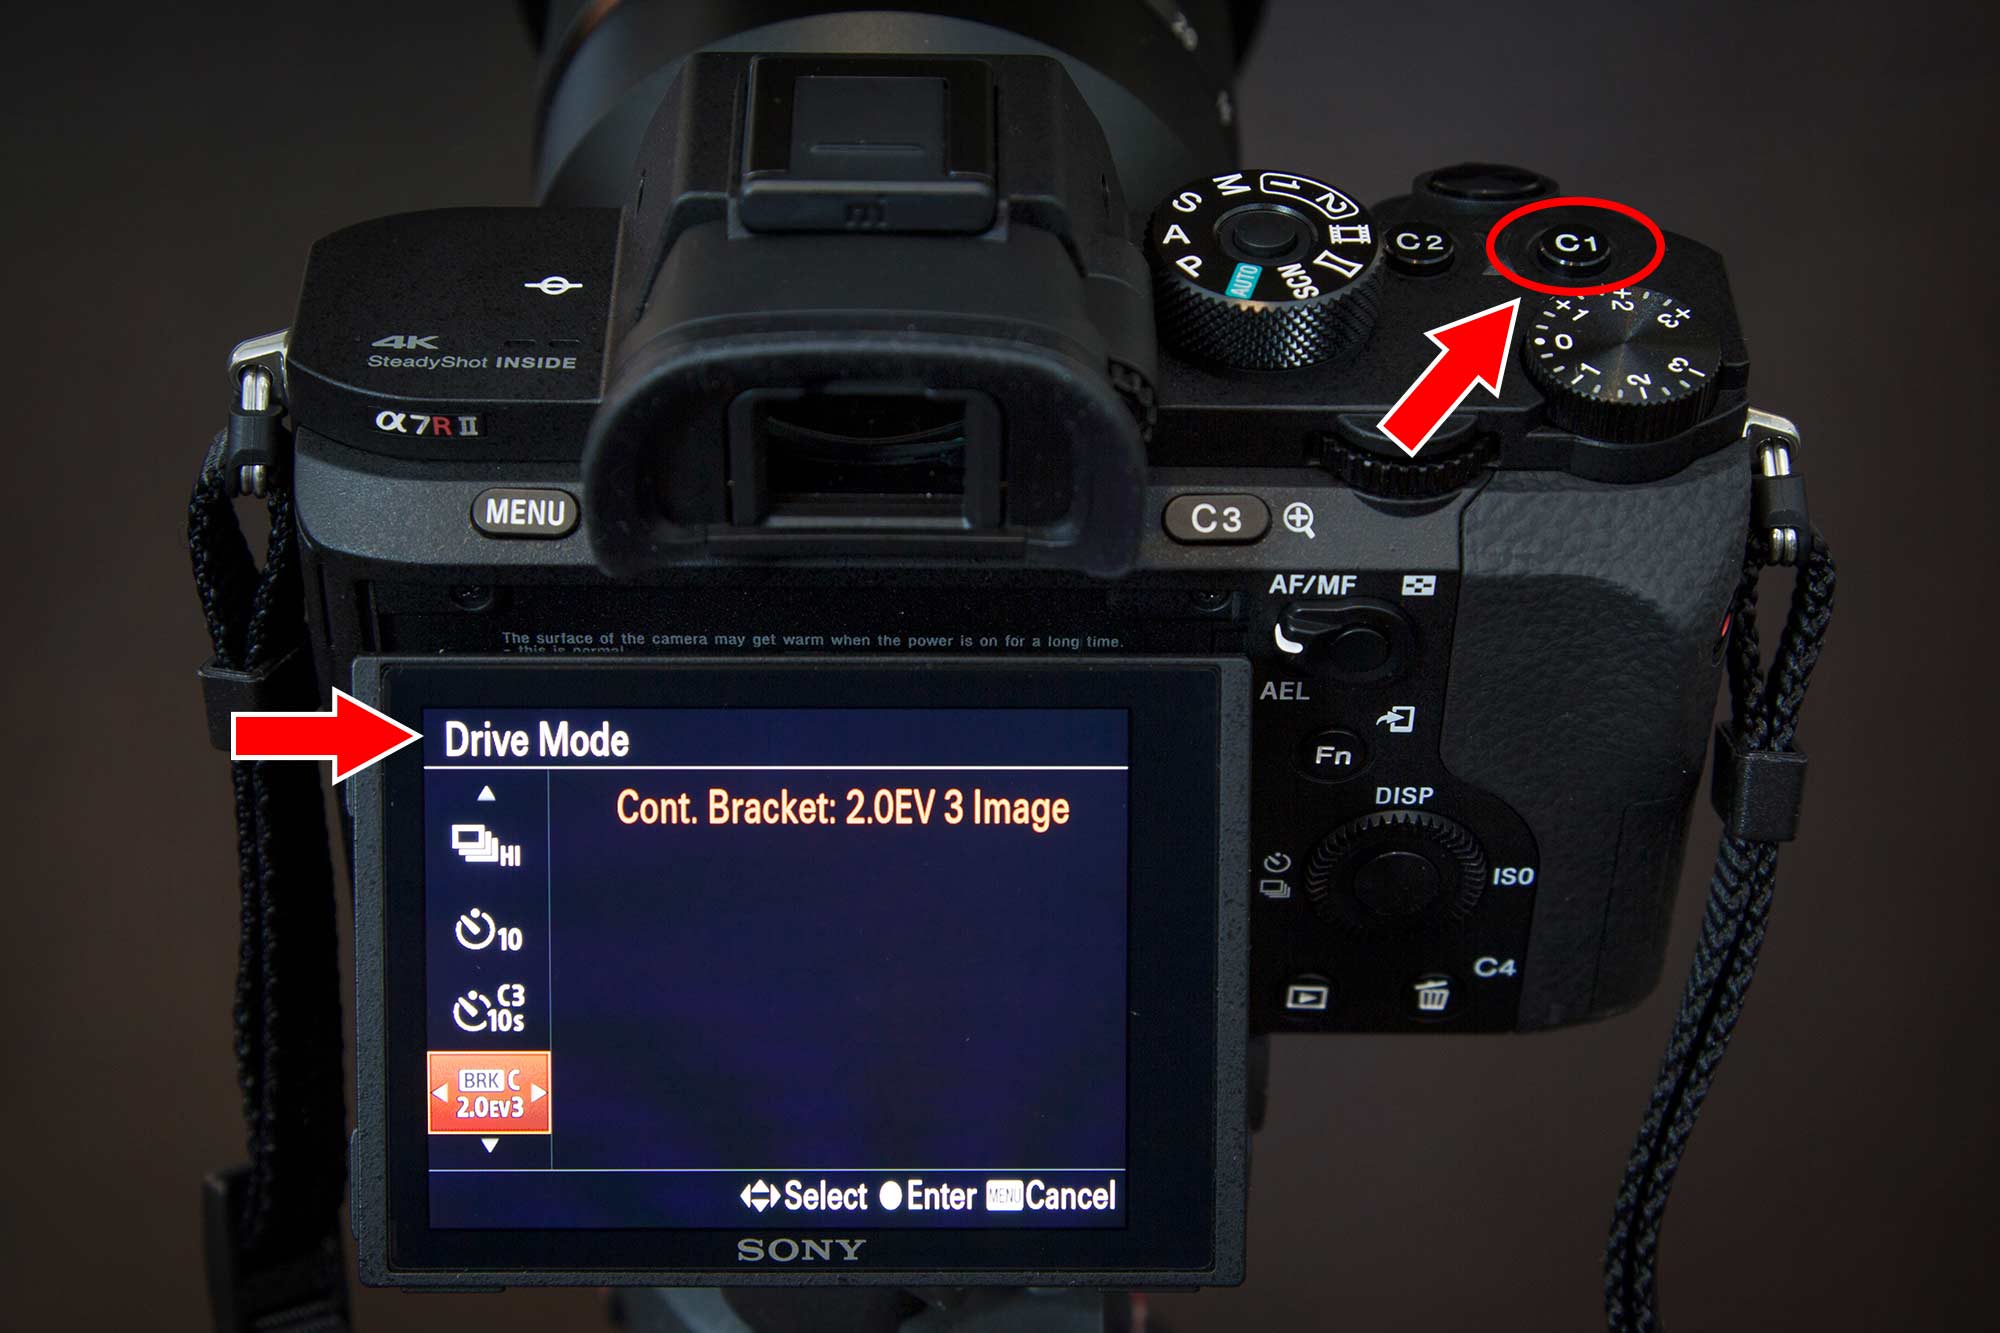
Examples of My Customized Buttons/Settings
C1. Drive Mode – I use drive mode to adjust the EV (Exposure Value) when bracketing shots. Also, I can quickly switch to single shooting or continuous shooting depending what I am photographing.
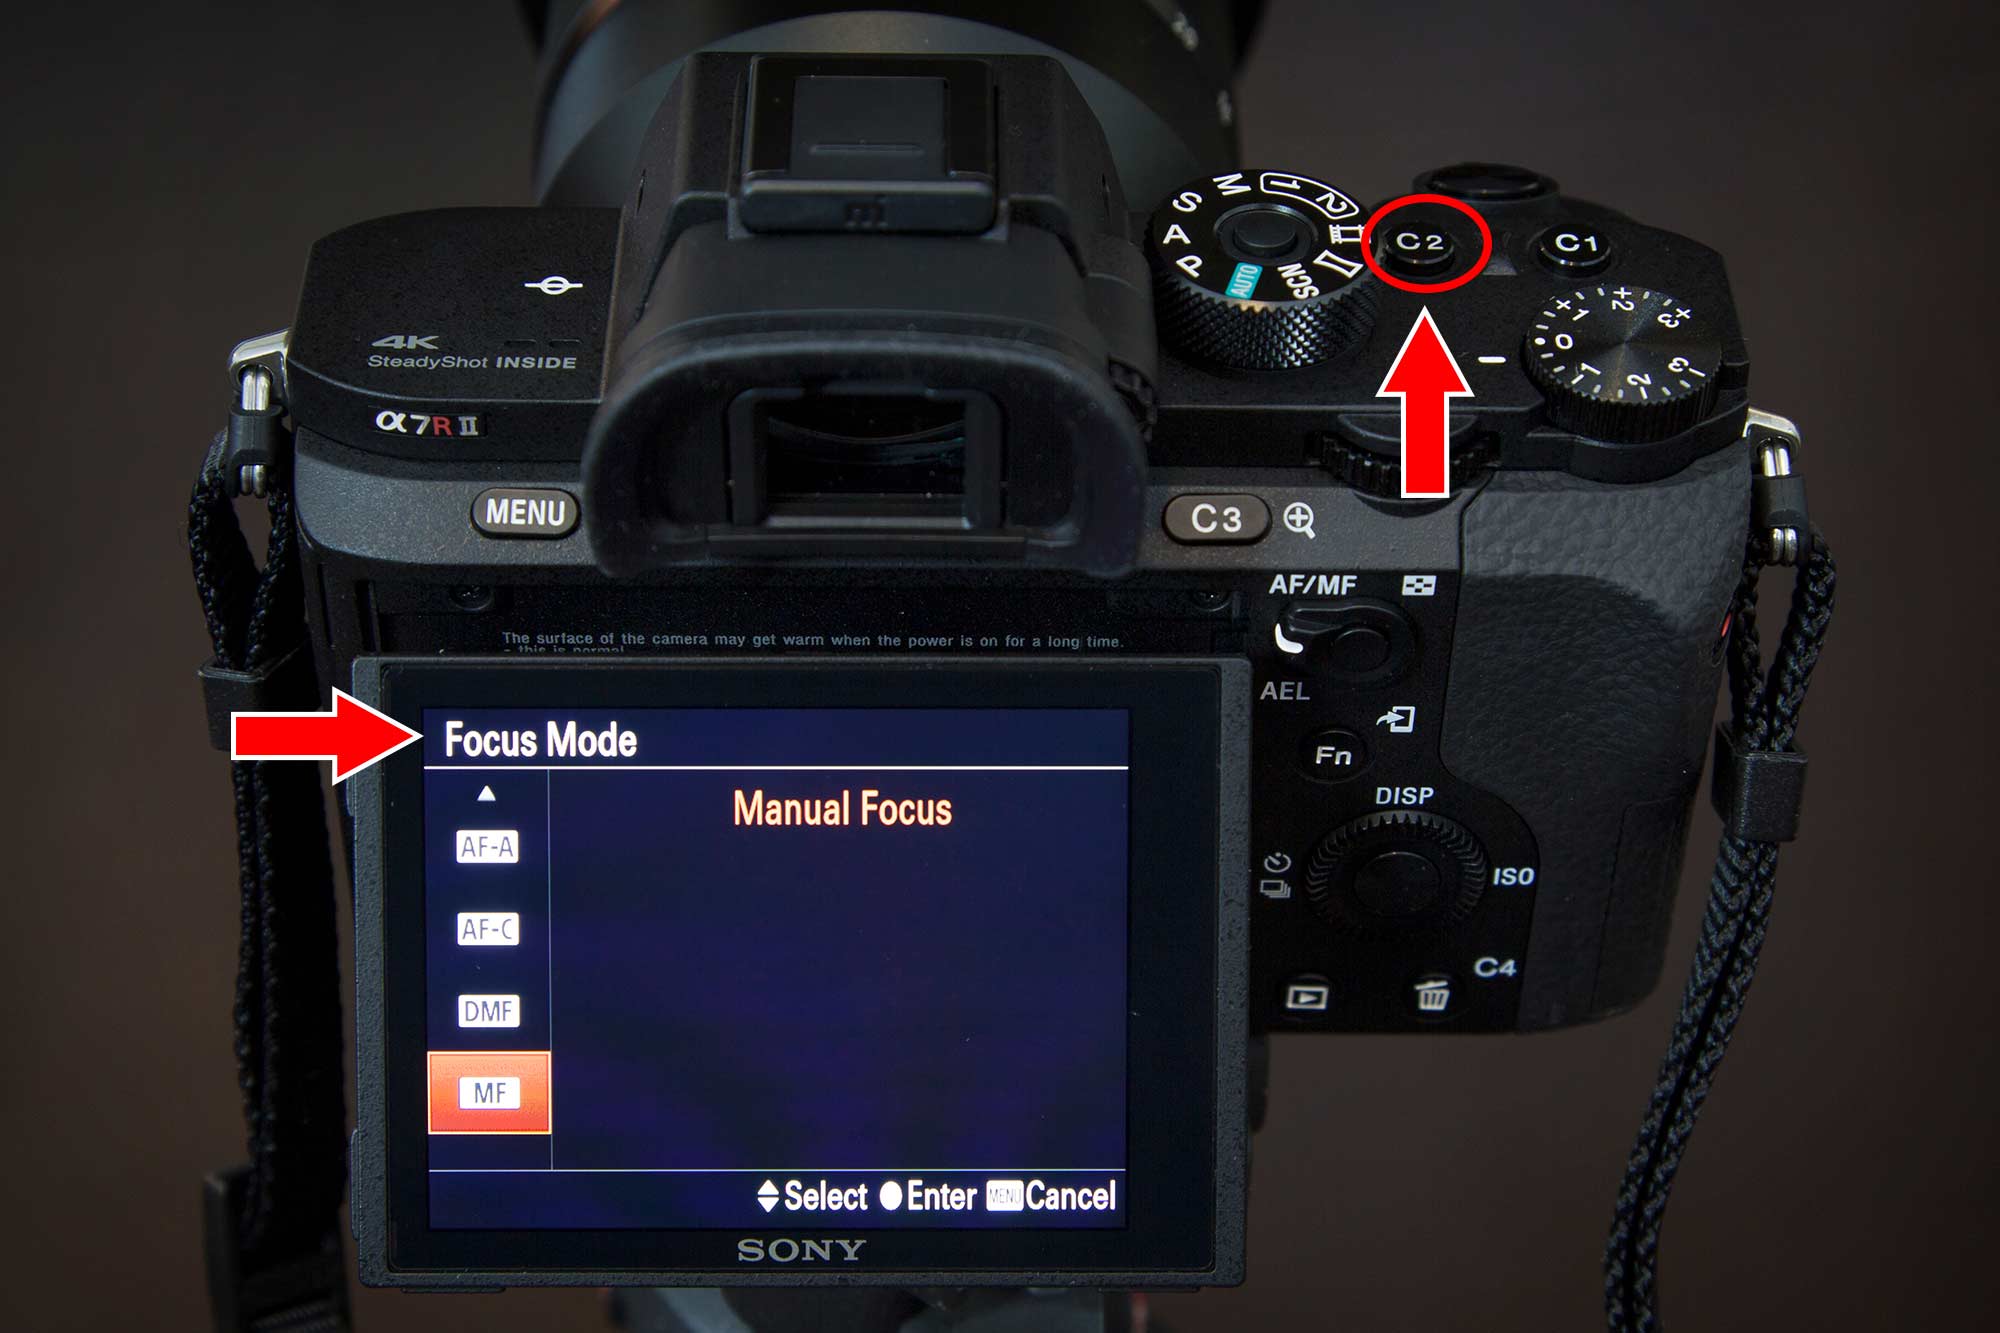
C2. Focus Mode – Being able to quickly access the Focus Mode is handy when you need to change up your shooting style. You can choose between Manual Focus, Single-Shot AF, Continuous AF, etc.
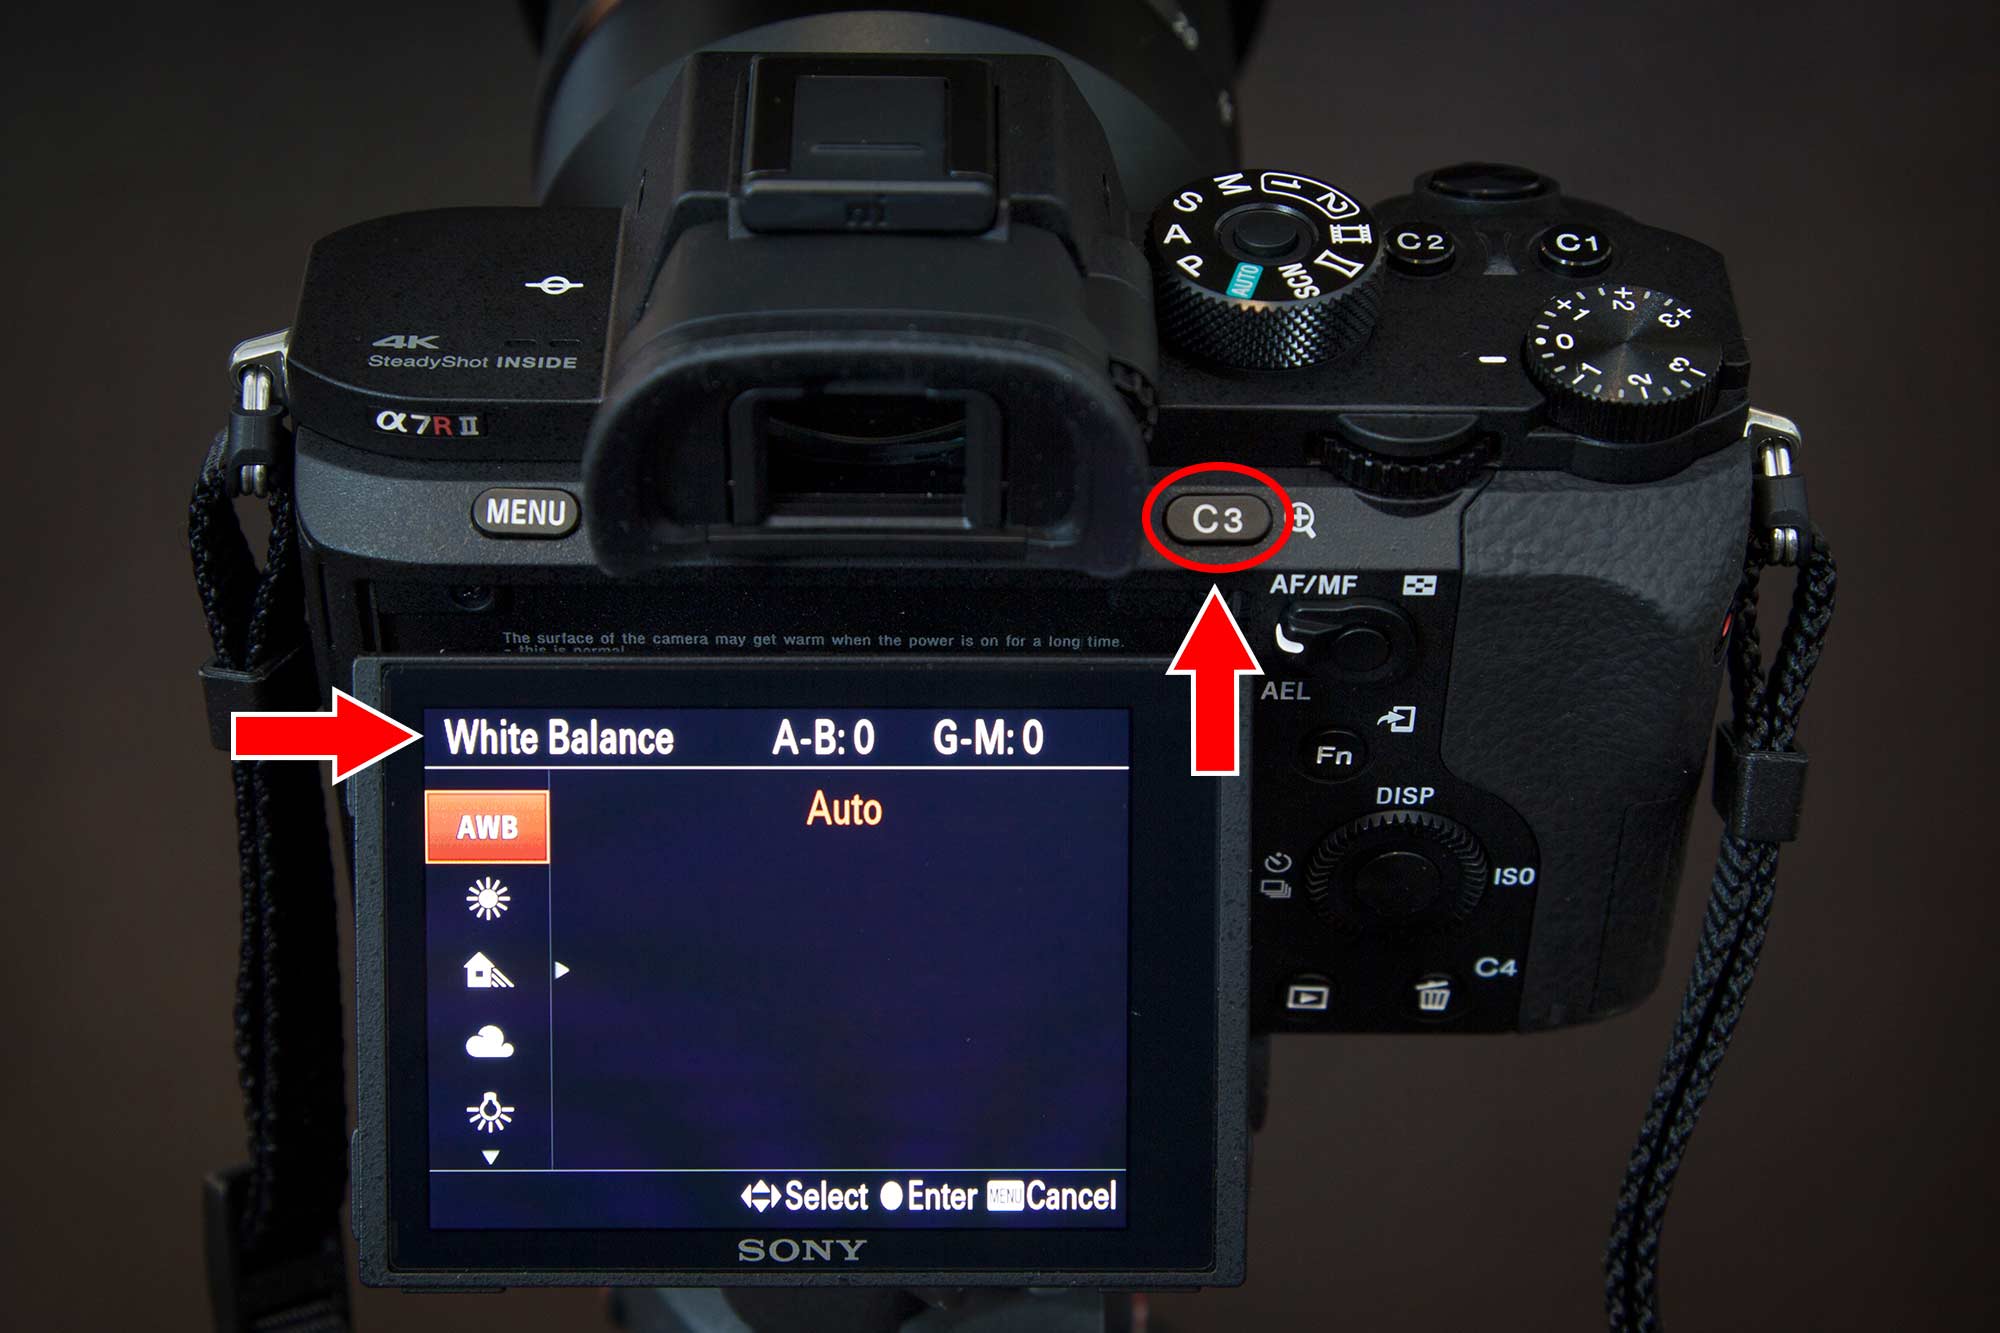
C3. White Balance – I use this feature more than I initially thought I would. Having quick access to your white balance allows you to switch up the “mood” of your scene or quickly dial in a custom white balance.
C4. Self-timer During Bracketing – “I lost my wireless remote” This custom button allows me to quickly set a timer for my bracketed shots. This is a new feature on the Sony a7r ii.

How to Auto Focus while in Manual Focus Mode
I like to use the AF/MF AEL Button to Auto Focus while in Manual Focus mode. Since my camera is set to Manual Focus Mode 90% of the time, I like having the option to quickly Auto Focus when needed. (Note: When in Manual Focus Mode, auto-focusing will not work on the shutter release button.)
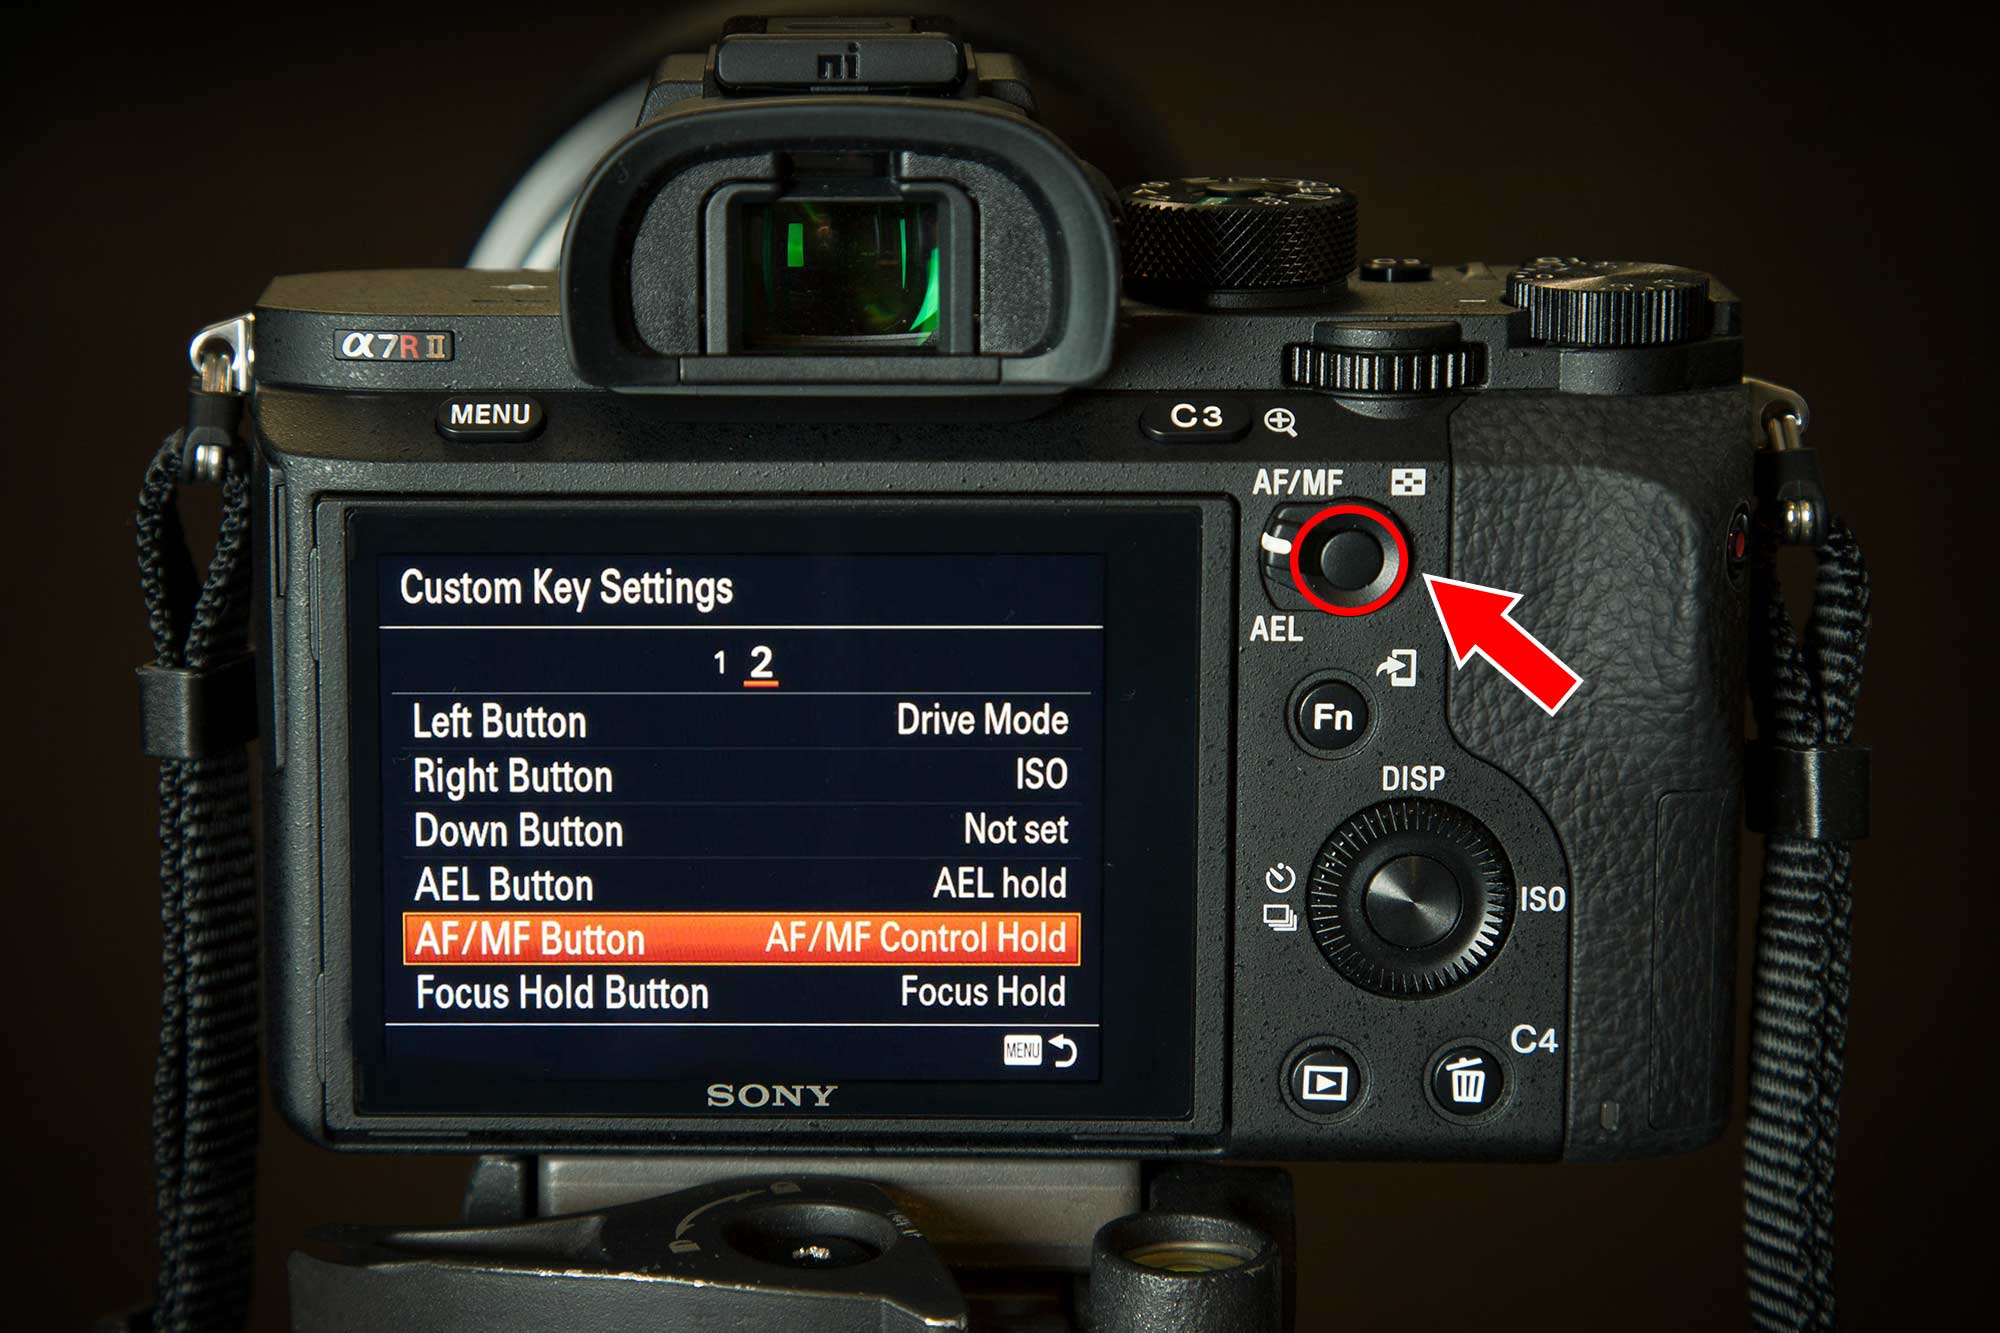
Set Up: 1. Press the menu button and go to the Gear icon. Scroll sideways to the 7th section #7, then scroll down to “Custom Key Settings”. 2. Now in the Custom Key Settings menu, scroll left to the 2nd section #2, then scroll down to AF/MF Button. 3. I use “AM/FM Control Hold” to allow me to quickly Auto Focus while shooting in Manual Focus.
I hope you enjoyed reading this tutorial on how to customized the Sony a7r ii. My best advice is to play with your camera and really think about the features that you use the most. The more you know your settings, the easier it will be to get the shot you want out in the field. Thanks for reading!
Looking for Lightroom Presets? Check out the Creative Flow and enjoy over 1000 Lightroom Presets & Creative Brushes: The Creative Flow is the ultimate workflow and premium preset collection by Presetpro. The Creative Flow is your own personal preset “tool box” where you can swap out tone curves, change base settings or easily color tone your image with a few simple clicks. When you purchase the Creative Flow you get all of our premium collections (at a discounted price) plus the Creative Flow workflow and Creative Brushes. Enjoy the power of 1000 + Lightroom presets integrated into one simple and easy to use workflow!
Lightroom Presets!
Lightroom Presets
Lightroom Presets
Lightroom Presets
Lightroom Presets
Lightroom Presets
Lightroom Presets
Lightroom Presets
Lightroom Presets

Lightroom Presets