How to Add Metadata to Your Photos in Lightroom
Hello, Welcome to the tutorial – How to Add Metadata to Your Photos in Lightroom! In this tutorial we will demonstrate how to add metadata and copyright information to your images. This process will help protect your photos by adding your contact information (i.e – copyright, website, email, phone number, etc) along with your camera metadata/settings. Basically, you are adding your “fingerprint” to your work. Follow along with this step by step tutorial and make sure you check out the video below to see it in action!
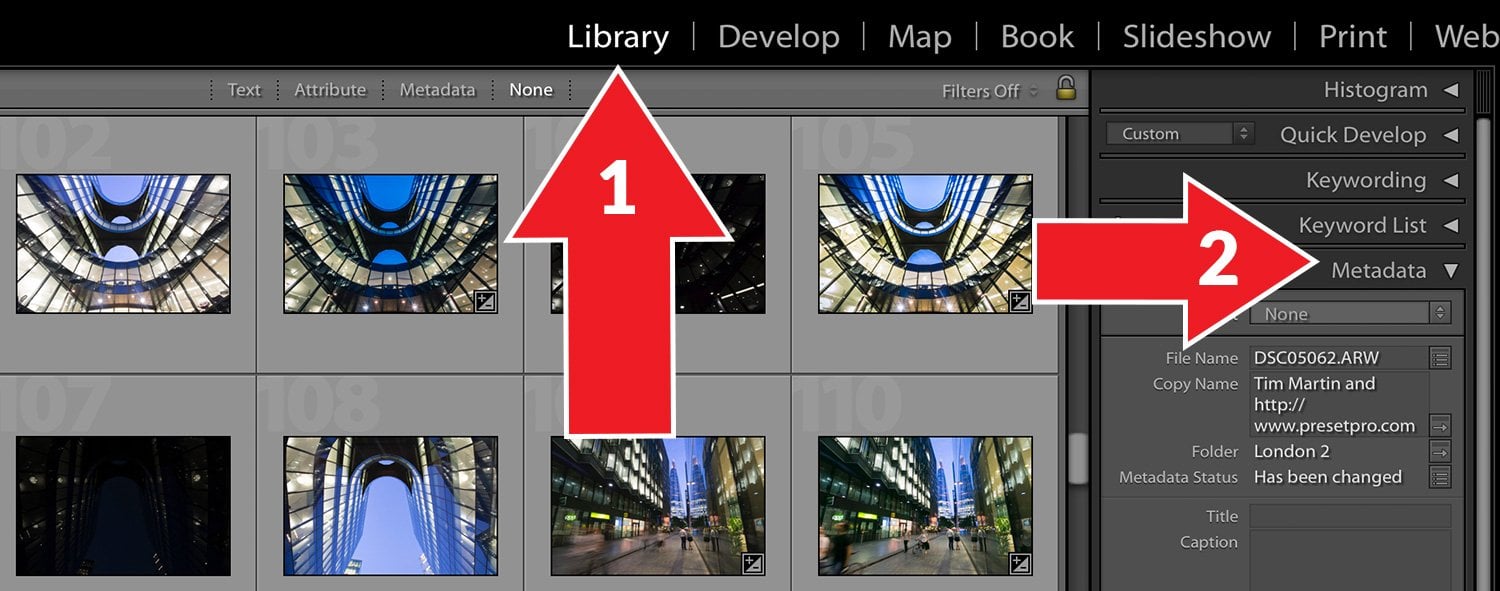
Step 1. Open Library Module.
Open the Library Module in Lightroom and then open the Metadata drop down menu, as seen in arrow 2.
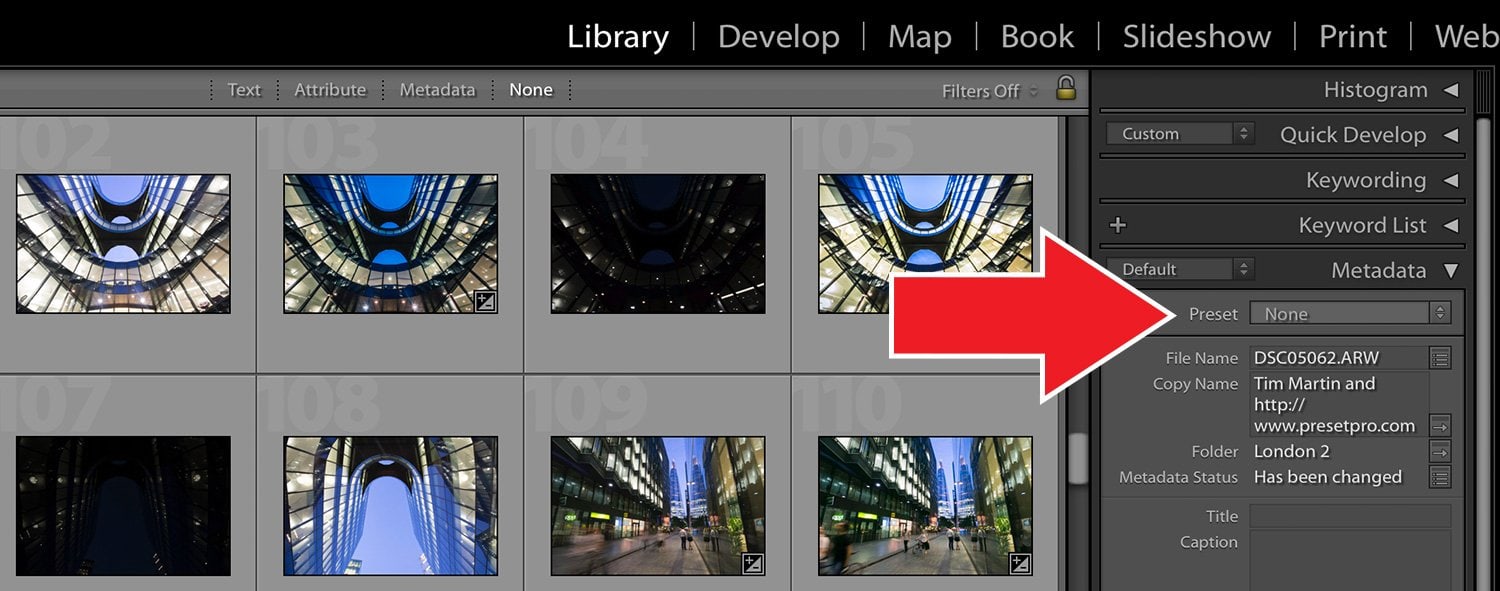
Step 2. Open Preset Menu
Find the Preset Menu as seen below.
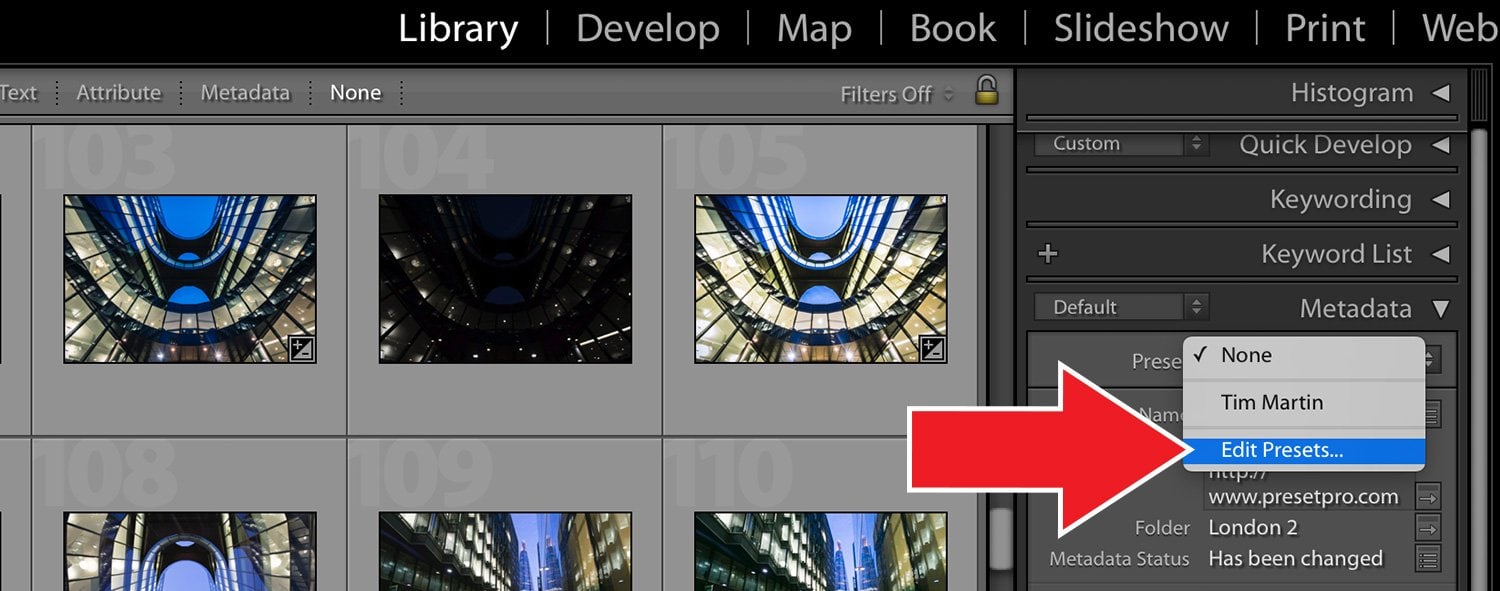
Step 3. Edit Presets
From the drop down menu select Edit Presets.
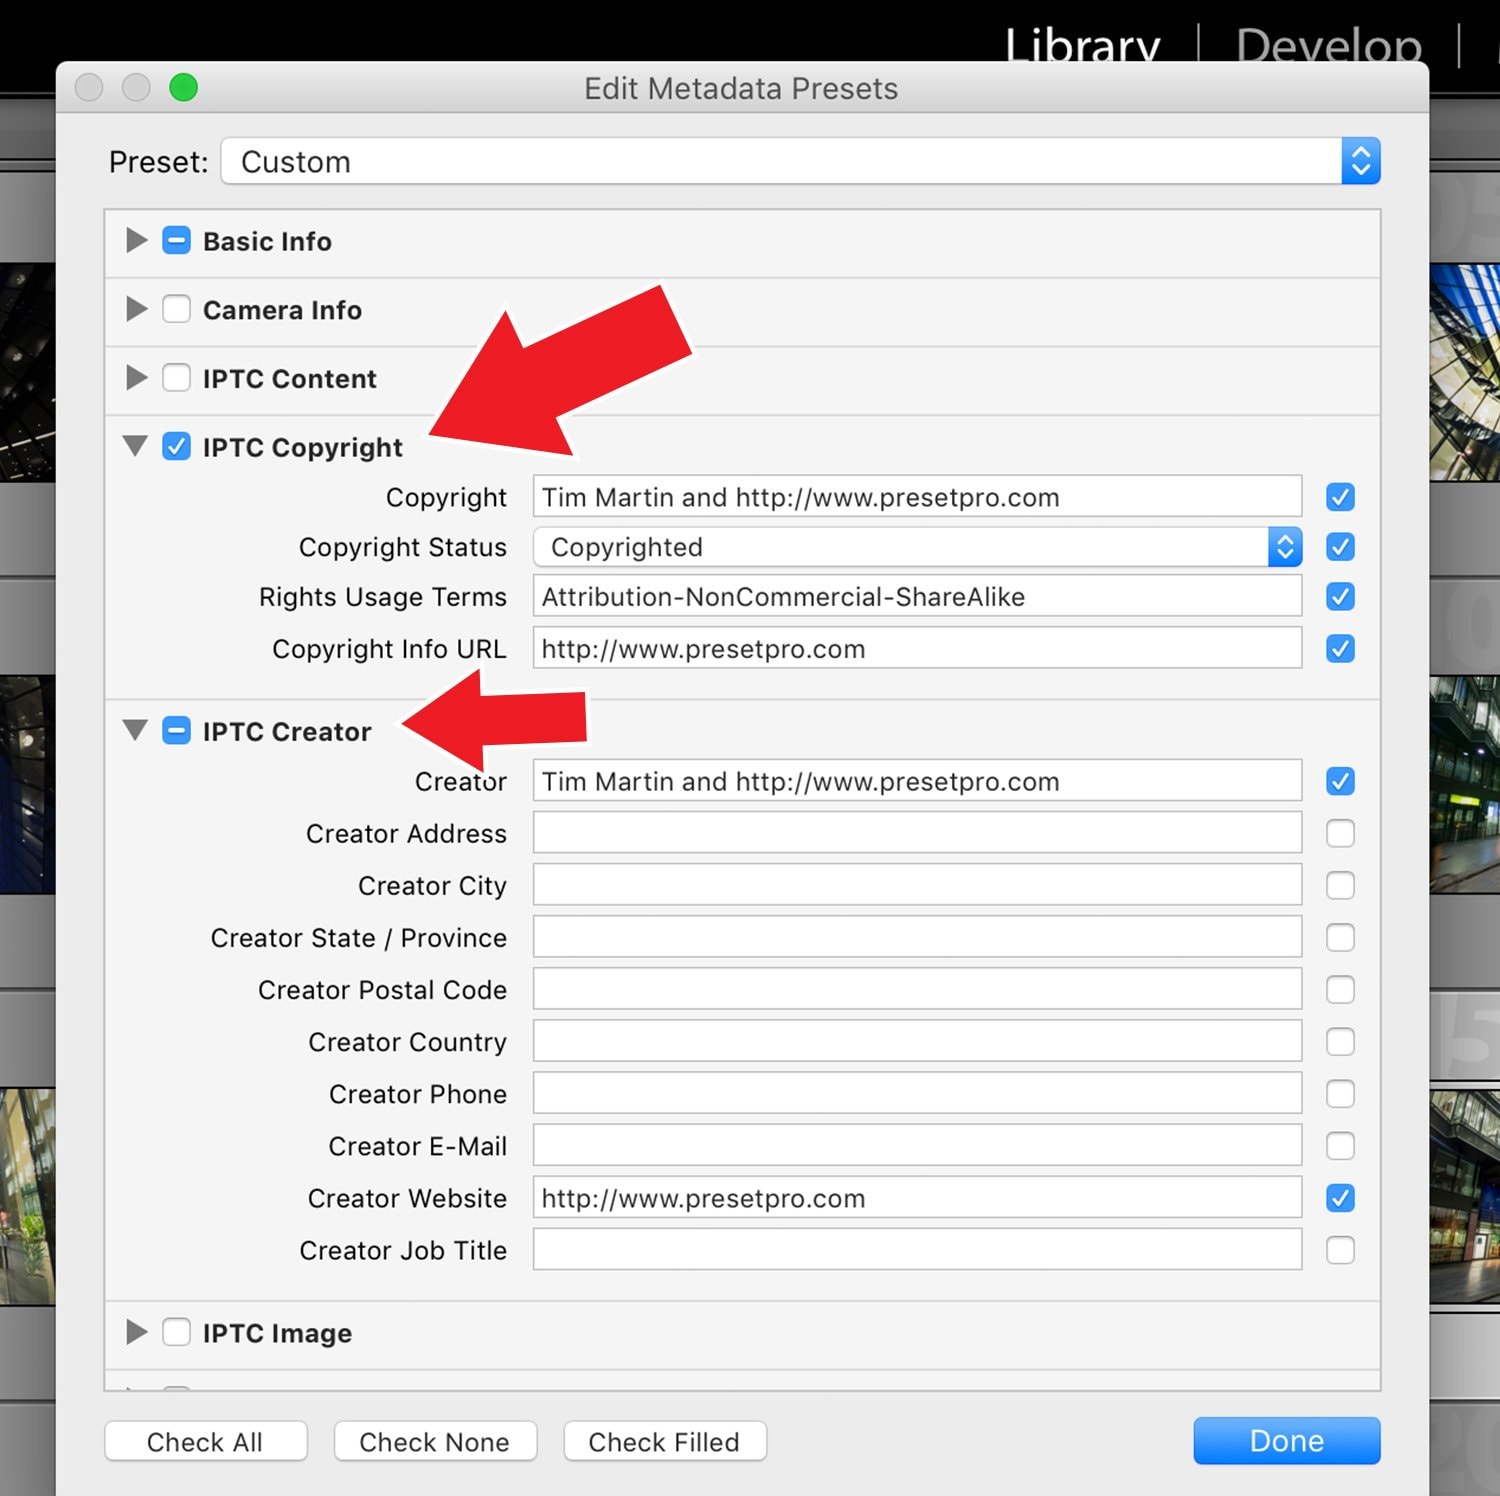
Step 4. Edit Metadata Presets
To cover the basics, you can fill out IPTC Copyright and IPTC Creator. Simply add your information in these fields (i.e – copyright, website, email, phone number, etc) When you are finished, click done!
Watch the Video Below!
This completes our tutorial: How To Add Metadata to your Photos in Lightroom. Check out the video below for an in depth look. Thanks for watching!
Looking for Lightroom Presets? Checkout the Creative Flow and enjoy over 1000 Lightroom Presets & Creative Brushes: The Creative Flow is the ultimate workflow and premium preset collection by Presetpro. The Creative Flow is your own personal preset “tool box” where you can swap out tone curves, change base settings or easily color tone your image with a few simple clicks. When you purchase the Creative Flow you get all of our premium collections (at a discounted price) plus the Creative Flow workflow and Creative Brushes. Enjoy the power of 1000 + Lightroom presets integrated into one simple and easy to use workflow!


