
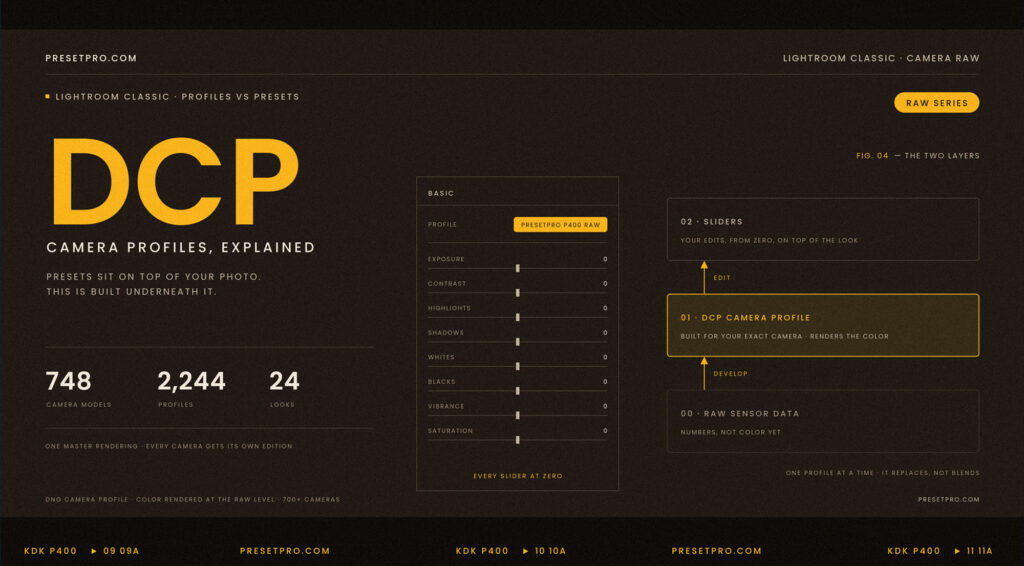
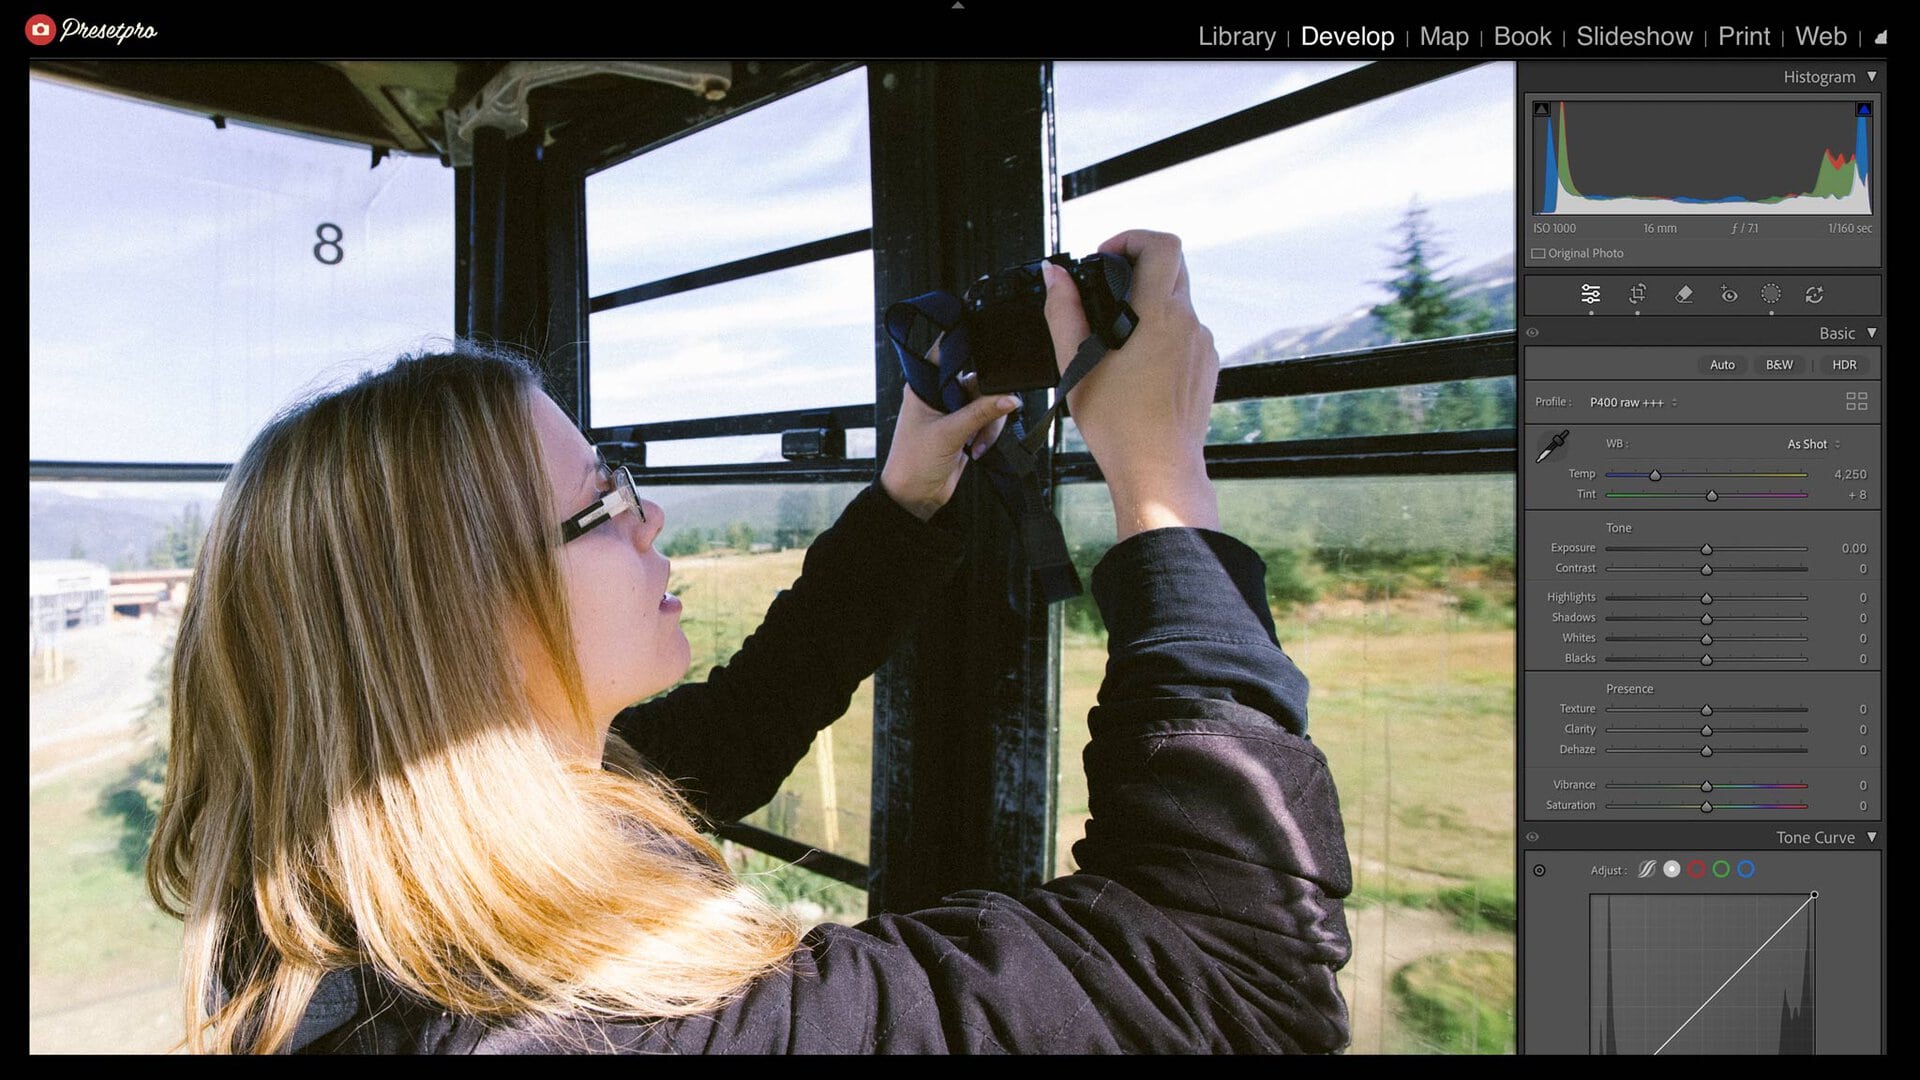
Here is a small experiment that changes how you think about editing. Open a RAW photo in Lightroom Classic, apply a film look built into a DCP camera profile, and watch the Basic panel. The image transforms. The sliders do not move. Every tone and color slider is still sitting at zero.
So where did the look come from?
It came from a layer of Lightroom most photographers never touch: the camera profile. This article explains what DCP camera profiles are, how they are different from presets, and why color rendered at the profile level looks smoother, cleaner, and more like film than anything a preset can do.
Your camera does not record color
A camera does not capture color. It captures numbers: measurements of light hitting the sensor. A RAW file is not a photograph yet. It is data, and there is no picture inside it until software interprets those numbers into color.
That interpretation is the job of a profile. Every photo you have ever seen in Lightroom was an interpretation performed by a profile, usually Adobe’s default. Most people never realize they could choose the interpreter.
Film photographers already know this idea by another name. A RAW file is like an exposed roll of film that has not been developed. The light is captured, but the picture does not exist until something develops it. The profile is the development. A preset edits a photo that already exists. A profile decides what the photo becomes.
The two layers of color in Lightroom
Every image in Lightroom has two layers of color decision:
- The profile, underneath. It converts RAW data into color in the first place. You can see it at the top of the Develop module’s Basic panel.
- The sliders, on top. Exposure, contrast, the Tone Curve panel, HSL, and everything else you adjust by hand.
A typical preset is a saved recipe of slider positions, plus at most a generic profile choice such as Adobe Color. The look you buy lives in layer two, sitting on a foundation that was never built for your specific camera.
A profile-based look works in layer one. The color changes at the rendering level, and the sliders stay untouched, free for your own editing on top of the look.
What is a DCP camera profile?
DCP stands for DNG Camera Profile, a format Adobe defined as part of its Digital Negative (DNG) specification. It is the same format Adobe uses for its own camera profiles, including camera-matching profiles that imitate each manufacturer’s in-camera rendering. When you see profiles like Adobe Color or Camera Standard in the profile browser, you are looking at this system at work.
Three things about DCP profiles worth knowing:
- They are camera specific. A DCP is built for one camera model’s sensor, which is why Adobe ships different profiles for different cameras.
- They work on RAW files. A DCP’s job is interpreting sensor data, so it applies when a RAW file is selected. JPEGs were already interpreted by the camera.
- Lightroom uses exactly one at a time. A camera profile is not stacked on your camera’s own color science. It replaces it. Your sensor’s physical character stays; the profile handles the color interpretation.
Why the same preset looks different on every camera
Every camera model sees color differently. Adobe ships per-camera default profiles that aim for a consistent neutral, but no generic profile can fully even out different sensors, and many shooters use camera matching defaults that differ by brand on purpose. So a Canon file and a Fuji file of the same scene never start from quite the same color foundation.
A preset applies one recipe on top of whatever foundation your camera loads. Same recipe, different foundation, different result. This is why a preset that looks beautiful in the seller’s demo looks different on your camera, and different again on your second body. The color underneath was never the same.
Camera manufacturers solved this problem years ago, at the profile level. When a camera brand builds a film simulation, it is not a preset. It is built into the rendering for that exact camera. Profile-based film emulation brings the same approach to Lightroom.
Why color rendered in a profile looks better
Why does the color look this good? Because the color is mixed straight from your RAW file. That’s why skin stays smooth, and highlights roll off like film.
The longer answer comes down to three things.
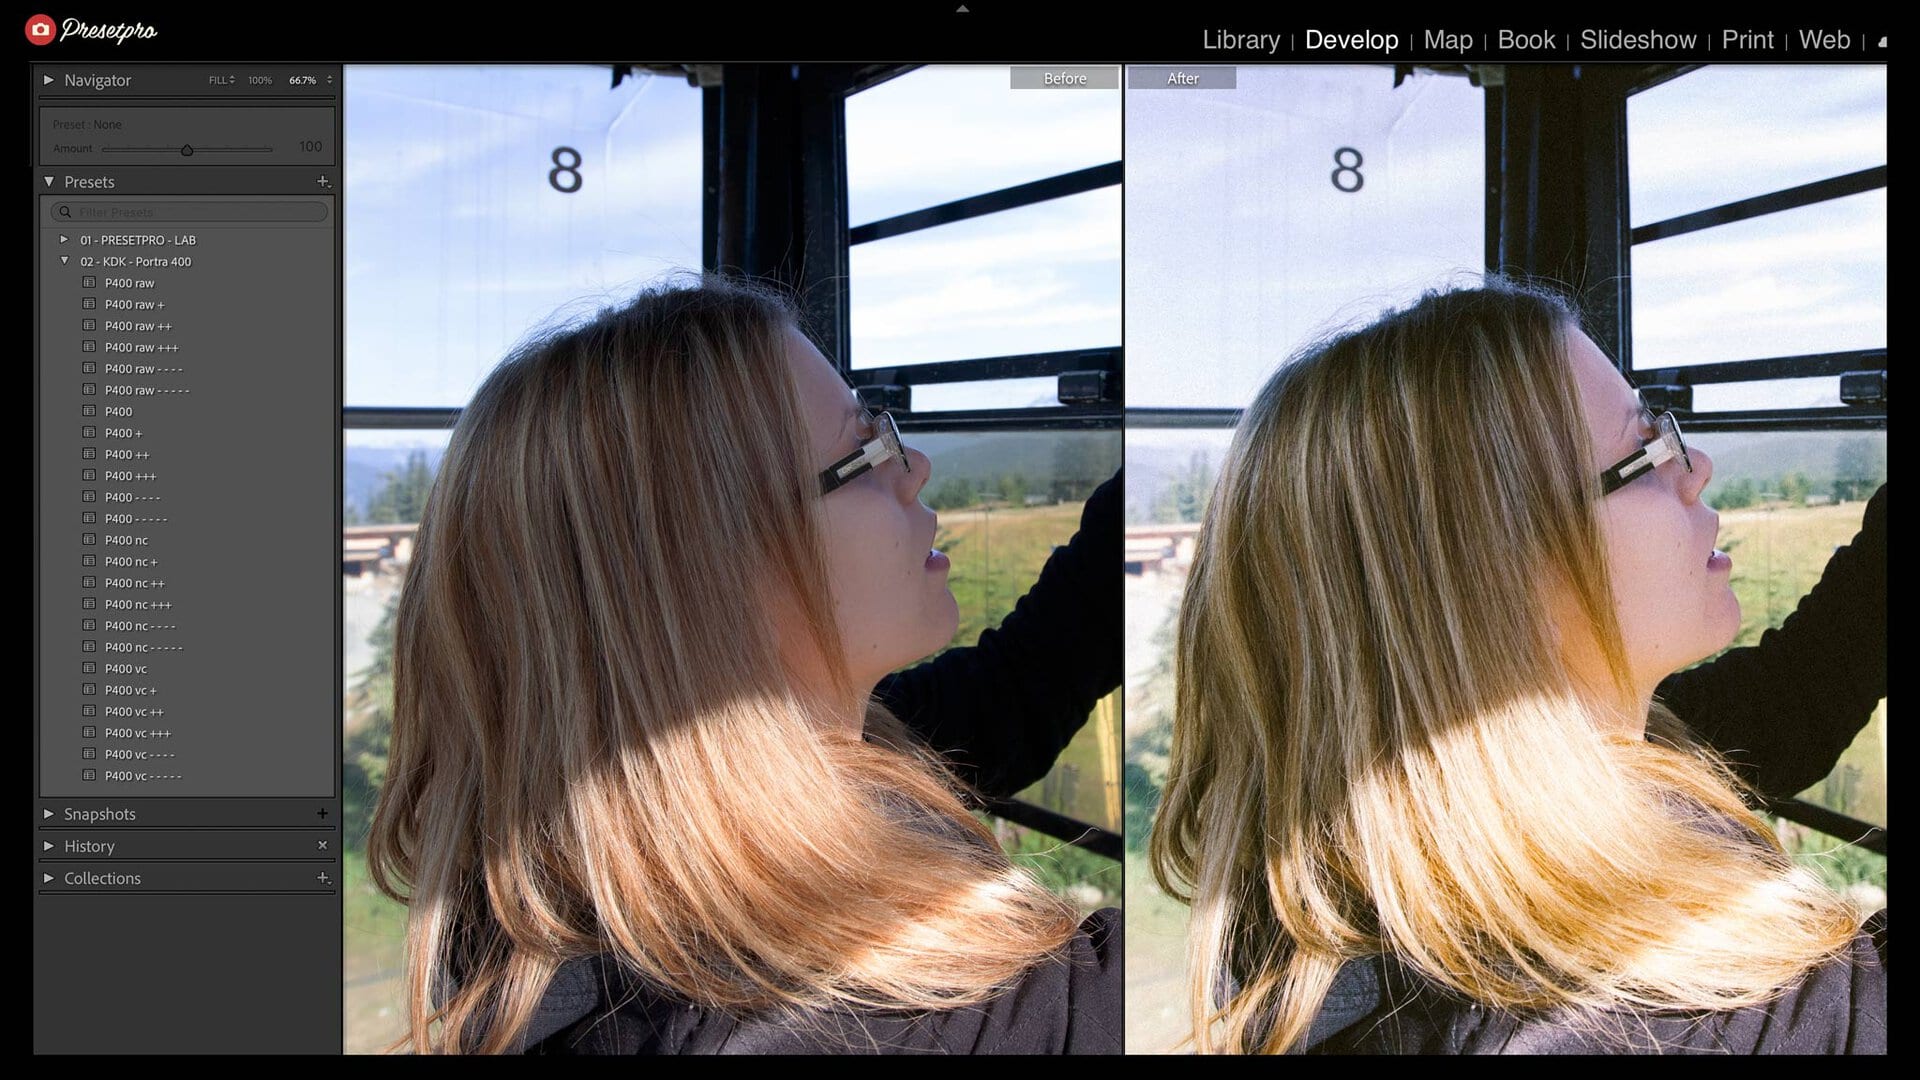
First, a profile works at the exact point where RAW data becomes color. The rendering itself is designed, highlight rolloff included, instead of starting from a neutral rendering and bending it afterward with broad tools. That is why skin tones glide smoothly from light into shadow, and highlights fade out gently the way film responds.
Second, nothing underneath is fighting the look. Most presets are like repainting a wall that was the wrong color. The old color is still under there, and it muddies everything. A profile mixes the color right the first time, so there is no wrong layer underneath.
Third, a profile changes only the colors the film look calls for. Slider tools grab wide bands of color; warm up skin with sliders and the whole photo drifts orange. A well-built profile shifts the specific colors the film moved and leaves everything else honest. Skin goes golden, skies stay true.
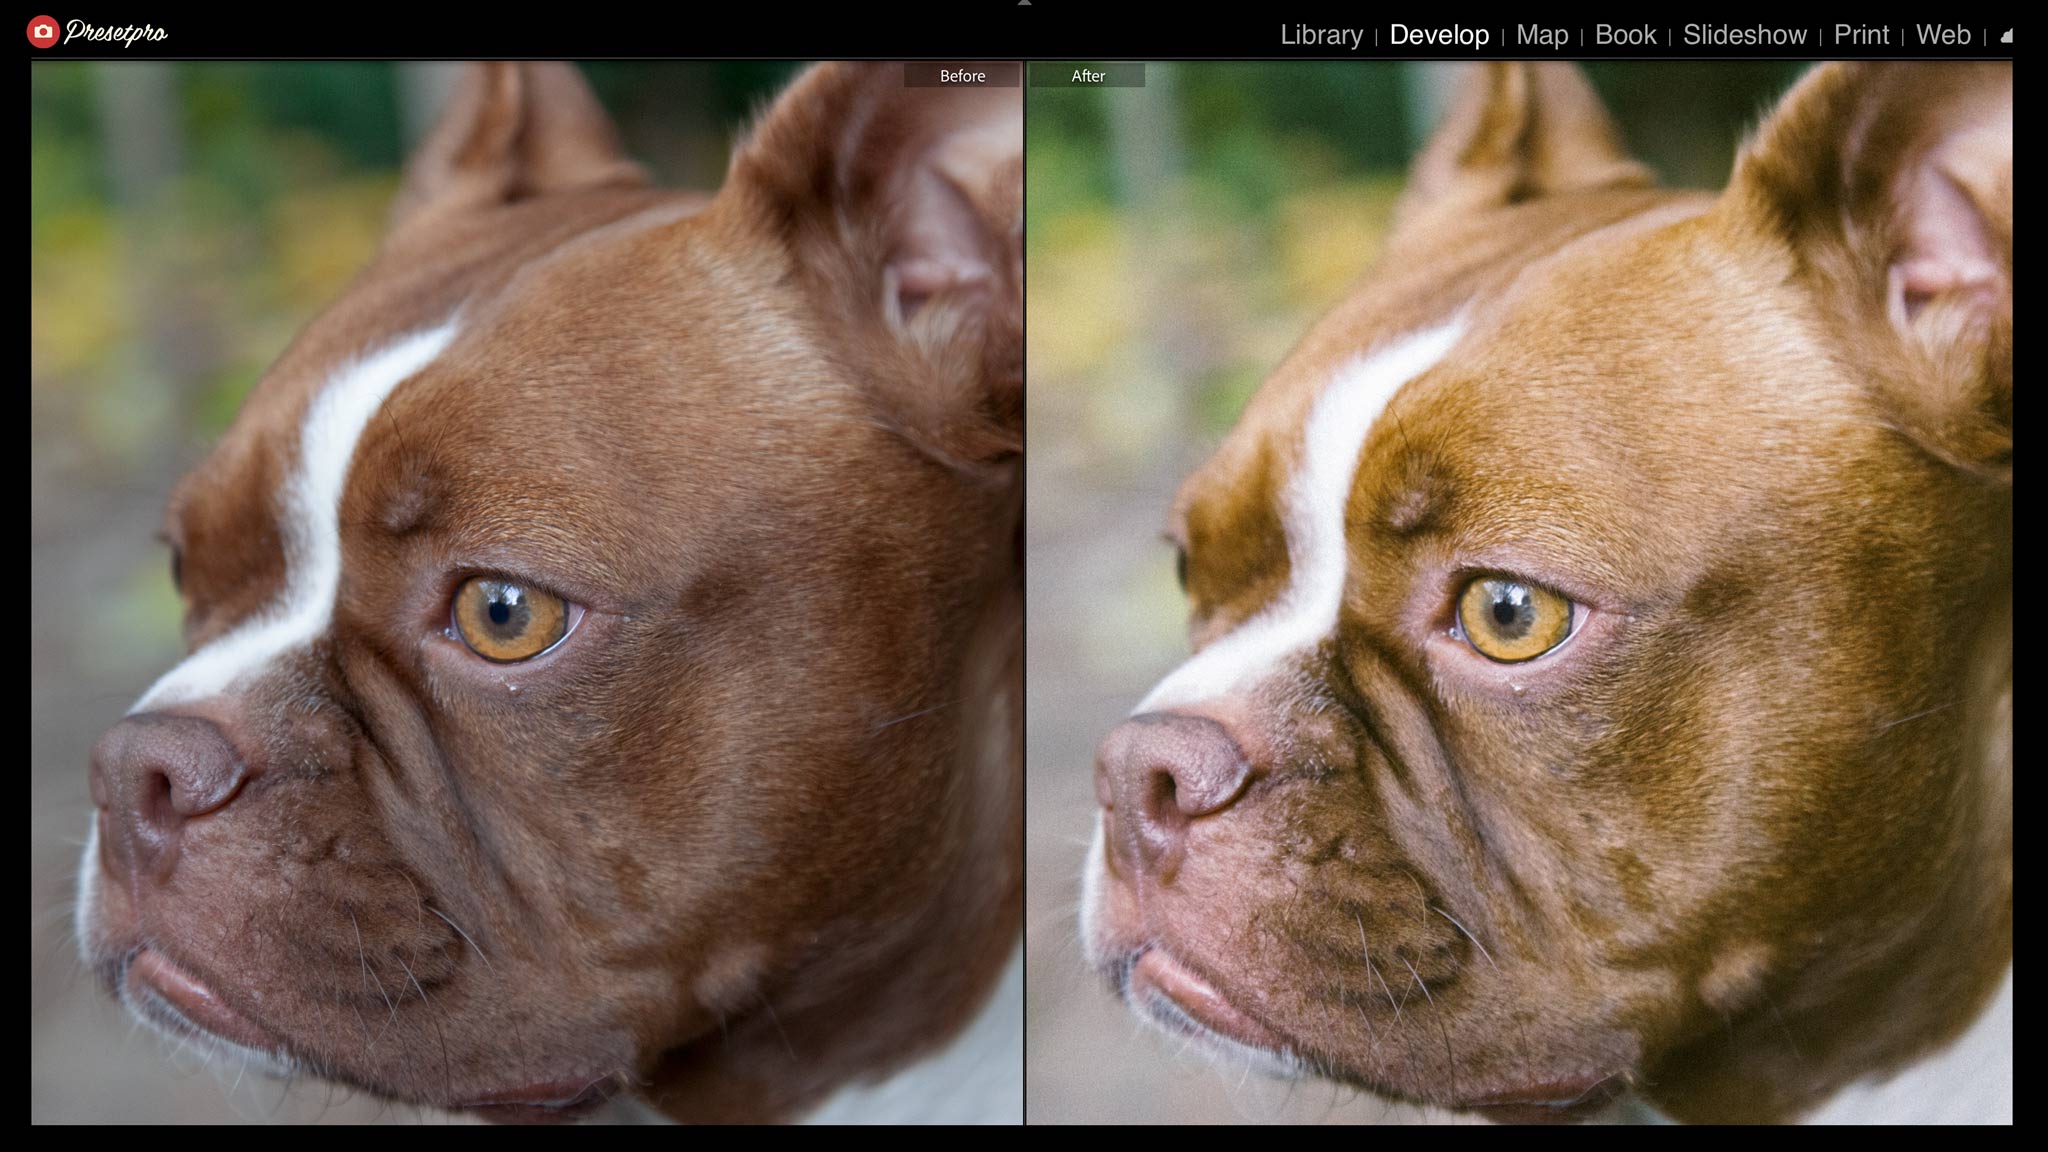
The RAW Series: film emulation built into camera profiles
The RAW Series is Presetpro’s film emulation line built on exactly this idea. Instead of one recipe applied across every camera, every supported camera model gets its own DCP camera profile, and each is matched against the same master rendering before it ships.
The first release, RAW Series P400, is inspired by Kodak Portra 400, the most loved color negative film ever made. (New to film stocks? Start with the complete film emulation guide and the Portra 400 deep dive.)
What that looks like in practice:
- Camera profiles individually built for 759 camera models: 2,277 profiles across ten brands, including Canon, Nikon, Sony, and Fujifilm, all matched to one master P400 rendering.
- 24 looks, each with a matching preset. Six raw looks render through the profile built for your exact camera: fixed, designed renderings with the sliders left at zero. Eighteen universal looks work on every photo, including JPEGs, with an Amount slider from 0 to 200.
- The 64-tool PRESETPRO LAB: film fades, grain by ISO, tone moves, vignettes, and finishing tools that stack on any look. One habit worth learning: apply the preset first, then the profile, because a preset always resets the profile to its own bundled choice.
The raw looks are a Lightroom Classic feature on Mac and PC, because the cloud version of Lightroom does not support third-party camera profiles. The download includes a dedicated Cloud Edition with the eighteen universal looks and the complete LAB for the cloud app.
So the look is the look, on any supported camera. Your camera does not get a copy of the look. It gets its own edition of it.
Who profile-based film emulation is for
You will feel the difference most if any of these sound familiar:
- You shoot two camera bodies, or shoot alongside a second photographer, and your film preset renders differently on each. Profile-based looks land both cameras on the same rendering.
- You love a film look but hate that adjusting exposure or white balance afterward seems to bend the look. With the look in the profile, your sliders start at zero and edits sit cleanly on top.
- You shoot skin. Portraits, weddings, family work. The smooth skin gradation and gentle highlight rolloff of profile-level rendering is most visible exactly where presets struggle most.
- You have been burned by presets that looked nothing like the demo on your camera. The per-camera profile is the fix for the reason that happened.
DCP camera profiles: frequently asked questions
What is a DCP file?
DCP stands for DNG Camera Profile, the camera profile format from Adobe’s Digital Negative (DNG) specification, used for camera profiles in Lightroom and Camera Raw. It tells the software how to interpret a specific camera’s RAW data into color.
Do DCP profiles work in the cloud version of Lightroom?
No. The cloud version of Lightroom does not support third-party camera profiles, so DCP-based looks are a Lightroom Classic feature. The RAW Series includes a dedicated Cloud Edition with its universal looks and the full LAB for the cloud app.
What is the difference between a profile and a preset?
A preset is a saved recipe of slider settings applied on top of whatever the current profile renders. A profile works underneath the sliders and decides how the RAW file becomes color in the first place. Presets edit the photo. Profiles develop it.
Do camera profiles replace my camera’s own color science?
Yes, and that is the point. Lightroom uses one camera profile at a time, so a DCP look takes the place of the manufacturer’s color rendering. Your sensor’s character stays; the color interpretation becomes the film look, identical across every supported camera.
Do profile-based looks work on JPEG files?
The raw looks need a RAW file, because they interpret sensor data. The RAW Series universal looks work on every photo, including JPEGs, with an Amount slider from 0 to 200.
How do I install DCP camera profiles in Lightroom Classic?
From the Develop module in Lightroom Classic, choose File, then Import Develop Profiles and Presets, select the downloaded zip, and restart Lightroom. Full walkthrough with video: how to install the RAW Series in Lightroom Classic.
Ready to try it? Get the RAW Series P400, inspired by Kodak Portra 400, or browse the full RAW Series collection.
Kodak and Portra are trademarks of their respective holders. Presetpro is not affiliated with or endorsed by Kodak. Adobe, Adobe Lightroom, and Adobe Camera Raw are trademarks of Adobe Inc.