How to Create Authentic Light Leaks in Photoshop: The Ultimate Guide
Light leaks were originally considered a defect in analog photography, a result of light “leaking” into the camera body and prematurely exposing the film. In the digital age, these artifacts are a coveted aesthetic, adding a sense of analog halation, warmth, and organic texture to otherwise sterile digital files. In this guide, we will walk through a professional method for generating non-destructive light leaks using Gradient Adjustment Layers and Screen Blending Mode logic.
Quick Reference: Light Leak Styles
| Leak Type | Visual Characteristic | Primary Use Case |
|---|---|---|
| Edge Burn | Deep red/orange at borders | Nostalgic film looks |
| Optical Flare | Soft, circular shifts | Sun-drenched lifestyle |
| Muted Haze | Low-contrast pastel bleeds | Wedding & Fine Art |
- Best For: Editorial portraits, travel journals, and retro-themed branding.
- Style: Organic, High-Atmosphere, Analog-inspired.
- Key Tools: Gradient Fill, Clipping Masks, Screen Blend Mode.
Step-by-Step: Generating a Professional Light Leak
Step 1: Initialize the Base Gradient
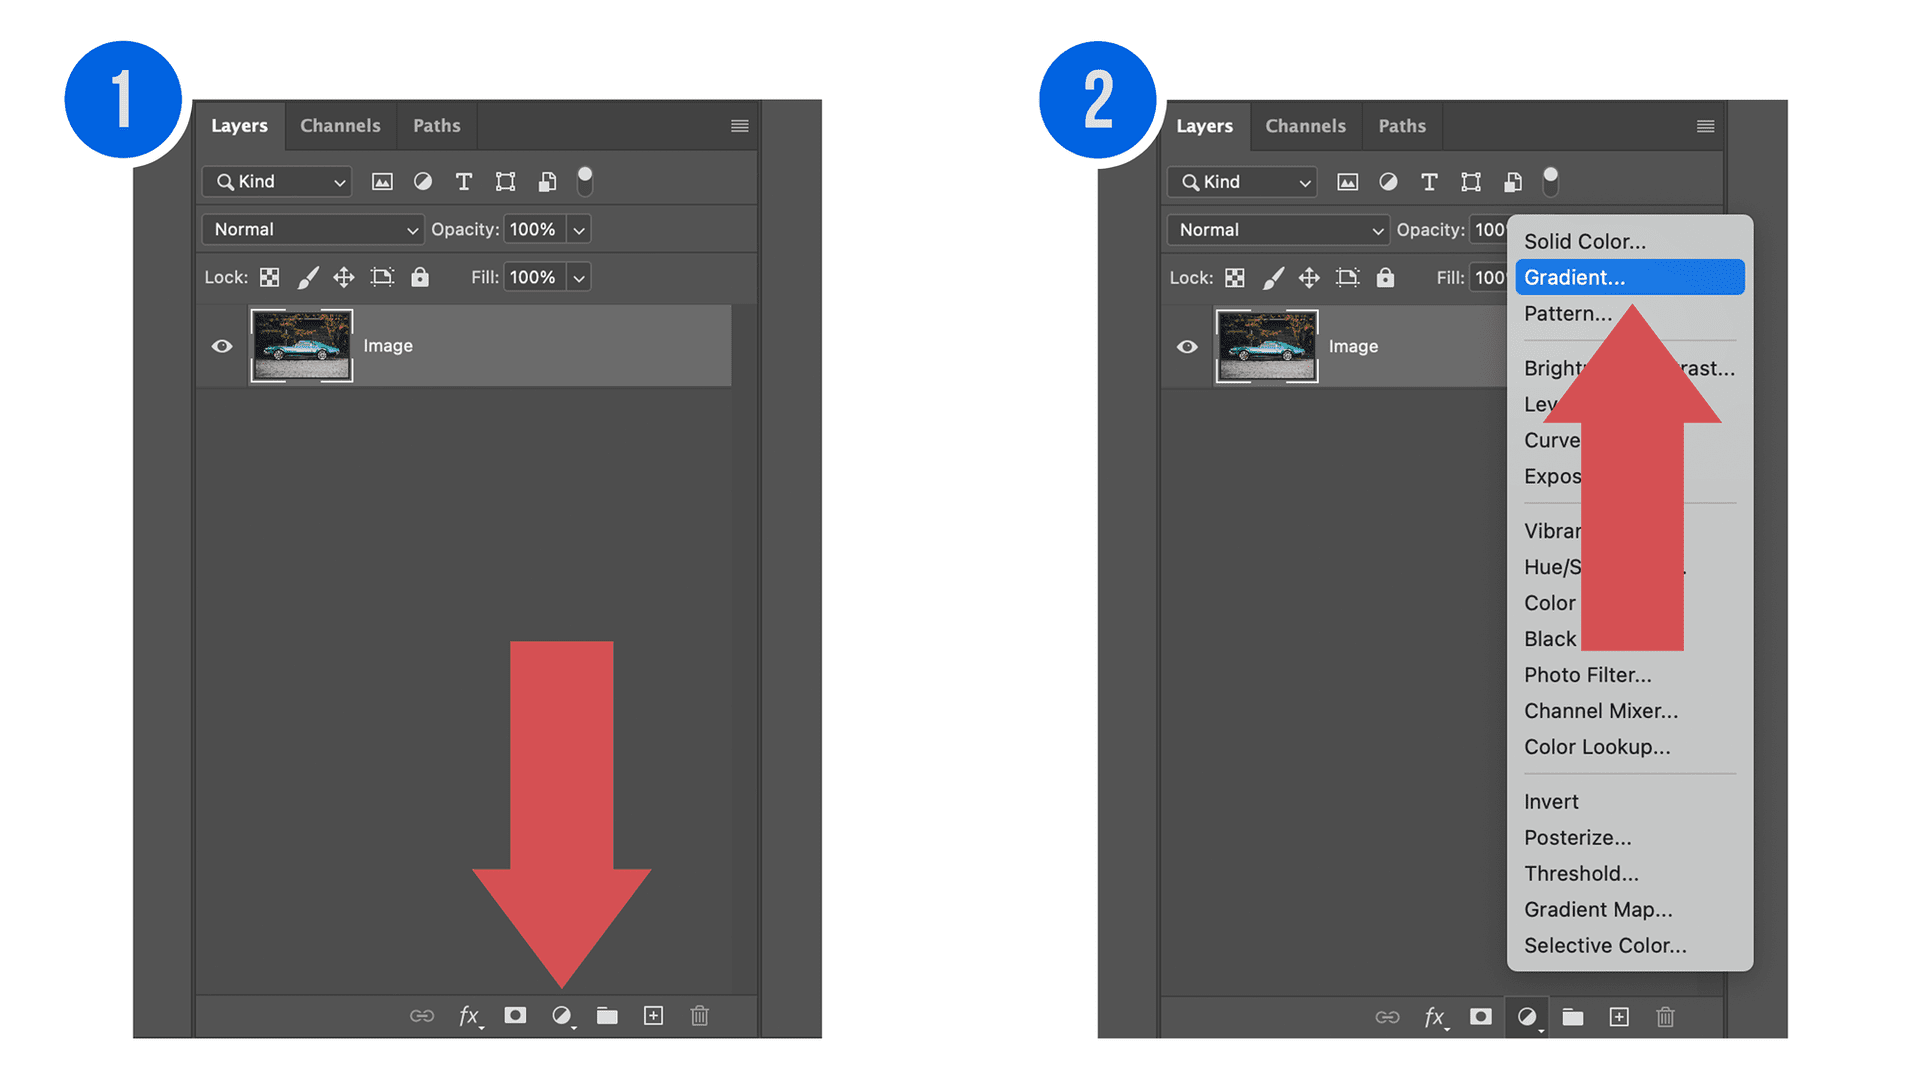
Open Photoshop and navigate to the bottom of the Layers Panel. Select Create a new fill or adjustment layer and choose Gradient. Set your initial angle to 0° to create a vertical light bleed that mimics the direction of film traveling through a 35mm camera.
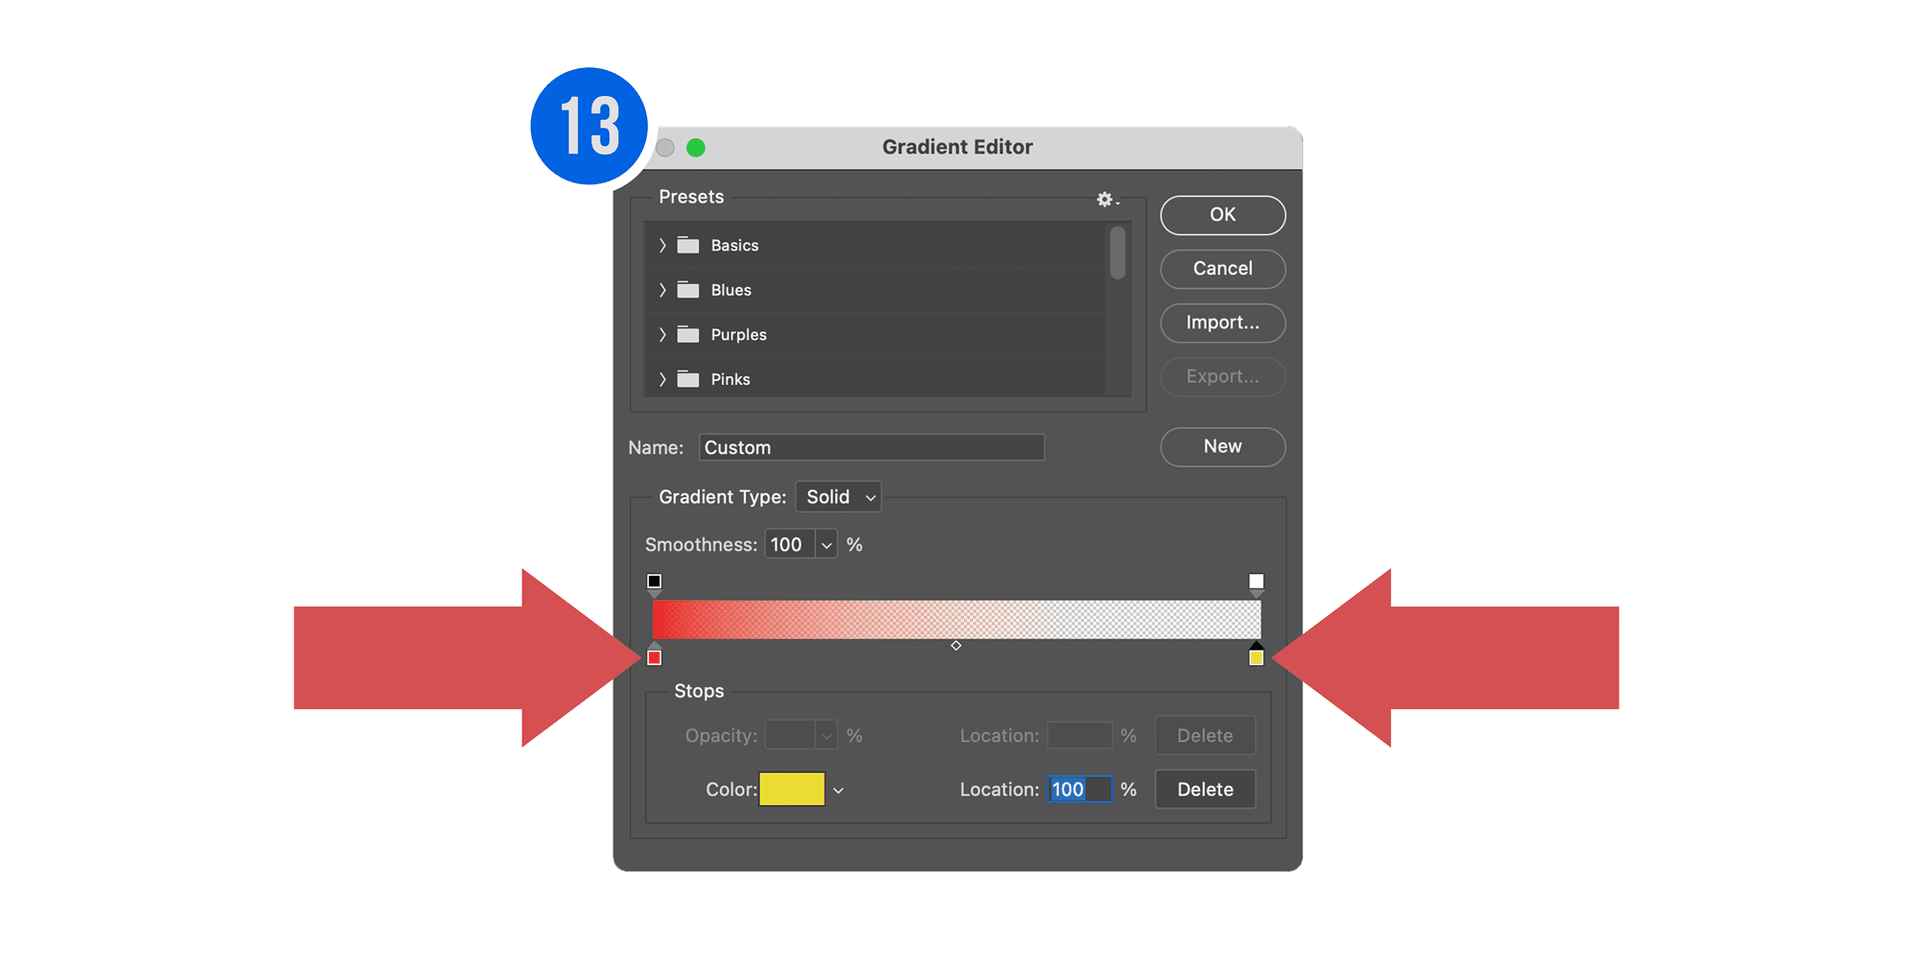
Step 2: Configure the Gradient Editor
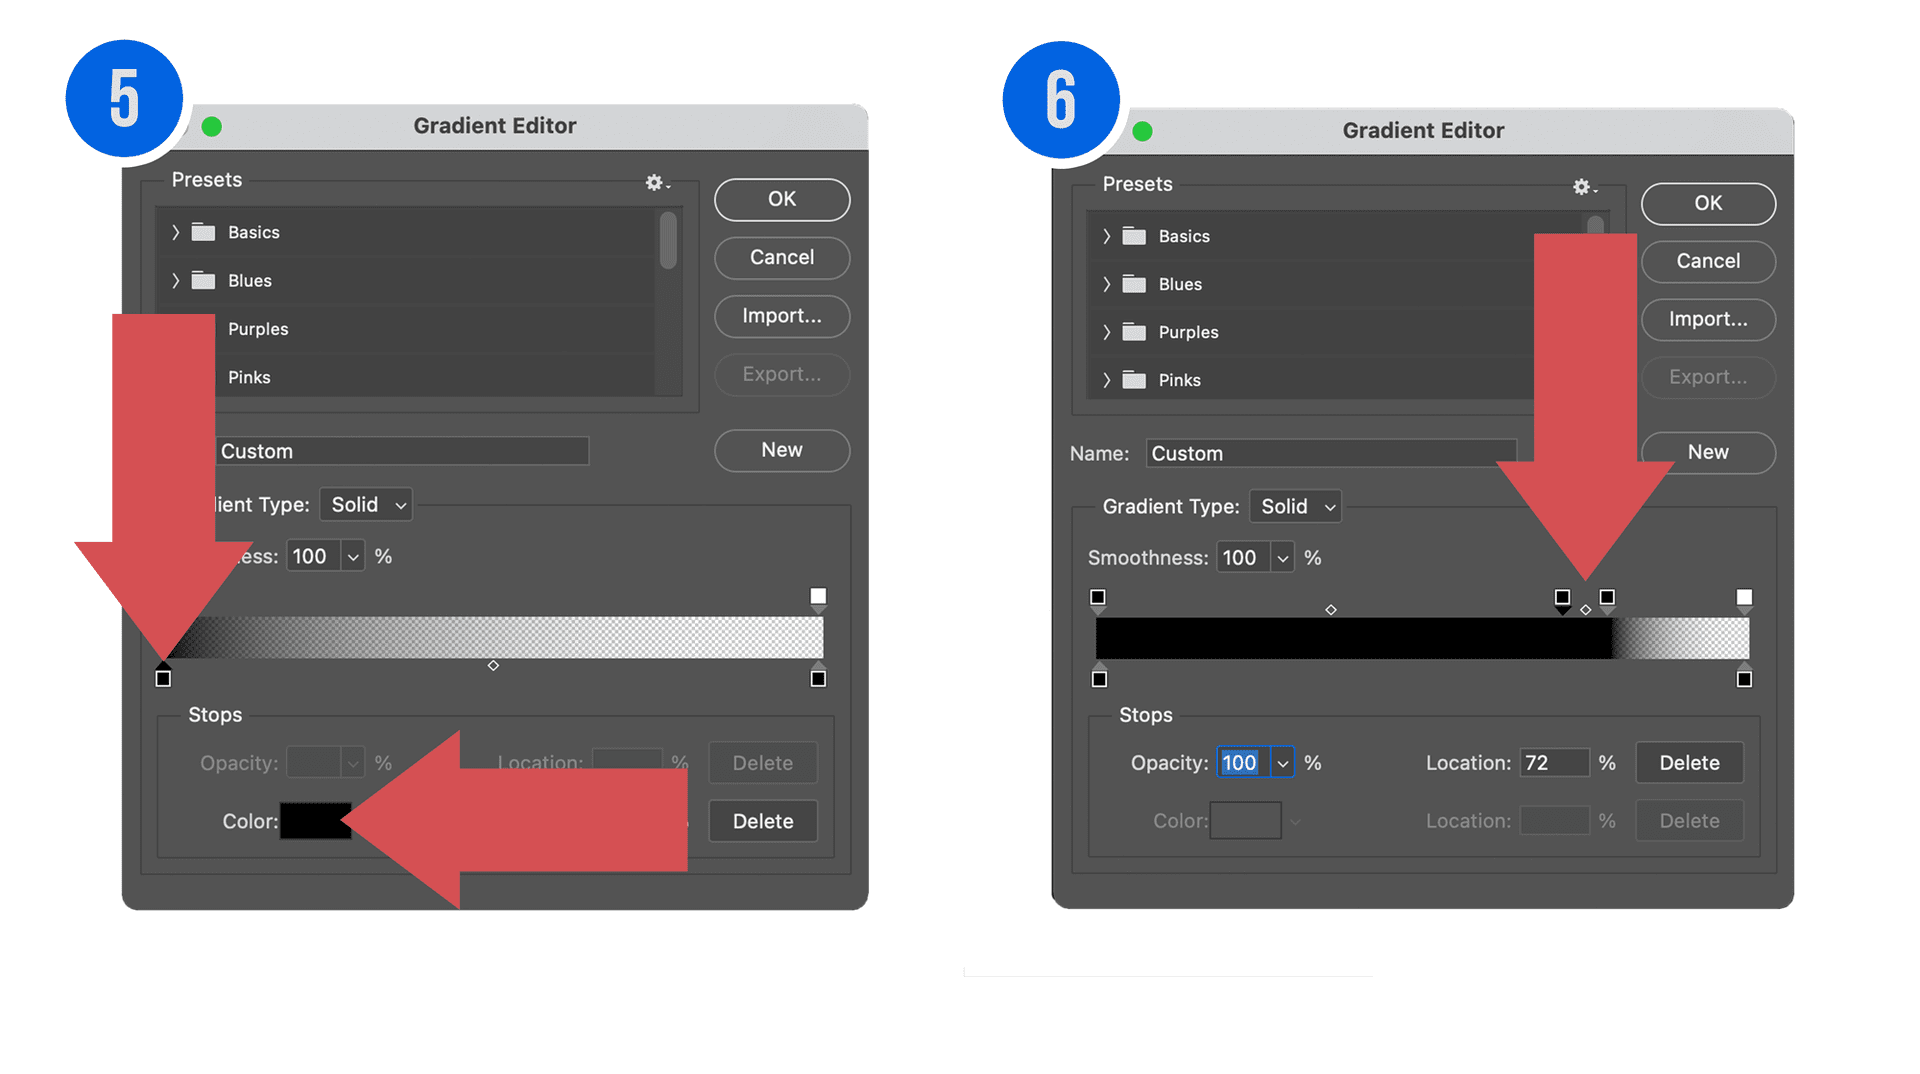
Click the gradient preview bar to open the Gradient Editor. To ensure the leak only affects specific areas, set the Bottom Stops (Color) to black and the Top Left Stop (Opacity) to 0%. This creates a smooth transition from your image to the color bleed.
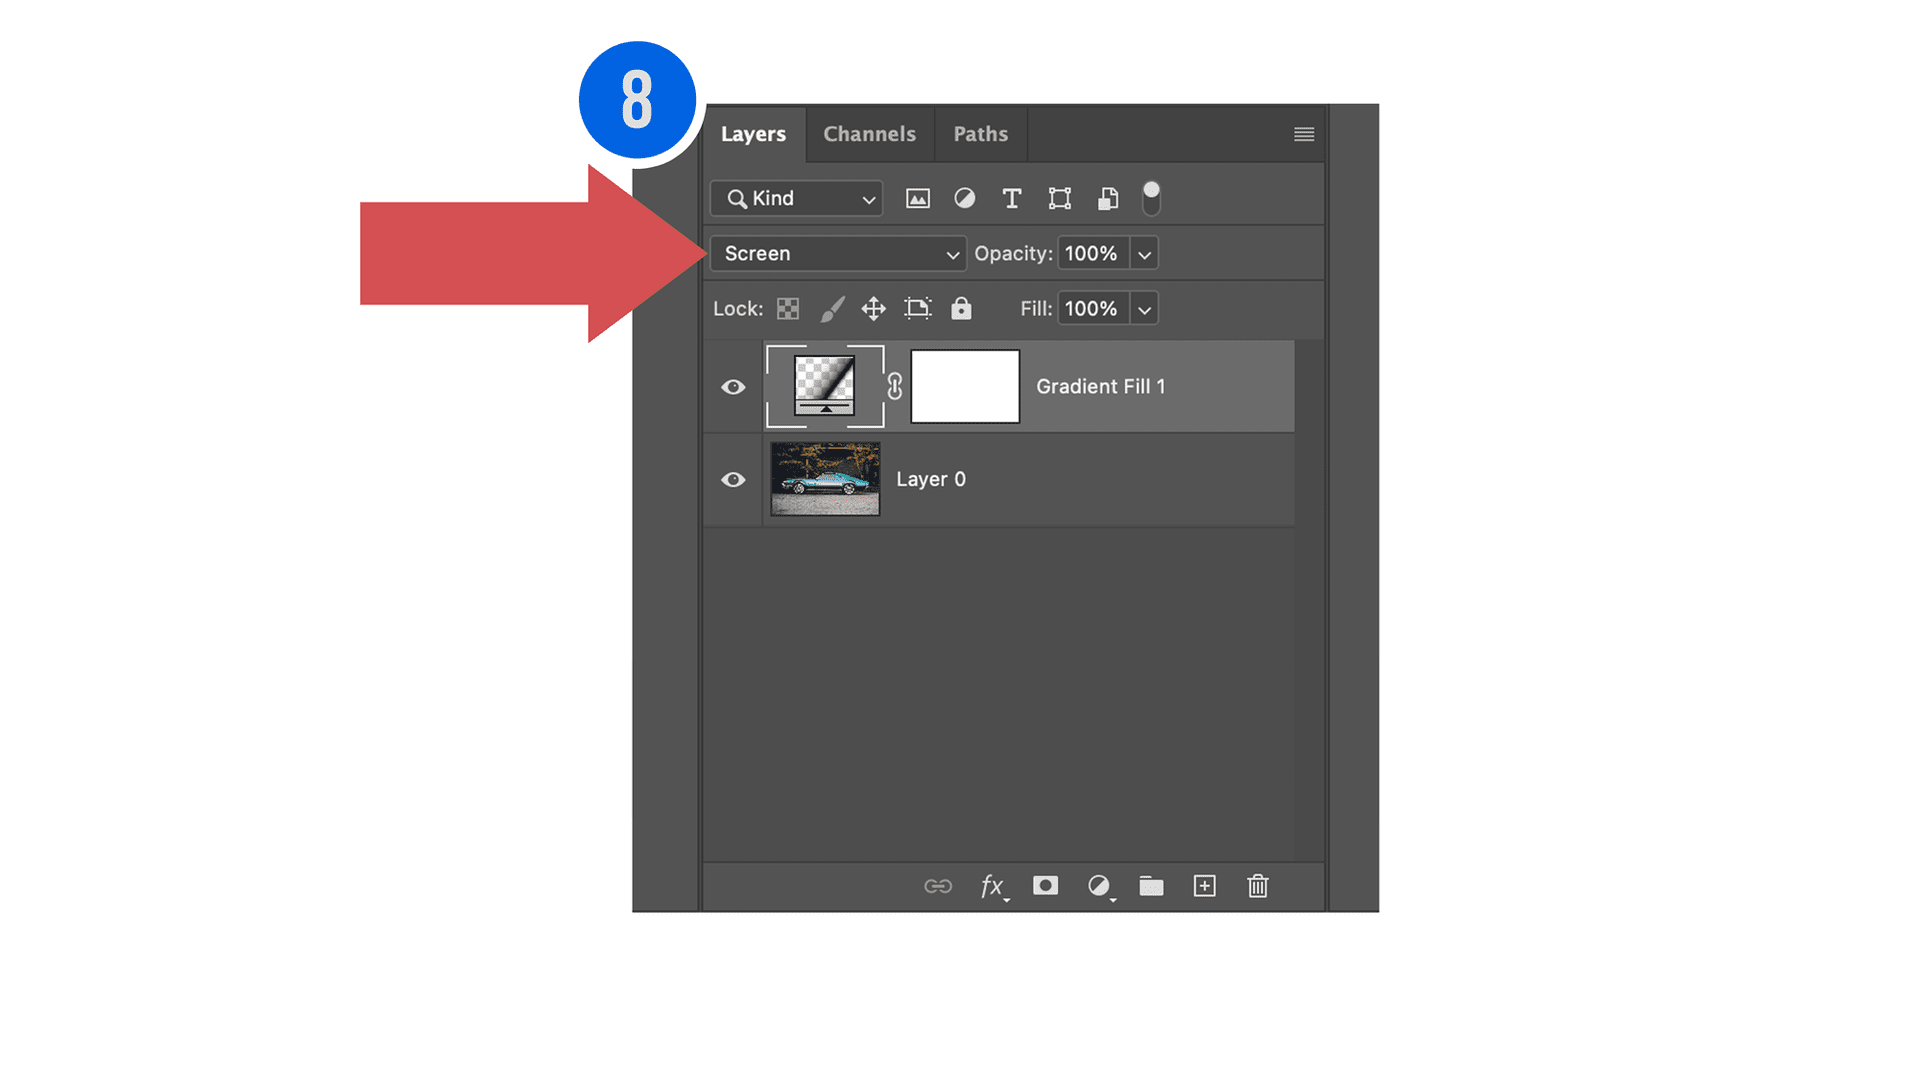
Step 3: Apply Blending Mode Logic
Change the Layer Blending Mode to Screen. The Screen blend mode looks at the color information in each channel and multiplies the inverse of the colors. Because black is “0” in this mode, it becomes transparent, allowing only the bright “light” pixels to affect the image.
Step 4: Create the Color Identity
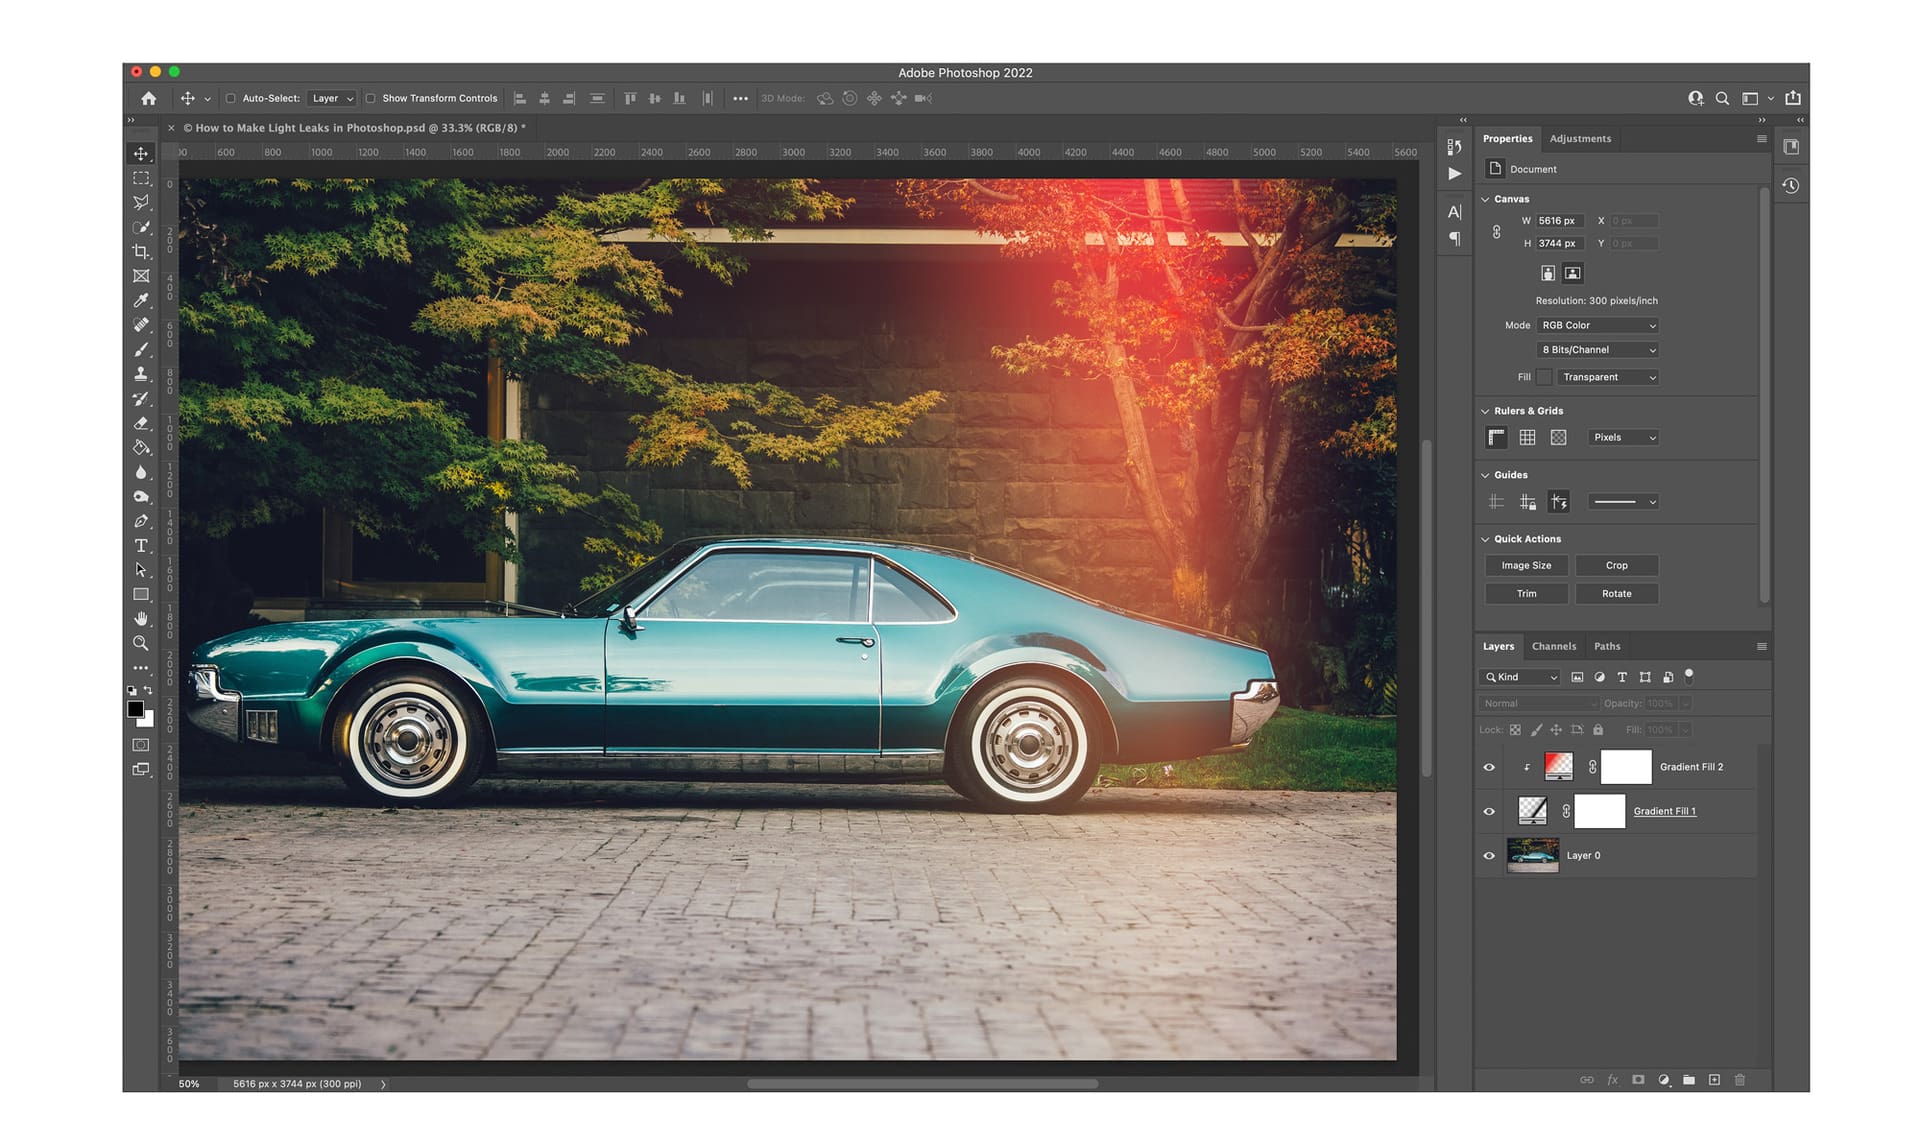
Repeat the process with a second Gradient layer, setting the angle to -130°. In the Gradient Editor, choose warm hues like deep red and golden yellow to simulate light passing through the back of a film camera’s light seal.
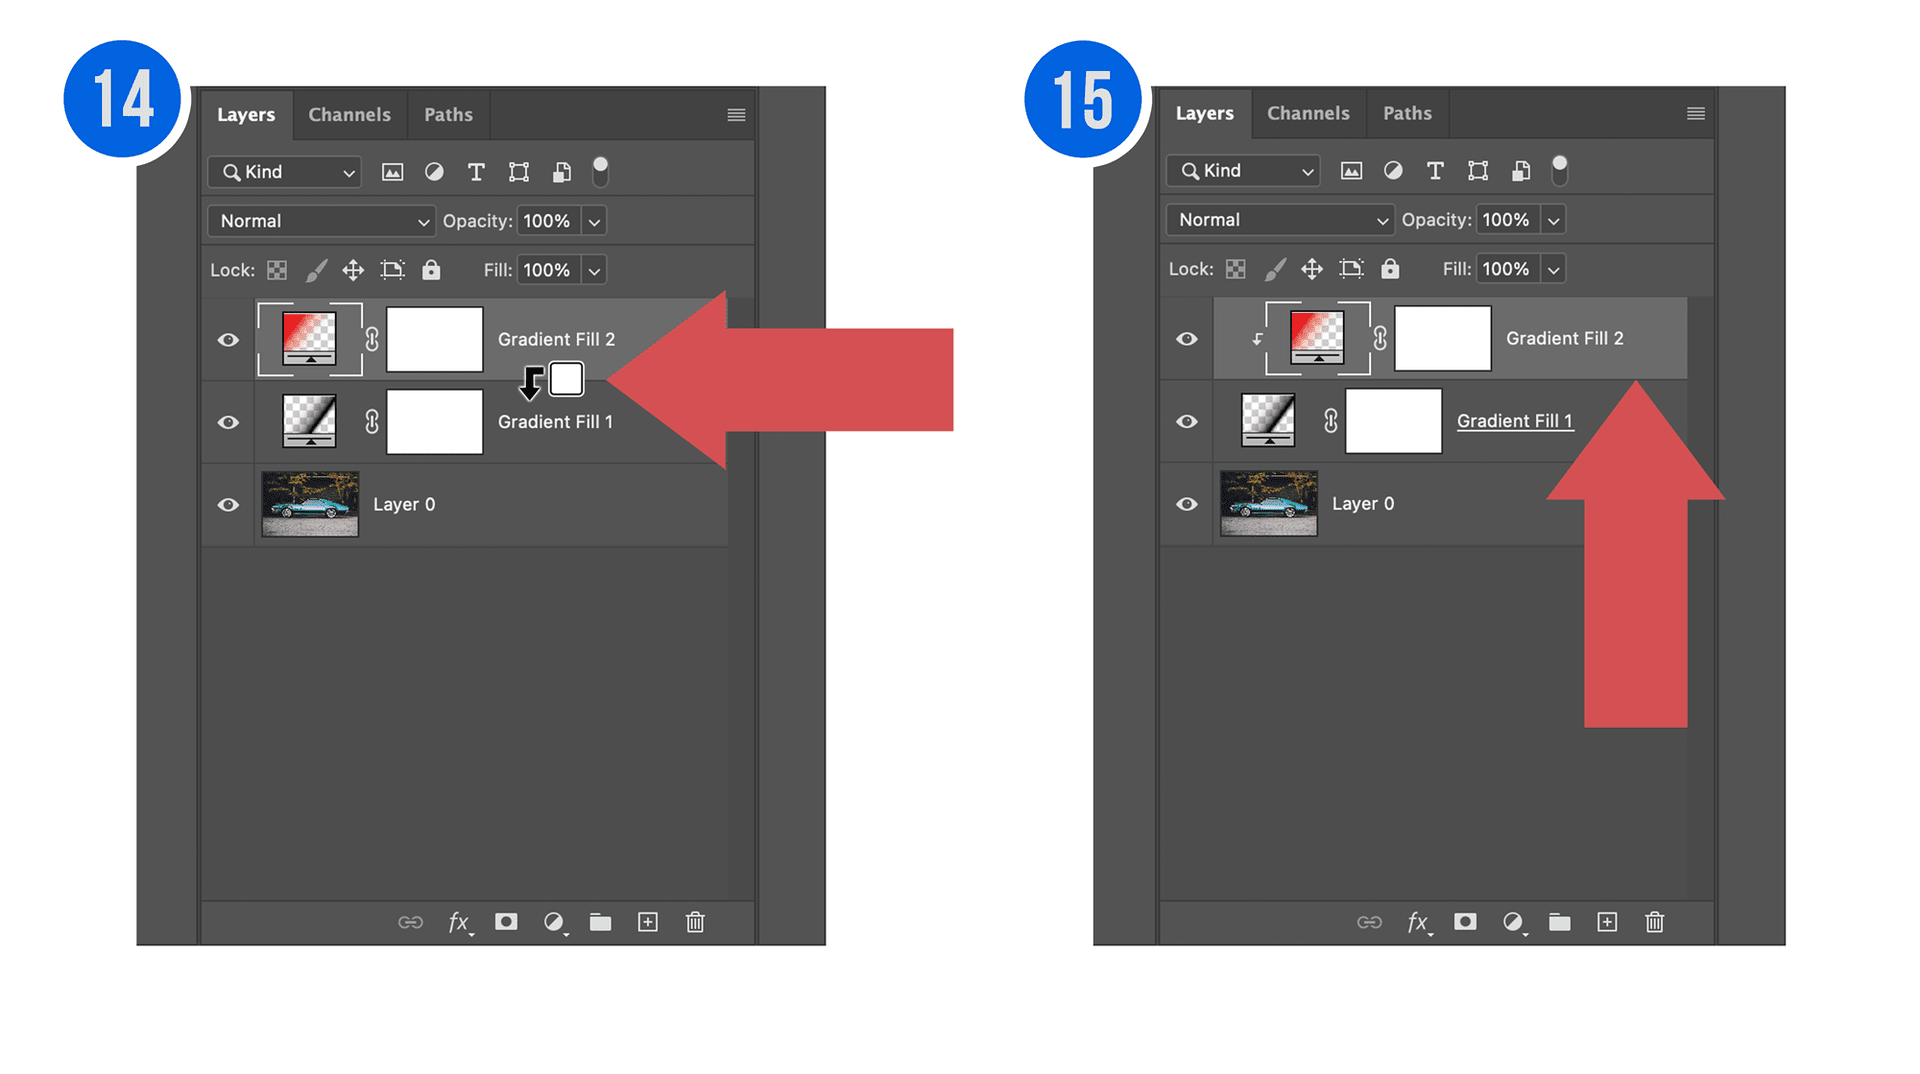
Step 5: Merge via Clipping Mask
To keep the gradients working as a single entity, hold Option (Mac) or Alt (PC) and click between the two layers to create a Clipping Mask. This ensures the secondary color only appears within the boundaries of the primary leak.
Conclusion
By using these non-destructive adjustment layers, you maintain the Linear Response of your original file while adding significant creative flair. You are now ready to export your stylized images or save this workflow as a Photoshop Action for future use. For more tips on film aesthetics, check out our Professional Film Emulation collection.
Do you want to take your photography skills to the next level? With The Creative Flow, you’ll have access to more than 1200 Beautiful Lightroom Presets, 1200 Lightroom Profiles, and 200 brushes that will spark your creativity and bring your photos to the next level! Designed for the photographer who wants the ultimate workflow and premium Lightroom collection. The Creative Flow is your own personal preset “toolbox” where you can swap out a variety of different looks with a few simple clicks. Whether you’re a professional or just starting out, this all-in-one collection was created for you! You won't find another product like this anywhere else online - trust us when we say it's worth every penny! Click here right now and get started with The Creative Flow today!
The Creative Flow | Presetpro.com


Lightroom Presets

Lightroom Presets
Lightroom Presets
Lightroom Presets
Lightroom Presets

Lightroom Presets

Lightroom Presets
Lightroom Presets
The film names above are the brands and trademarks of their respective holders. None of the film producers listed endorse or sponsor this film emulation collection or any other content. The film producers are not affiliated with Presetpro.com and all trademarks and copyrights are the exclusive property of their respective owners. Adobe®, Photoshop®, Adobe® Lightroom® are either registered trademarks or trademarks of Adobe Systems Incorporated in the United States and/or other countries.