

To get the Kodak Portra 400 film look in Lightroom, apply a Portra 400 inspired preset for the character, then dial the matching profile’s Amount slider until the warmth sits right. The Presetpro library includes nine Portra 400 inspired preset versions with matching profiles, color checked against real film, plus an FE edition with a moody Chroma fade built in. Here’s what the look does, where it came from, and how to use it.
Key Takeaways
| The film | Kodak’s professional portrait workhorse, the most-loved color negative film shooting today |
| The look | Warm, flattering skin, smooth highlight rolloff, fine grain, quietly rich color |
| In the library | Portra 400 inspired presets in nine versions (base, +, ++, +++, ++++, plus film, cool, warm, and boost) with matching profiles, and an FE Chroma edition |
| Best for | Weddings, portraits, editorial, lifestyle, anywhere people are in the frame |
| Get it | The Film Emulation Collection or The Creative Flow |
Why Photographers Still Chase Portra 400
Kodak built the Portra line in 1998 for one job, portraits, and named it accordingly. The Portra 400 shooters swear by today arrived in 2010, borrowing grain technology from Kodak’s motion picture films, and it quietly became the default professional color negative of the film revival. Ask a wedding film shooter what’s in their bag; you already know the answer.
The reputation rests on two things. First, skin: Portra renders skin tones warm, natural, and forgiving in a way digital sensors simply don’t attempt. Second, latitude: the film shrugs off exposure mistakes, and photographers routinely overexpose it a full stop just for the extra glow. Highlights don’t clip; they melt.
What the Look Actually Does
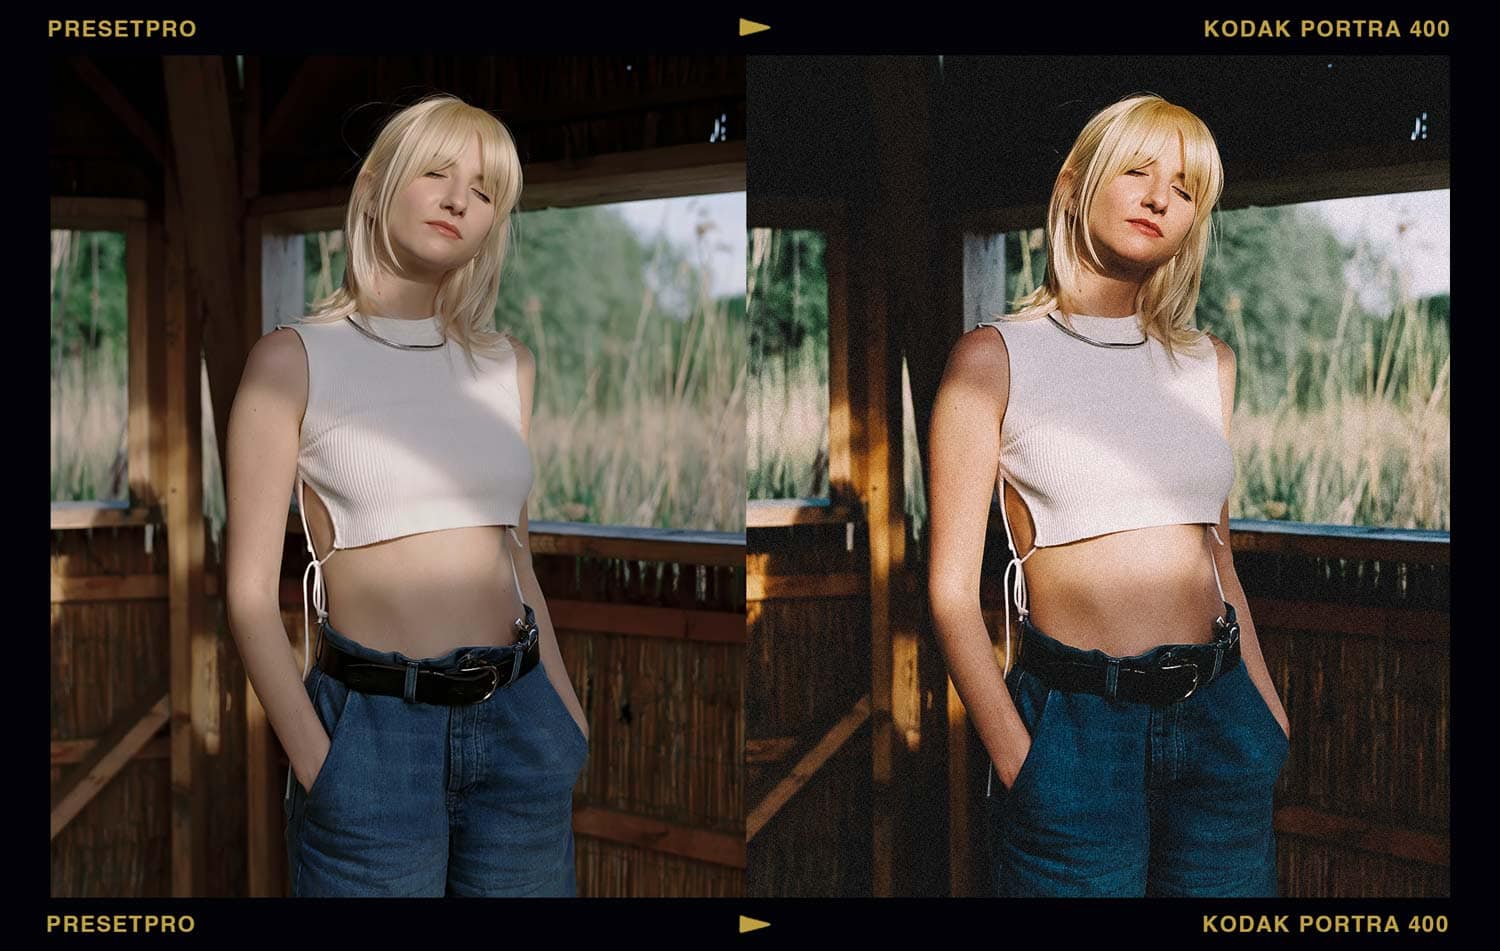
Drop the Portra 400 inspired preset on a digital portrait and watch three things happen. Skin picks up a golden warmth without tipping orange. Highlights stop being white walls and start rolling off like light through a curtain. And the color settles, still rich, but relaxed, like the photo has stopped trying so hard. Add the fine, even grain and that clinical digital sharpness melts into something you’d swear came off a scanner.
Can You Tell It’s Digital?
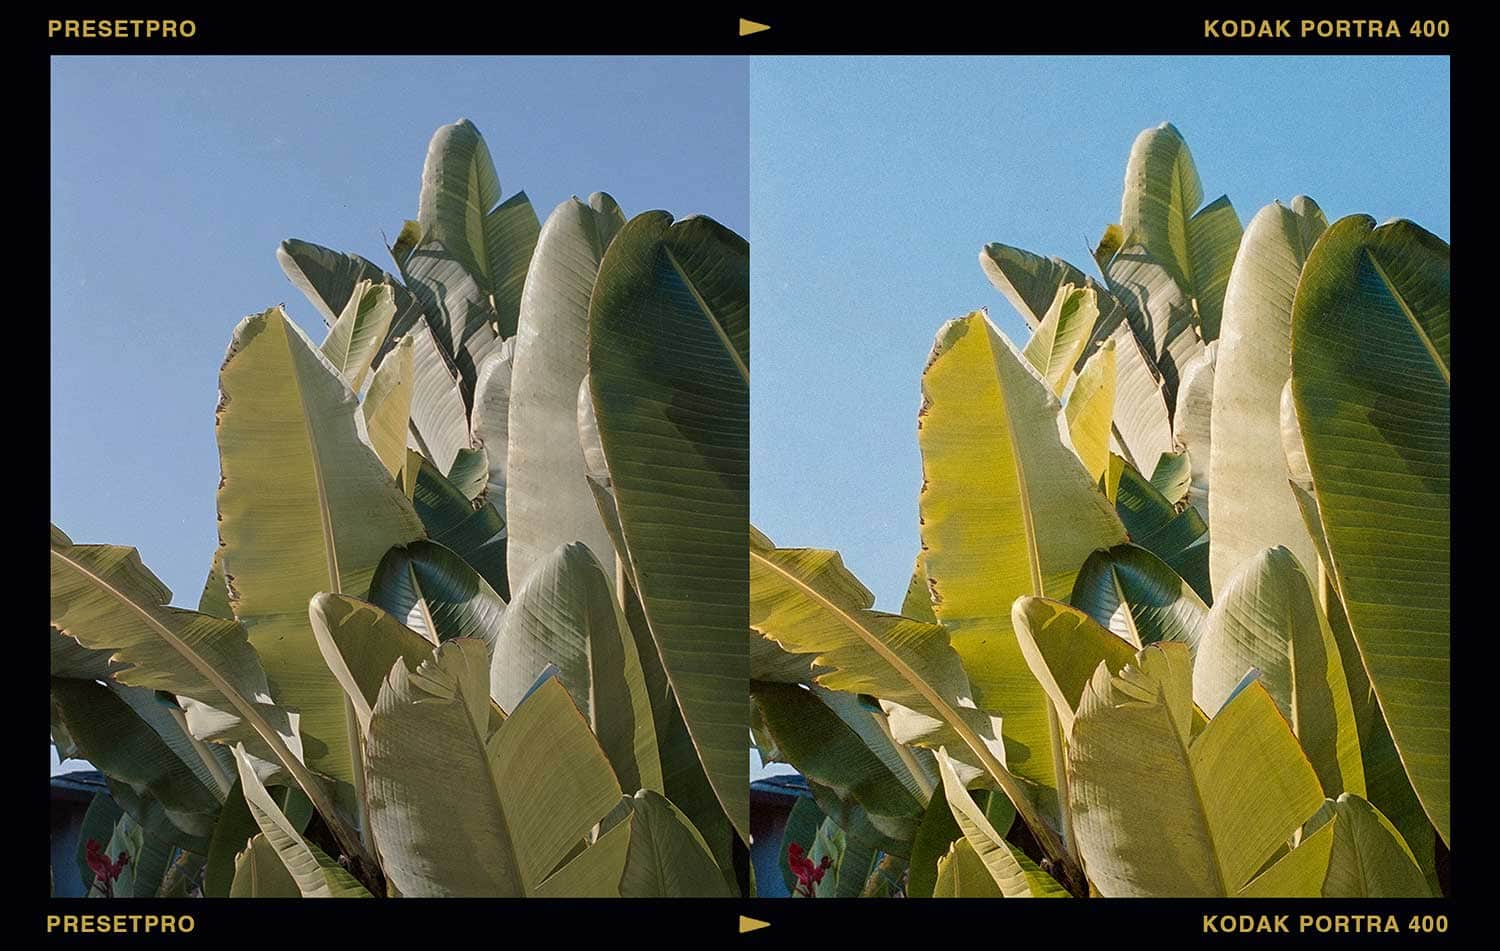
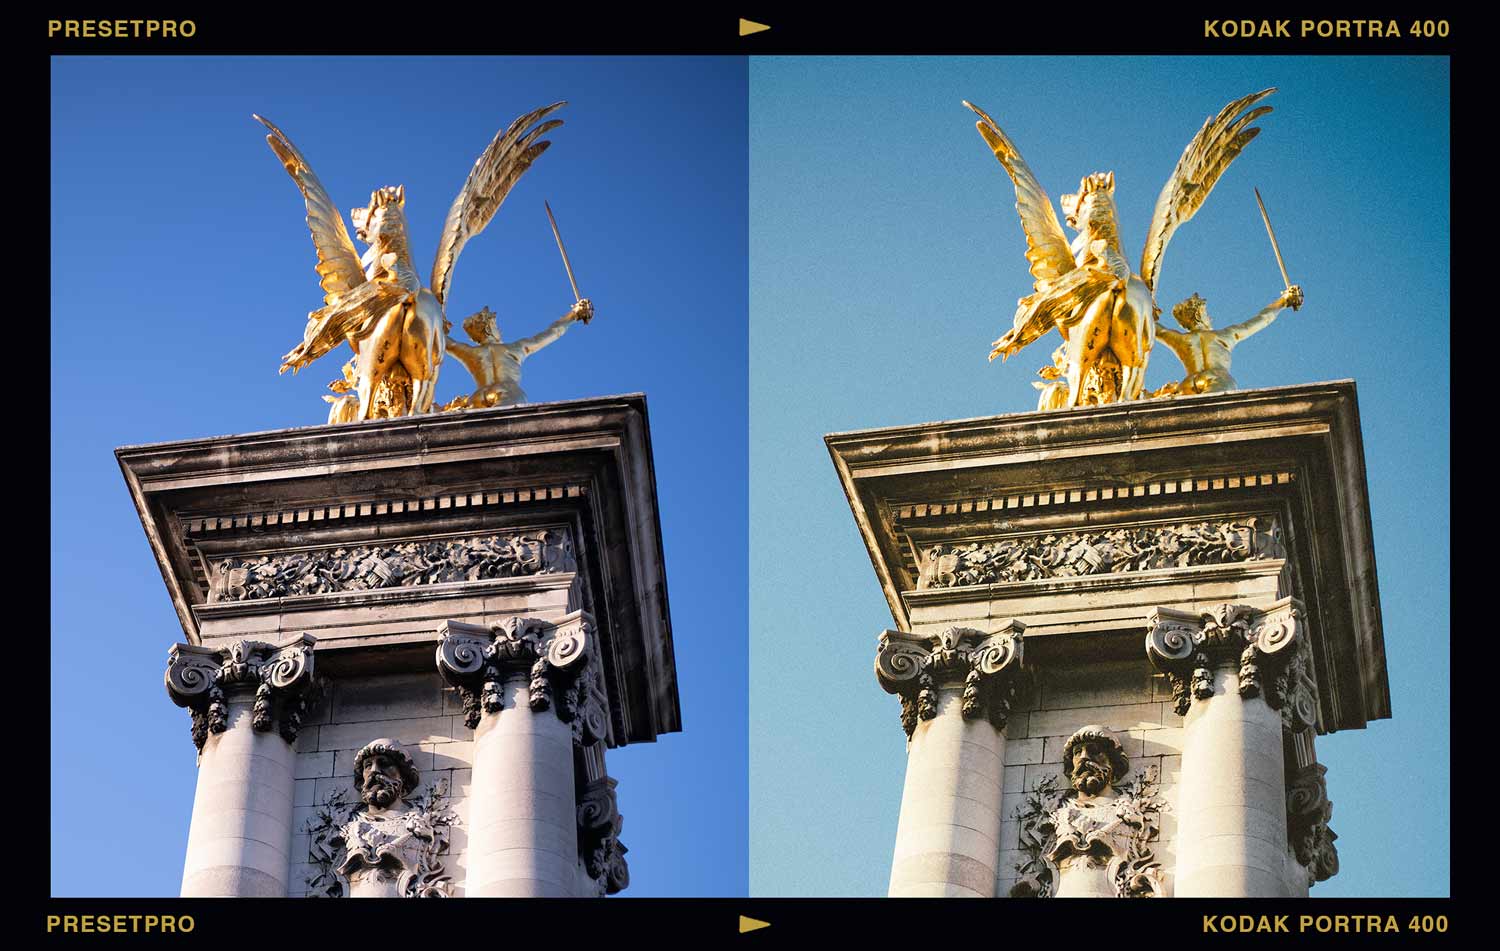
Every frame below is a digital file. The “after” is one click of the Portra 400 inspired preset; no manual grading.

Inside the Library: Nine Versions of One Legend
The Portra 400 inspired family in the Film Emulation Collection isn’t a single preset. It’s a system.
The intensity ramp. Base gives you the honest stock. The + through ++++ versions step the strength up in stages, so you pick your dose instead of wrestling sliders.

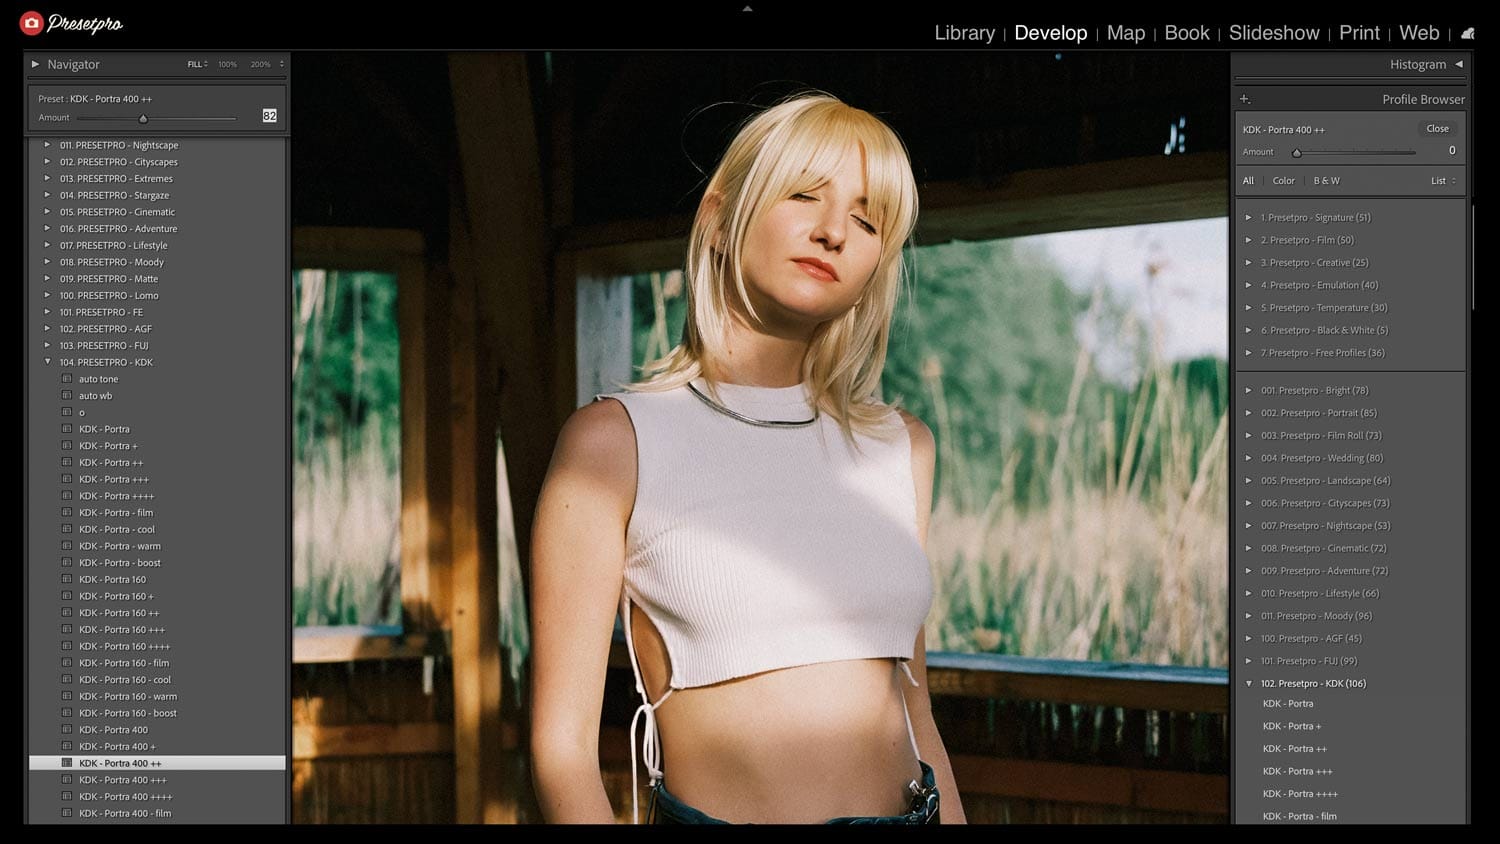
The flavors. + film adds extra analog character, + cool and + warm shift the light, + boost brings the punch.
The matching profile. Stack it under any version and the Amount slider fine-tunes the whole look, or run the profile alone when your image already has grain and you only want Portra’s palette. One order note worth knowing: apply the preset first, then the profile. A preset always resets to its own bundled profile, so applying it after a profile choice undoes that choice.
The FE edition. The FE series version comes pre-blended with a Chroma profile, so a moody, faded film base is built in and the mood is one slider away.
Finish with Lab Tools if you want grain matched to a specific ISO: Portra 400 at a whisper or at full texture.
Try the Look Free First
The Portra Colour free Lightroom profile gives you a taste of this palette at zero cost. The Portra Color free Lightroom preset offers the same warmth in preset form. The free film emulation collection has more stocks to sample.
Portra 400’s Siblings
Where 400 glows, Portra 160 whispers: softer, finer, built for controlled light. Portra 800 turns the volume up for evenings and receptions. And if you’re weighing Kodak warmth against Fuji’s cooler elegance, we settled it (sort of) in Kodak vs Fuji Lightroom Presets. The full library lives in the complete film stock guide.
Get Portra 400 in Your Workflow
Just want film? The Film Emulation Collection includes every Portra 400 inspired version above, plus the full six-family film library, the Chroma series, and Lab Tools.
Want everything? The Creative Flow ($139) adds all 16 style collections, 1,200+ presets and profiles, and 200 brushes on top.
Portra 400 Preset FAQ
Is there a Kodak Portra 400 preset for Lightroom?
Yes. The Presetpro library includes nine Portra 400 inspired preset versions with matching profiles, plus an FE edition with a Chroma fade built in. Every look is color checked against real film.
Should I use the Portra 400 preset or the profile?
The preset is the full recipe: color, tone, grain, character. The profile is just the palette, with an Amount slider. Use both to dial strength, applying the preset first and the profile second, or use the profile alone when your image already has grain.
Portra 400 or Portra 160, which should I choose?
Portra 400 for warmth, glow, and versatility in mixed light. Portra 160 for softer contrast and finer grain in bright, controlled light. If people are in the frame and you’re not sure, start with 400.
Do these presets work with RAW and JPEG?
Yes. Every preset and profile works on RAW and JPEG in Lightroom, Lightroom Classic, and Adobe Camera Raw, on Mac and PC.
Are these official Kodak products?
No. These are digital emulations inspired by Kodak Portra 400 and color checked against real film. Presetpro is not affiliated with or endorsed by Kodak.

Lightroom Presets
Lightroom Presets
Lightroom Presets

Lightroom Presets
Lightroom Presets
Lightroom Presets
Lightroom Presets
Lightroom Presets
Kodak, Portra, and related film names are trademarks of their respective owners, used only to describe the classic look that inspired these presets. Presetpro is not affiliated with, endorsed by, or sponsored by any film manufacturer. Adobe and Lightroom are trademarks of Adobe Inc.