

How to Master Tone Curves in Lightroom: The 2026 Ultimate Guide
The Tone Curve is the most powerful tool in Adobe Lightroom Classic for controlling luminance and chromatic balance. While basic sliders affect broad regions, the Tone Curve allows for surgical precision over your image’s dynamic range. In this guide, we will break down the technical differences between Point and Parametric curves and show you how to leverage RGB color theory to create professional, cinematic edits.
Quick Reference: Tone Curve vs. Parametric Curve
| Feature | Point Curve | Parametric Curve |
|---|---|---|
| Control Type | Manual anchor points | Region-based sliders |
| Flexibility | Infinite (Custom S-Curves) | Protected transitions |
| Best For | Creative color grading (RGB) | Smooth exposure balancing |
💡 Pro-Tip: The S-Curve for Contrast
To add professional contrast without crushing your blacks, create an “S-Curve” on the Point Curve. Add a point in the Highlights and pull it up slightly, then add a point in the Shadows and pull it down. This increases local contrast while maintaining a natural linear response in the midtones.
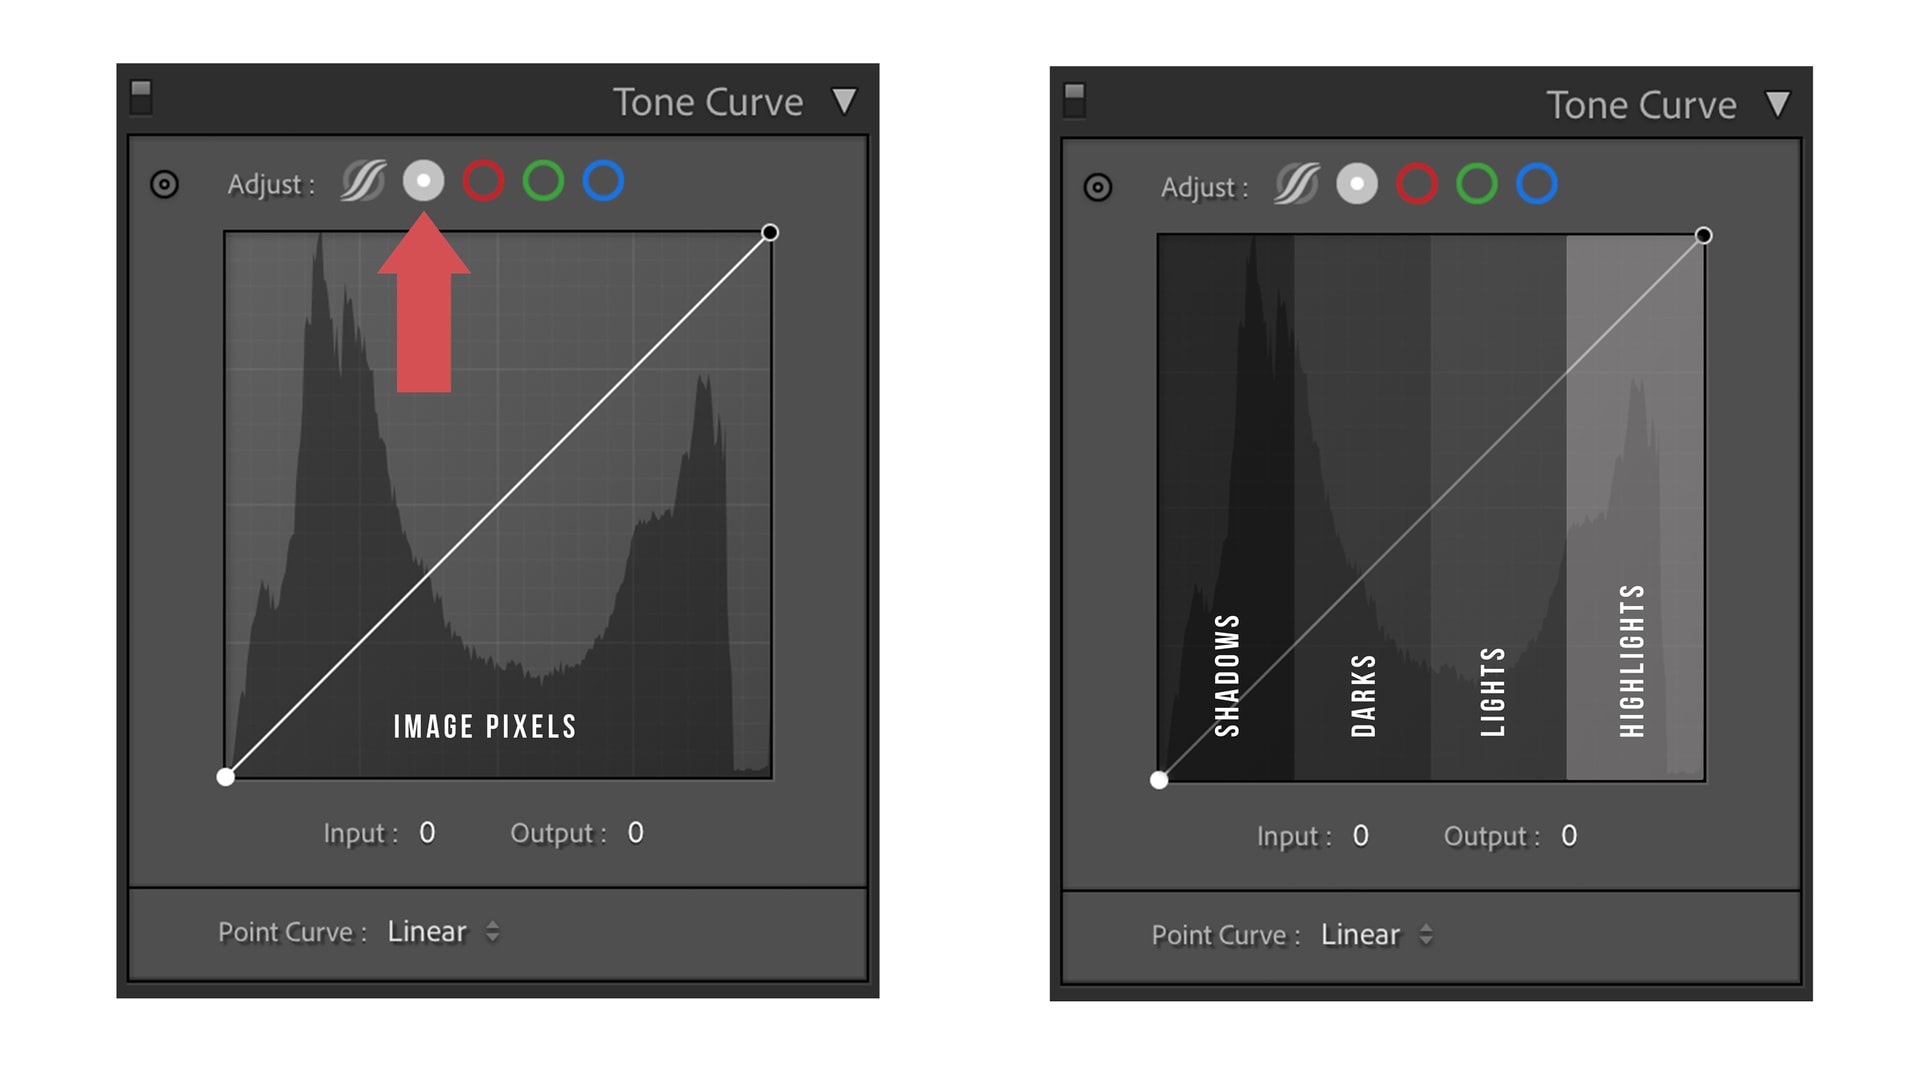
1. The Point Tone Curve (X vs. Y Axis)
The Point Tone Curve represents your image data on a graph. The X-axis (Input) represents the original brightness of the pixels, while the Y-axis (Output) represents the new value you are assigning them. By moving a point up, you increase the output (brighten); by moving it down, you decrease the output (darken).

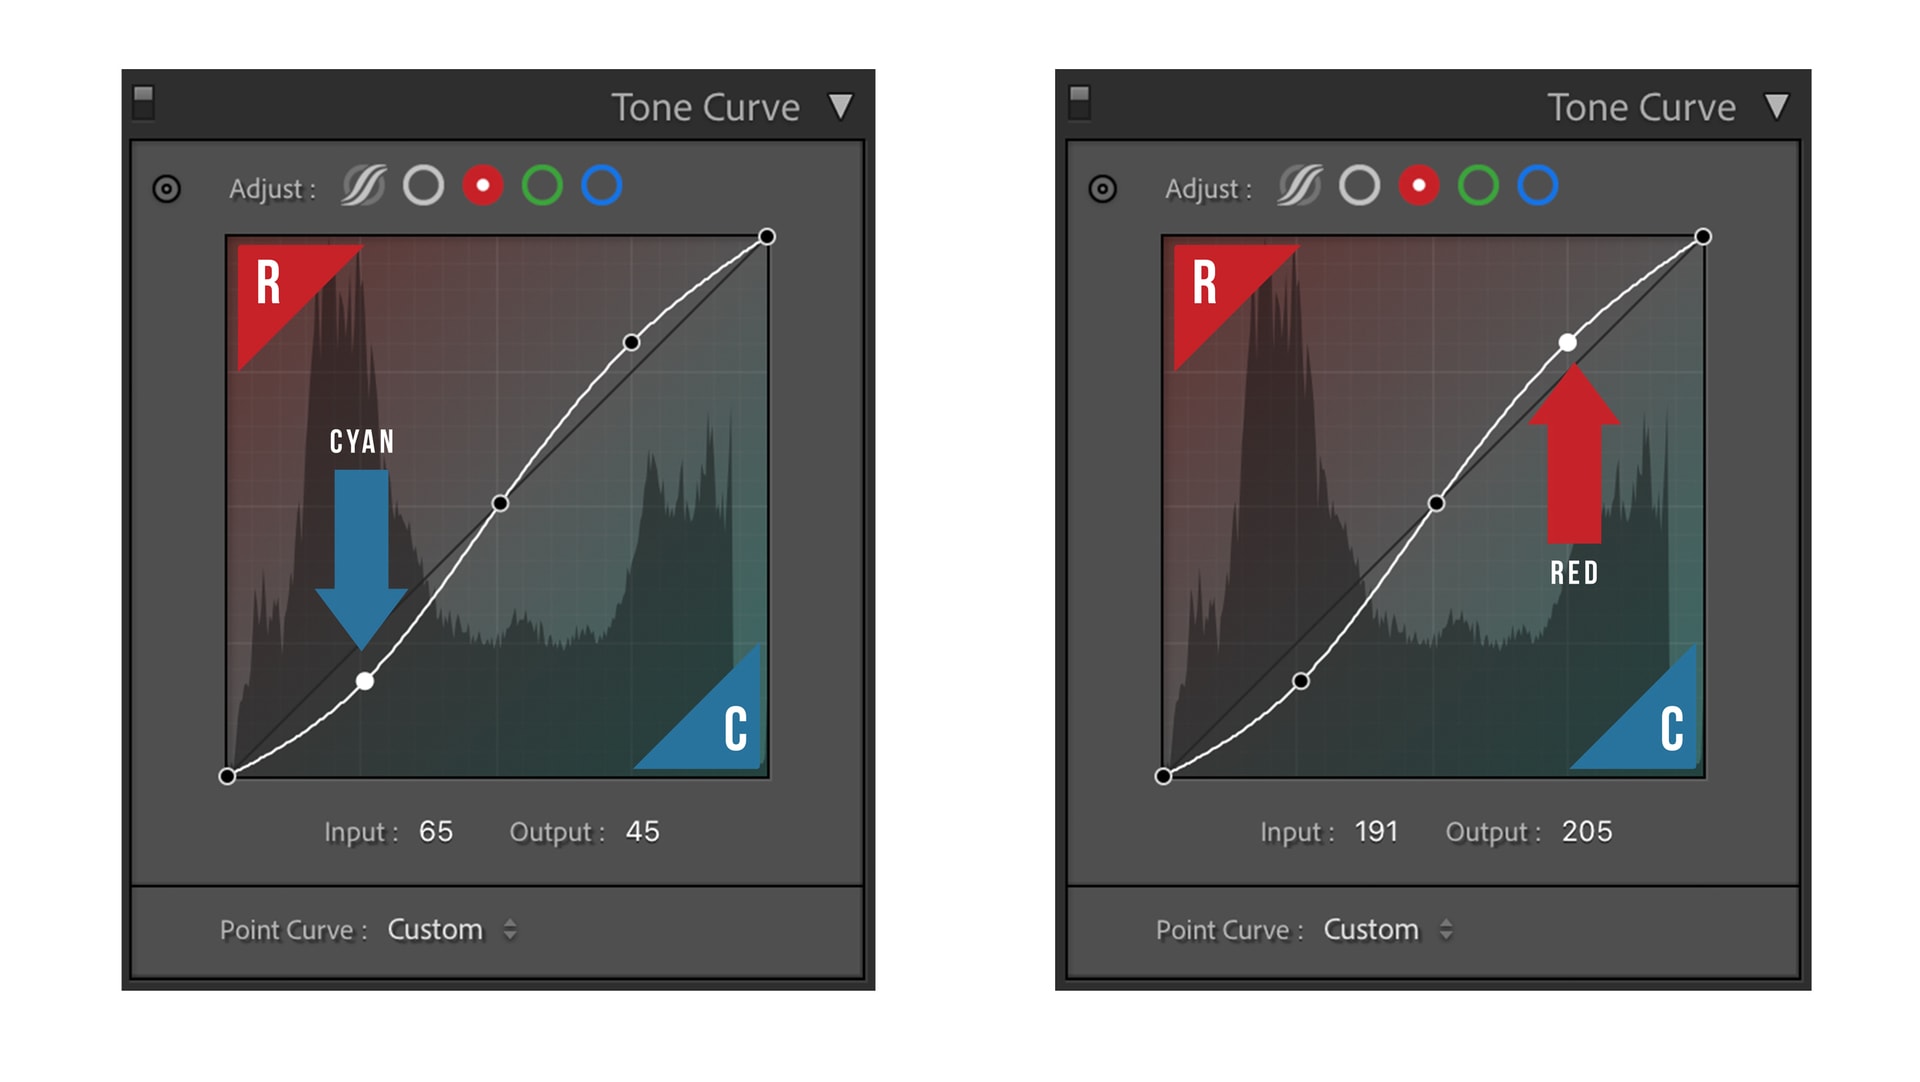
2. Mastering RGB Color Curves (Complementary Theory)
The Tone Curve isn’t just for brightness; it’s for colorimetry. Lightroom allows you to adjust individual Red, Green, and Blue channels. This is based on complementary color theory: adding Red subtracts Cyan, adding Green subtracts Magenta, and adding Blue subtracts Yellow.

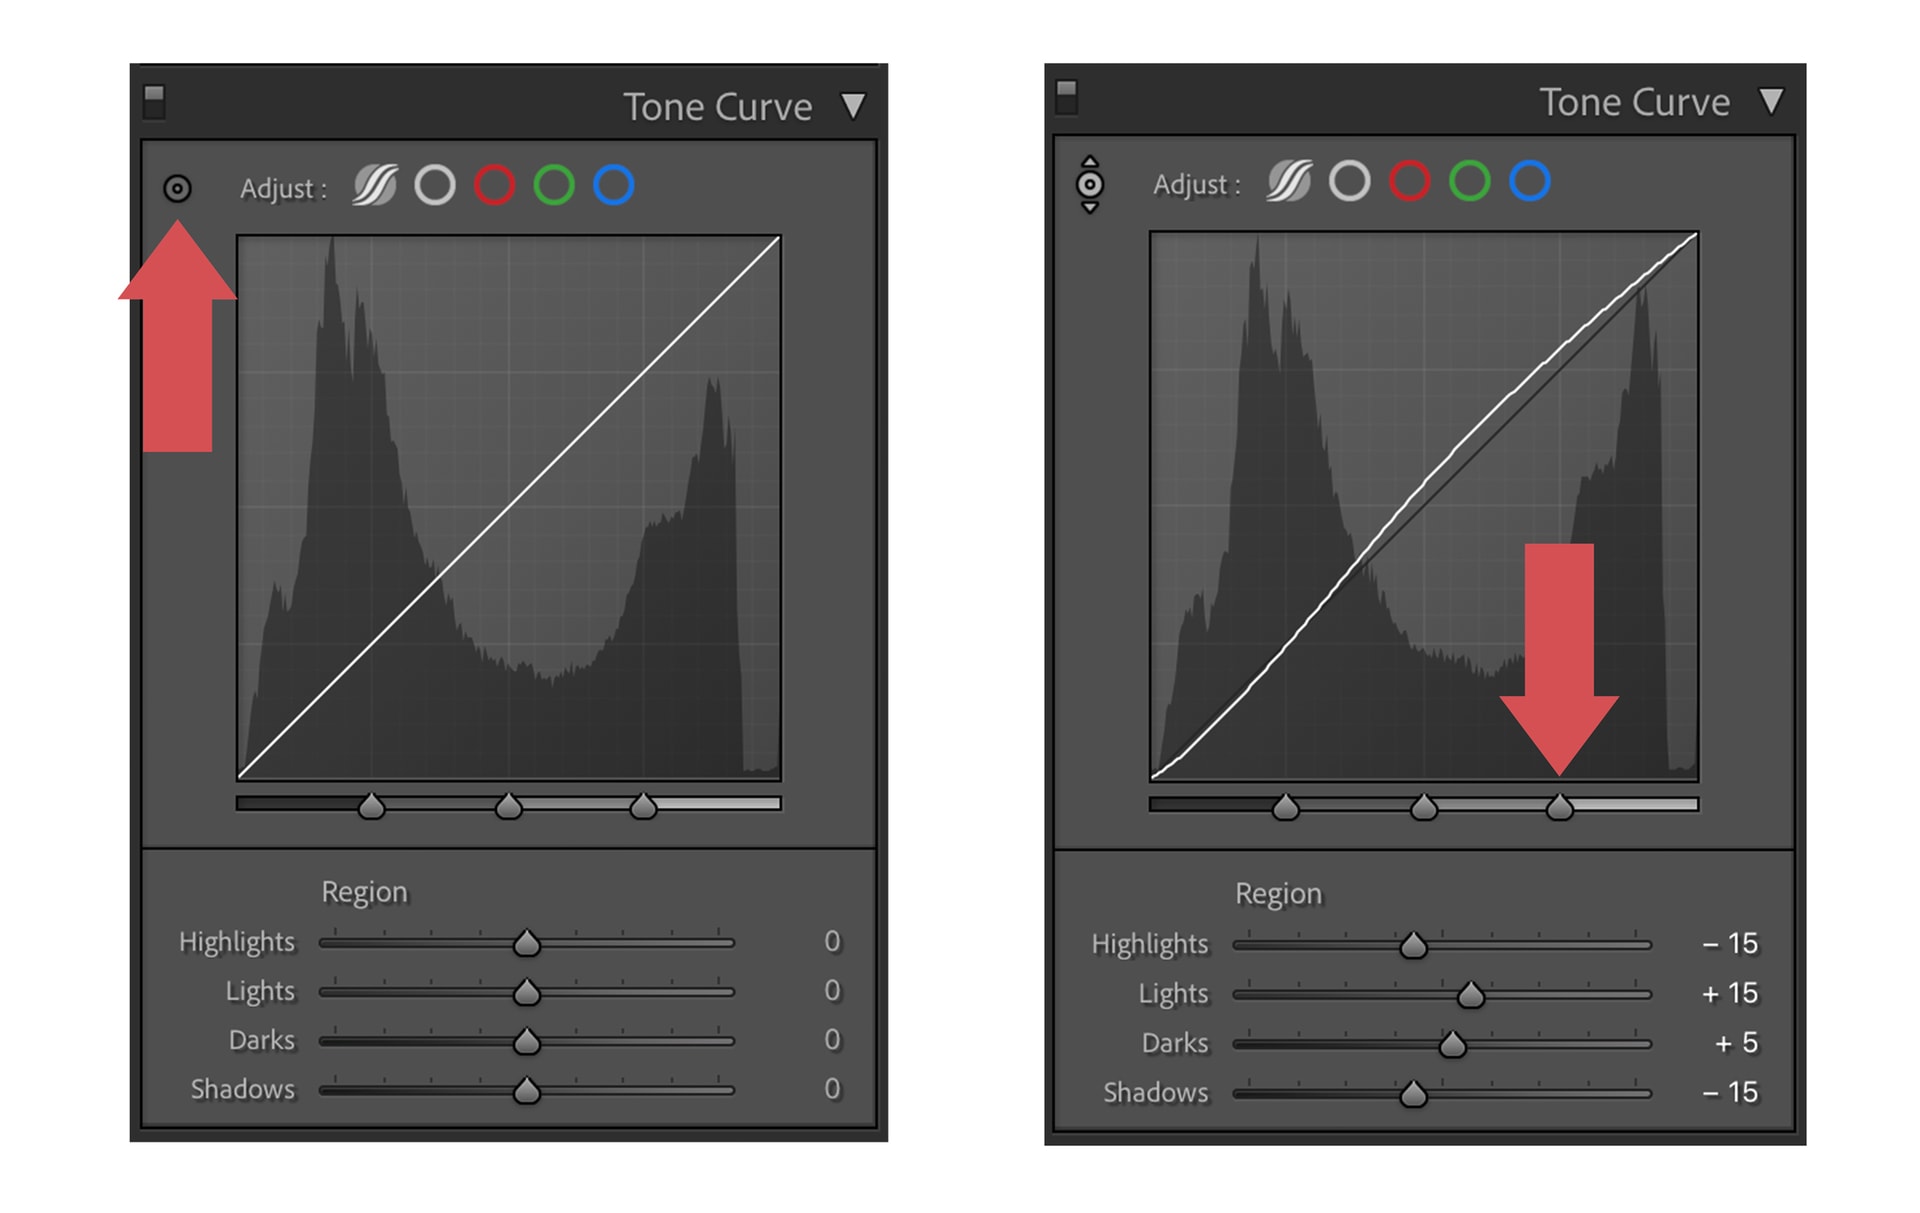
3. The Parametric Curve & Targeted Adjustments
The Parametric Curve is ideal for those who want smoother transitions. It uses sliders for Highlights, Lights, Darks, and Shadows, preventing the curve from becoming too jagged. For ultimate precision, use the Targeted Adjustment Tool (the small circle icon). Click and drag directly on your photo to adjust the specific tonal range of that area.

📁 Pro-Tip: Faded Film Look
To achieve the popular “faded” look, go to the bottom-left corner of the Point Curve (the blacks). Drag the very last point vertically upward. This raises the minimum output value, turning pure blacks into a soft, cinematic grey.
Conclusion
Understanding the Lightroom Tone Curve is the key to unlocking advanced photo editing. Whether you’re manipulating RGB channels for a stylized grade or using the Parametric curve for balanced exposure, these tools give you total creative control. To see these curves in action, check out our professional Lightroom Presets which utilize these exact techniques.

Do you want to take your photography skills to the next level? With The Creative Flow, you’ll have access to more than 1200 Beautiful Lightroom Presets, 1200 Lightroom Profiles, and 200 brushes that will spark your creativity and bring your photos to the next level! Designed for the photographer who wants the ultimate workflow and premium Lightroom collection. The Creative Flow is your own personal preset “toolbox” where you can swap out a variety of different looks with a few simple clicks. Whether you’re a professional or just starting out, this all-in-one collection was created for you! You won't find another product like this anywhere else online - trust us when we say it's worth every penny! Click here right now and get started with The Creative Flow today!
The Creative Flow | Presetpro.com


Lightroom Presets

Lightroom Presets

Lightroom Presets

Lightroom Presets
Lightroom Presets

Lightroom Presets

Lightroom Presets

Lightroom Presets
The film names above are the brands and trademarks of their respective holders. None of the film producers listed endorse or sponsor this film emulation collection or any other content. The film producers are not affiliated with Presetpro.com and all trademarks and copyrights are the exclusive property of their respective owners. Adobe®, Photoshop®, Adobe® Lightroom® are either registered trademarks or trademarks of Adobe Systems Incorporated in the United States and/or other countries.